Today we get to share the first fun tutorial from Mini Season 2: Bleach Dyeing. Here's Wendy from W. Pratt Crafts with the tutorial.
One of the things I love about participating in Project Run and Play is that it always forces me to stretch and challenge myself to try new things. When it was announced that my week's theme would be Stash Bash I will admit that I was a little disappointed that I didn't get an excuse to go on a fabulous fabric shopping spree to pick out just what I wanted. But, in limiting my resources it pushed me to try a technique I'd never done, but had wanted to try: Bleach Dying!

Bleach dying is basically the opposite of tie dying where your intention is to remove colors rather than add them. You can achieve similar design effects using tie dye techniques to manipulate the fabric before you add the bleach which can create some really interesting effects.
Bleach Dying Tutorial
Supplies
- Fabric to Bleach
- Bleach
- Spray Bottle
- Gloves
- Water (optional)
- Rubber bands (optional)
- Large Tub (optional)
I found some plain black French Terry in my stash and knew they would make some great Joseph Joggers. But, I wanted to add a bit of design detail and decided to try and bleach the fabric. Before I began, I read a few tutorials which told me that natural fibers tend to bleach better than others and they suggested some variation of a bleach to water ratio. As my fabric had a higher polyester content I decided to use a pure bleach solution with no water. I also made sure to do a small test patch before jumping in and spraying down my whole fabric piece.
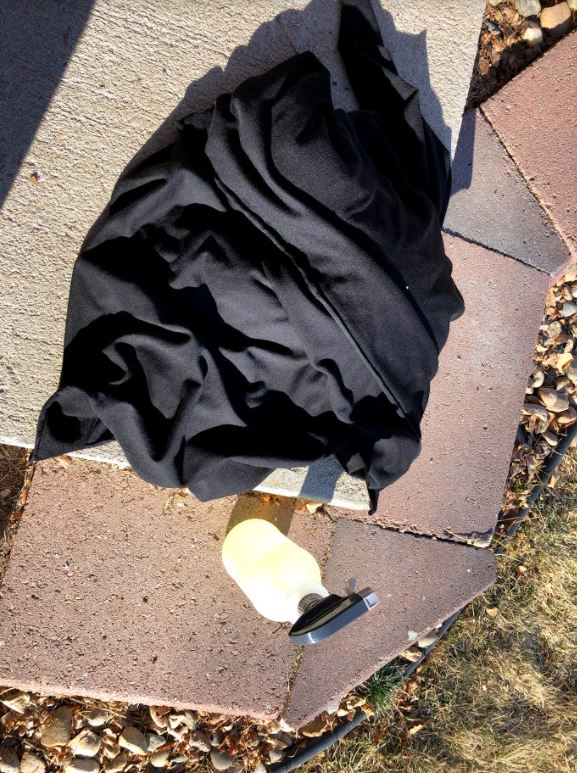
Once I saw that the bleach would indeed have an effect on my fabric, I loaded up my spray bottle, spread my fabric out on the lawn, and began spraying! If you don't want to try spraying, you can use rubber bands to section out pieces of the fabric and create different textures and looks depending on their placement, then either spray or submerge the fabric in a large tub. Almost any tie dye technique can be repeated using bleach instead of dye!


It was interesting to watch the colors begin to change, but it was also somewhat challenging to know just where and how much bleach was on each section. I noticed that the grass helped create some cool textures in the spray patterns based on how the fabric was laying on it.

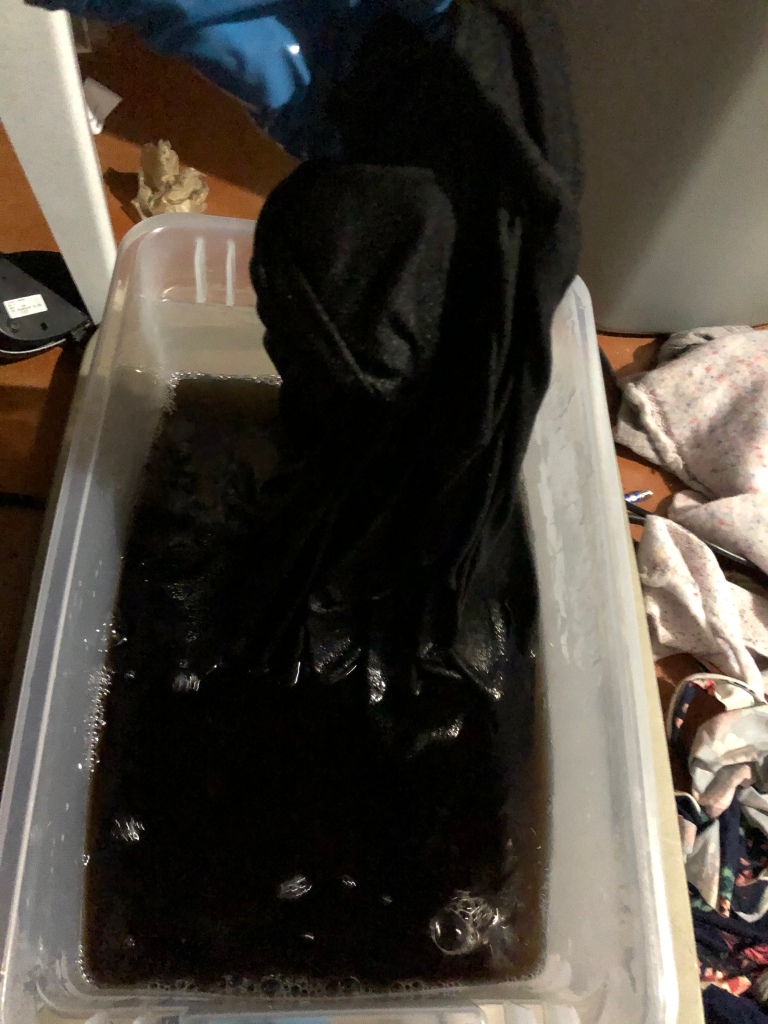
When bleach dying, it's important to give the bleach enough time to do it's thing, but you can also stop it from processing by rinsing it then giving it a go in the washer and dryer whenever you feel you like what you see. I think I waited 15-20 mins before I rinsed and washed my fabric.

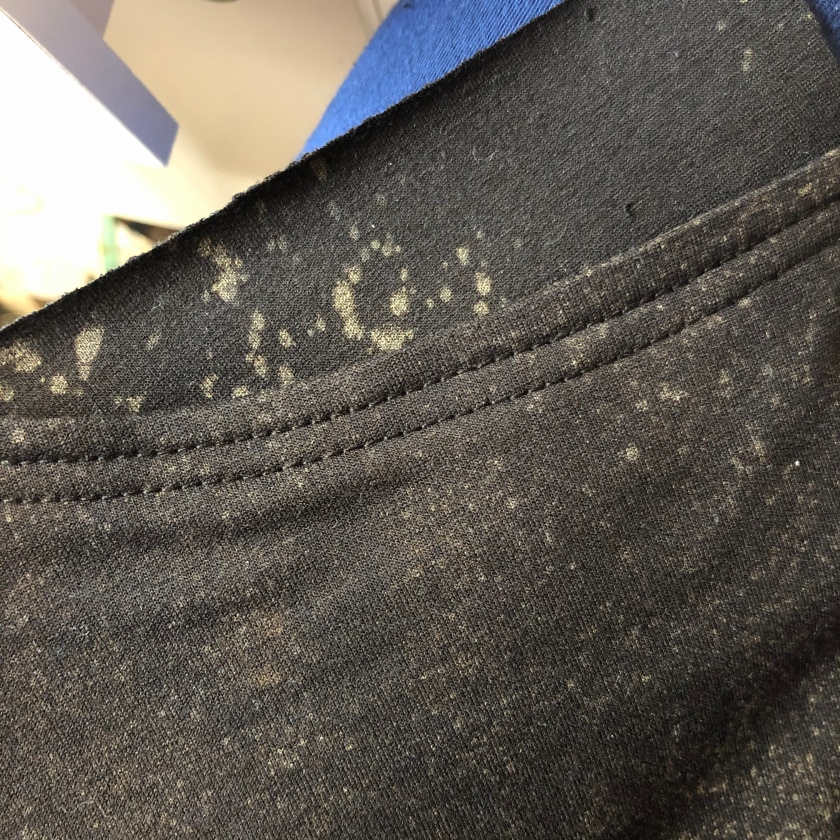
One thing I did notice about the color, which other tutorials had prepared me for, was it had a rusty orange tone to it. Oftentimes when lifting black you won't get a gray or white look. You will end up with orange or pinkish tones where the bleach is.
Knowing I wanted a less orange look to coordinate with my planned outfit, I decided to dye over the fabric with a grey pearl color from Rit Dye. This helped knock out some of those rusty hues and left me with a more taupe colored finish on the bleached areas. It ended up working perfectly with the other color tones of my fabrics.


One thing I may consider doing differently next time is to make the garment completely and then bleach it so I can control exactly where I put it on the finished piece. Though it was much easier to do an entire piece of fabric laid out all together, I just had to be careful with how I cut the fabric to get the desired look in the end.


I hope you enjoyed this short tutorial on bleach dying and would love to hear if you try it! To see more patterns and inspiration from the Project Lounge Library Capsule Collection click here.


No comments :
Post a Comment
Note: Only a member of this blog may post a comment.