Hello I'm Max! I hail from my blog -
Max California and I come from Australia. I'm a bit different to your regular crafty mama blogger, but I'm just as nice I swear! I usually specialise in sweet threads for my little man Vince who is three, but lately I've been sewing little girl stuff because there is a daughter on the way {as in being born on the 9th of July!}. I was
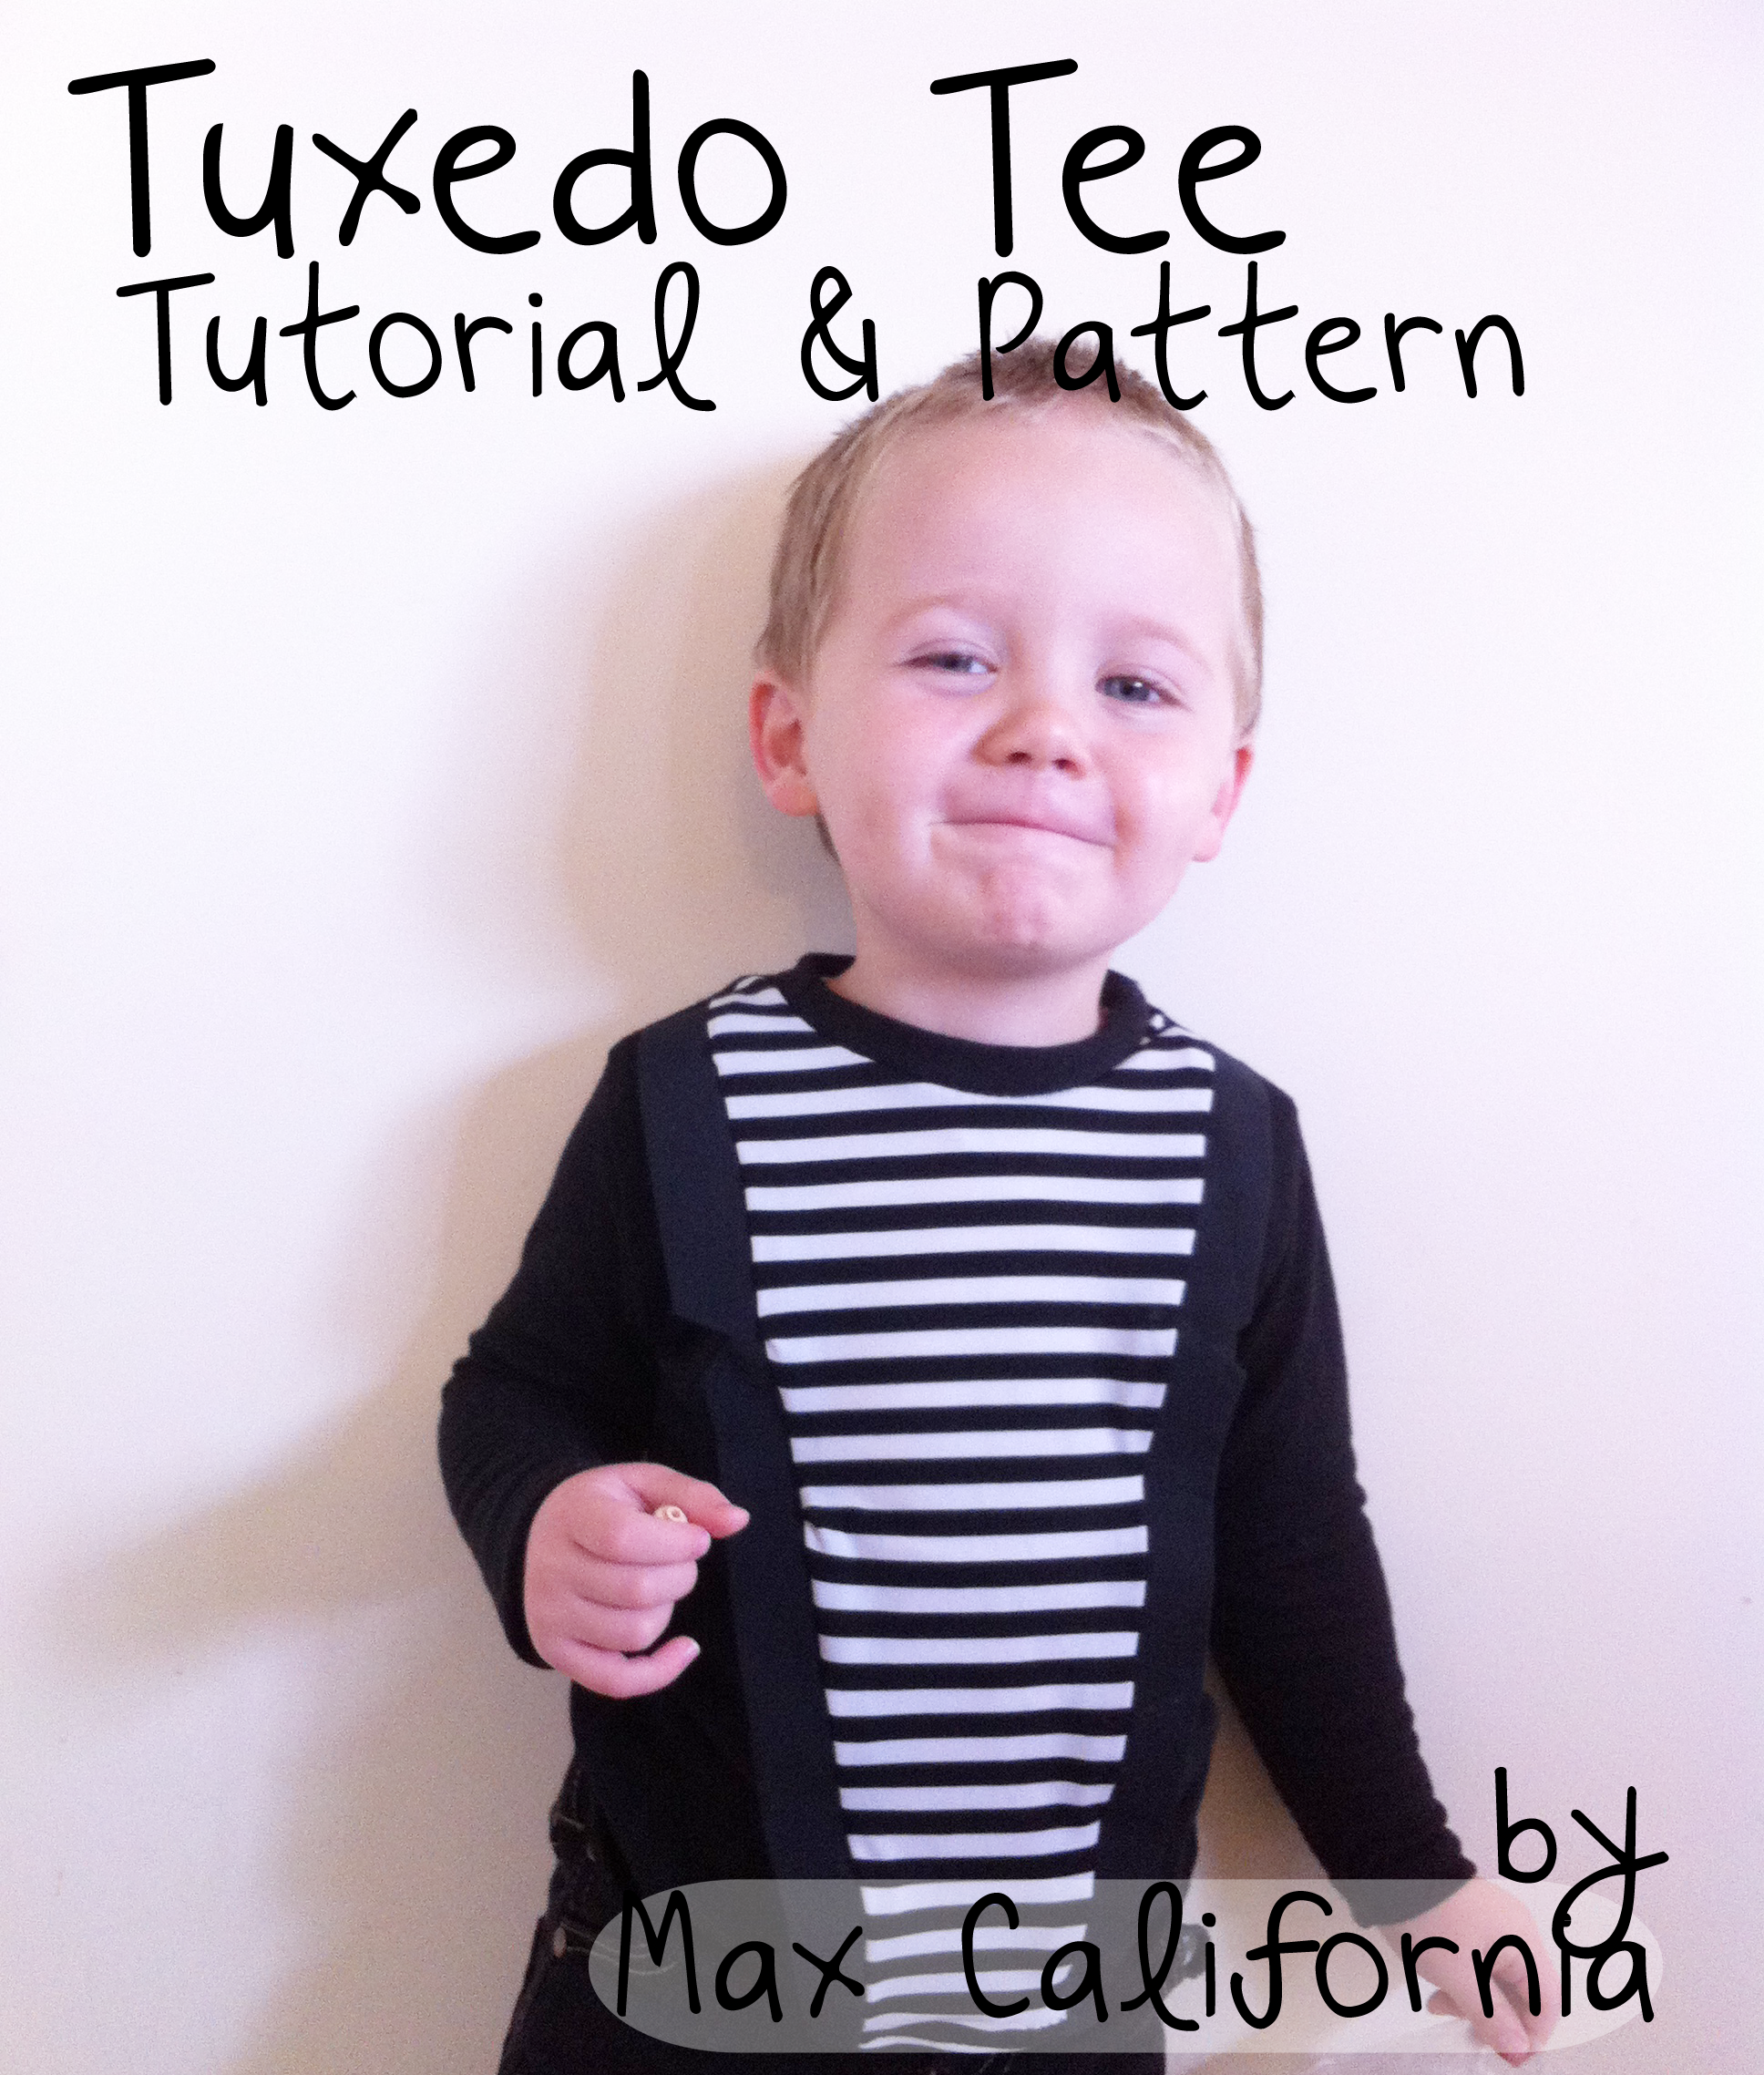
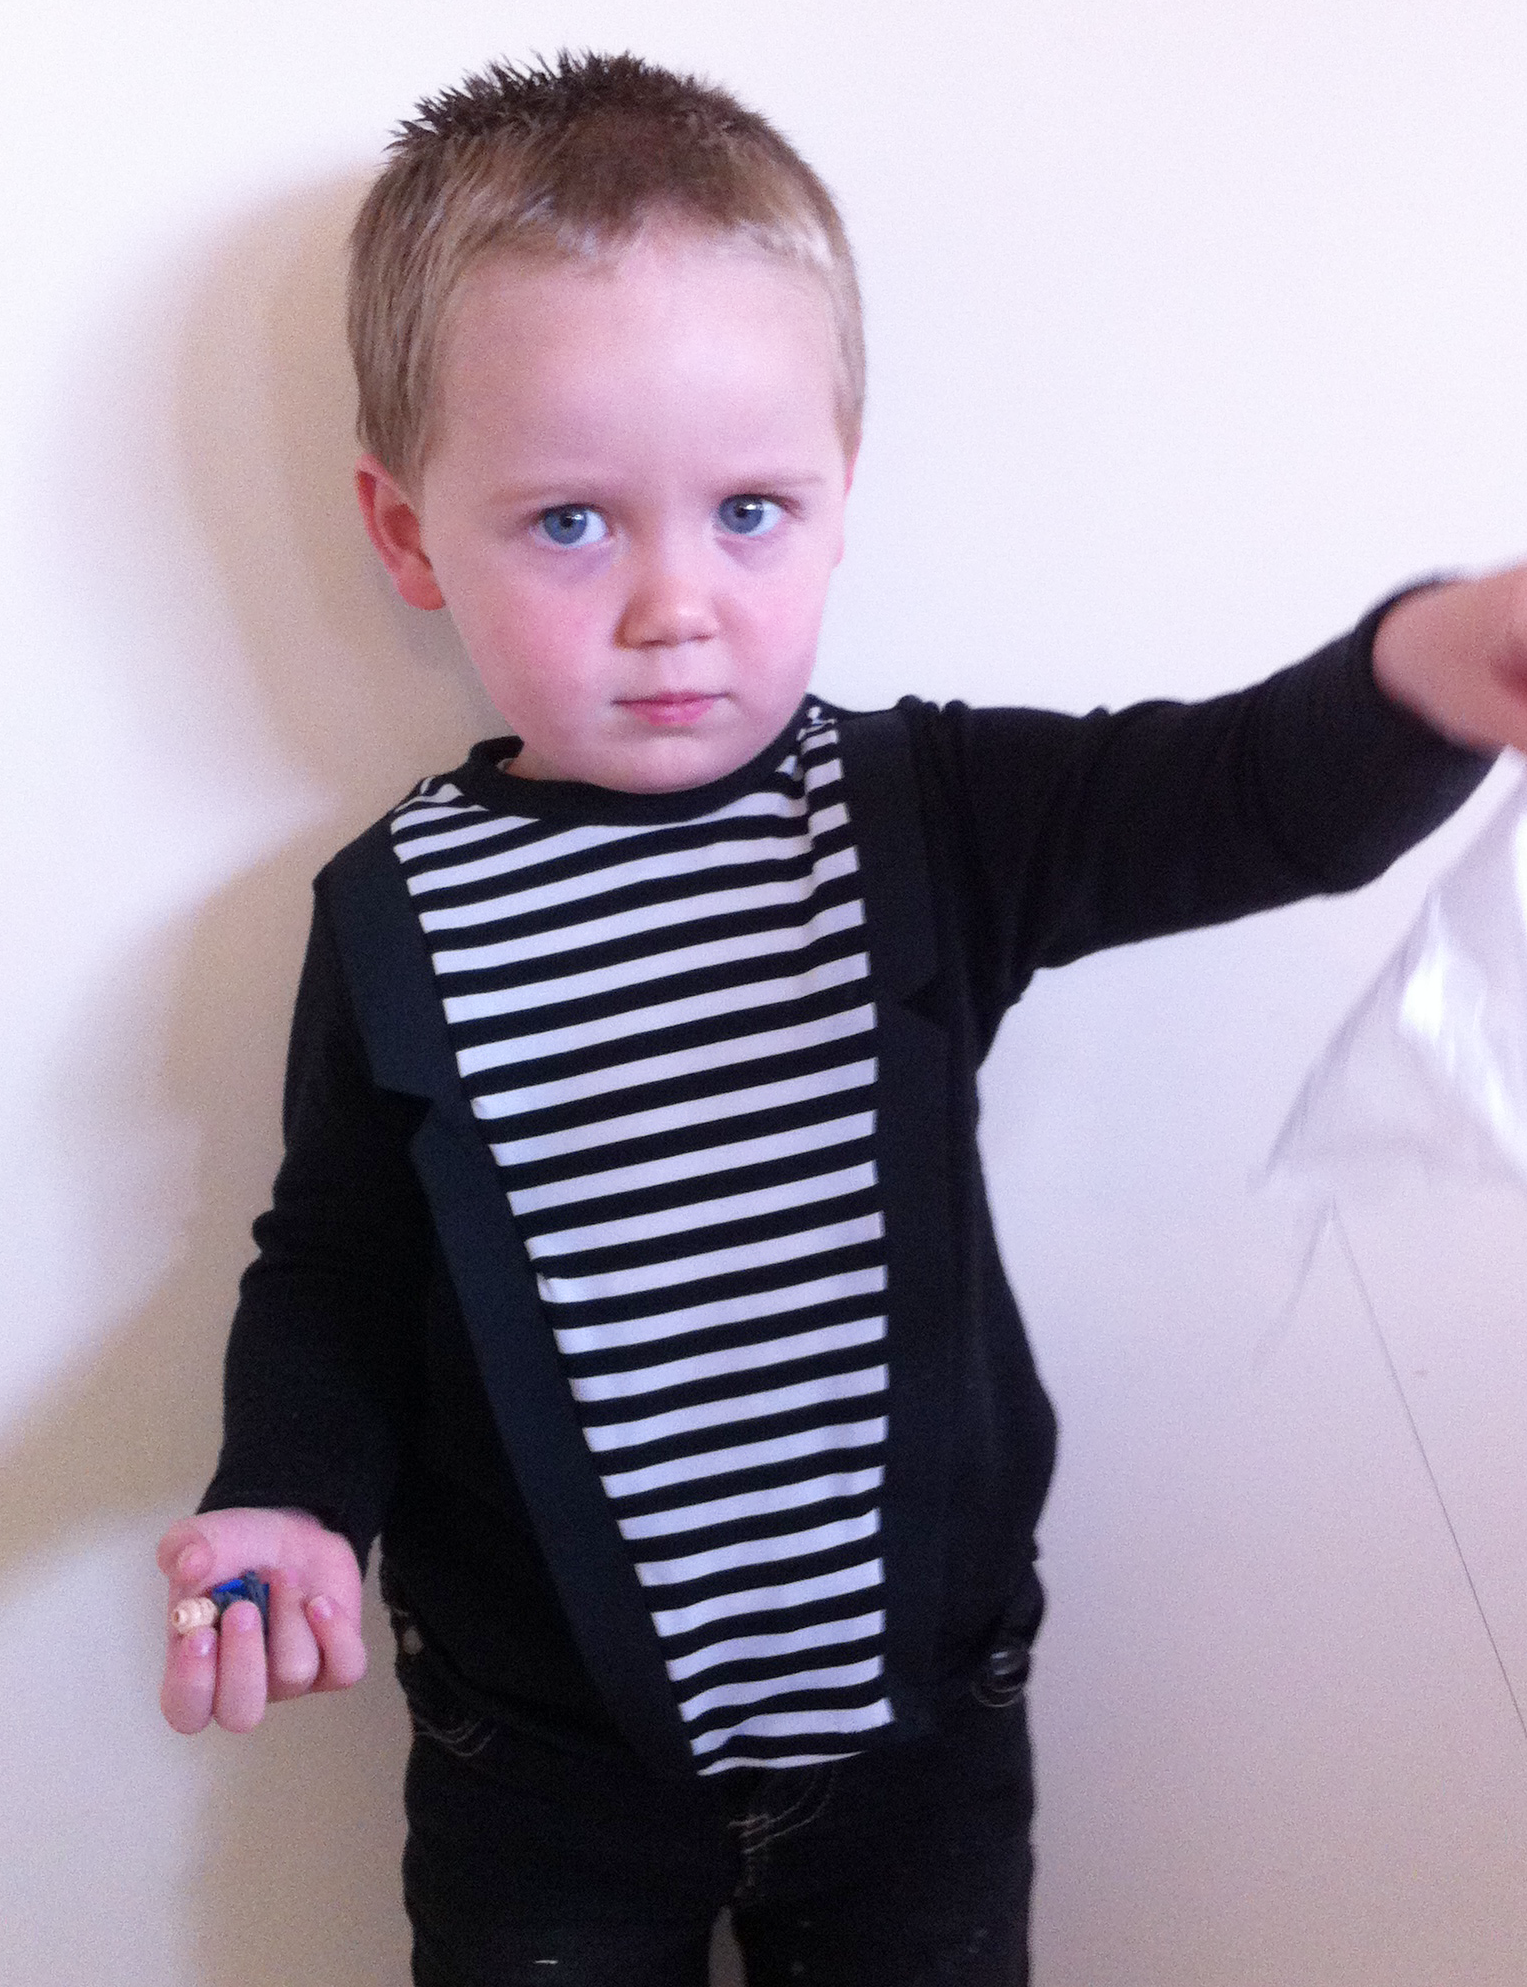
so stoked to be asked to participate in this guest blogging adventure here at Project Run & Play and today I thought I'd show you how to make a tuxedo tee. Nope, not your average
awesomely tacky tuxedo tee {both myself + my son own one of
those}, this one is super adorable and semi-classy actually {not that I know anything about being classy!}
 |
| I'm so blessed to have TWO good-looking men that belong to me! |
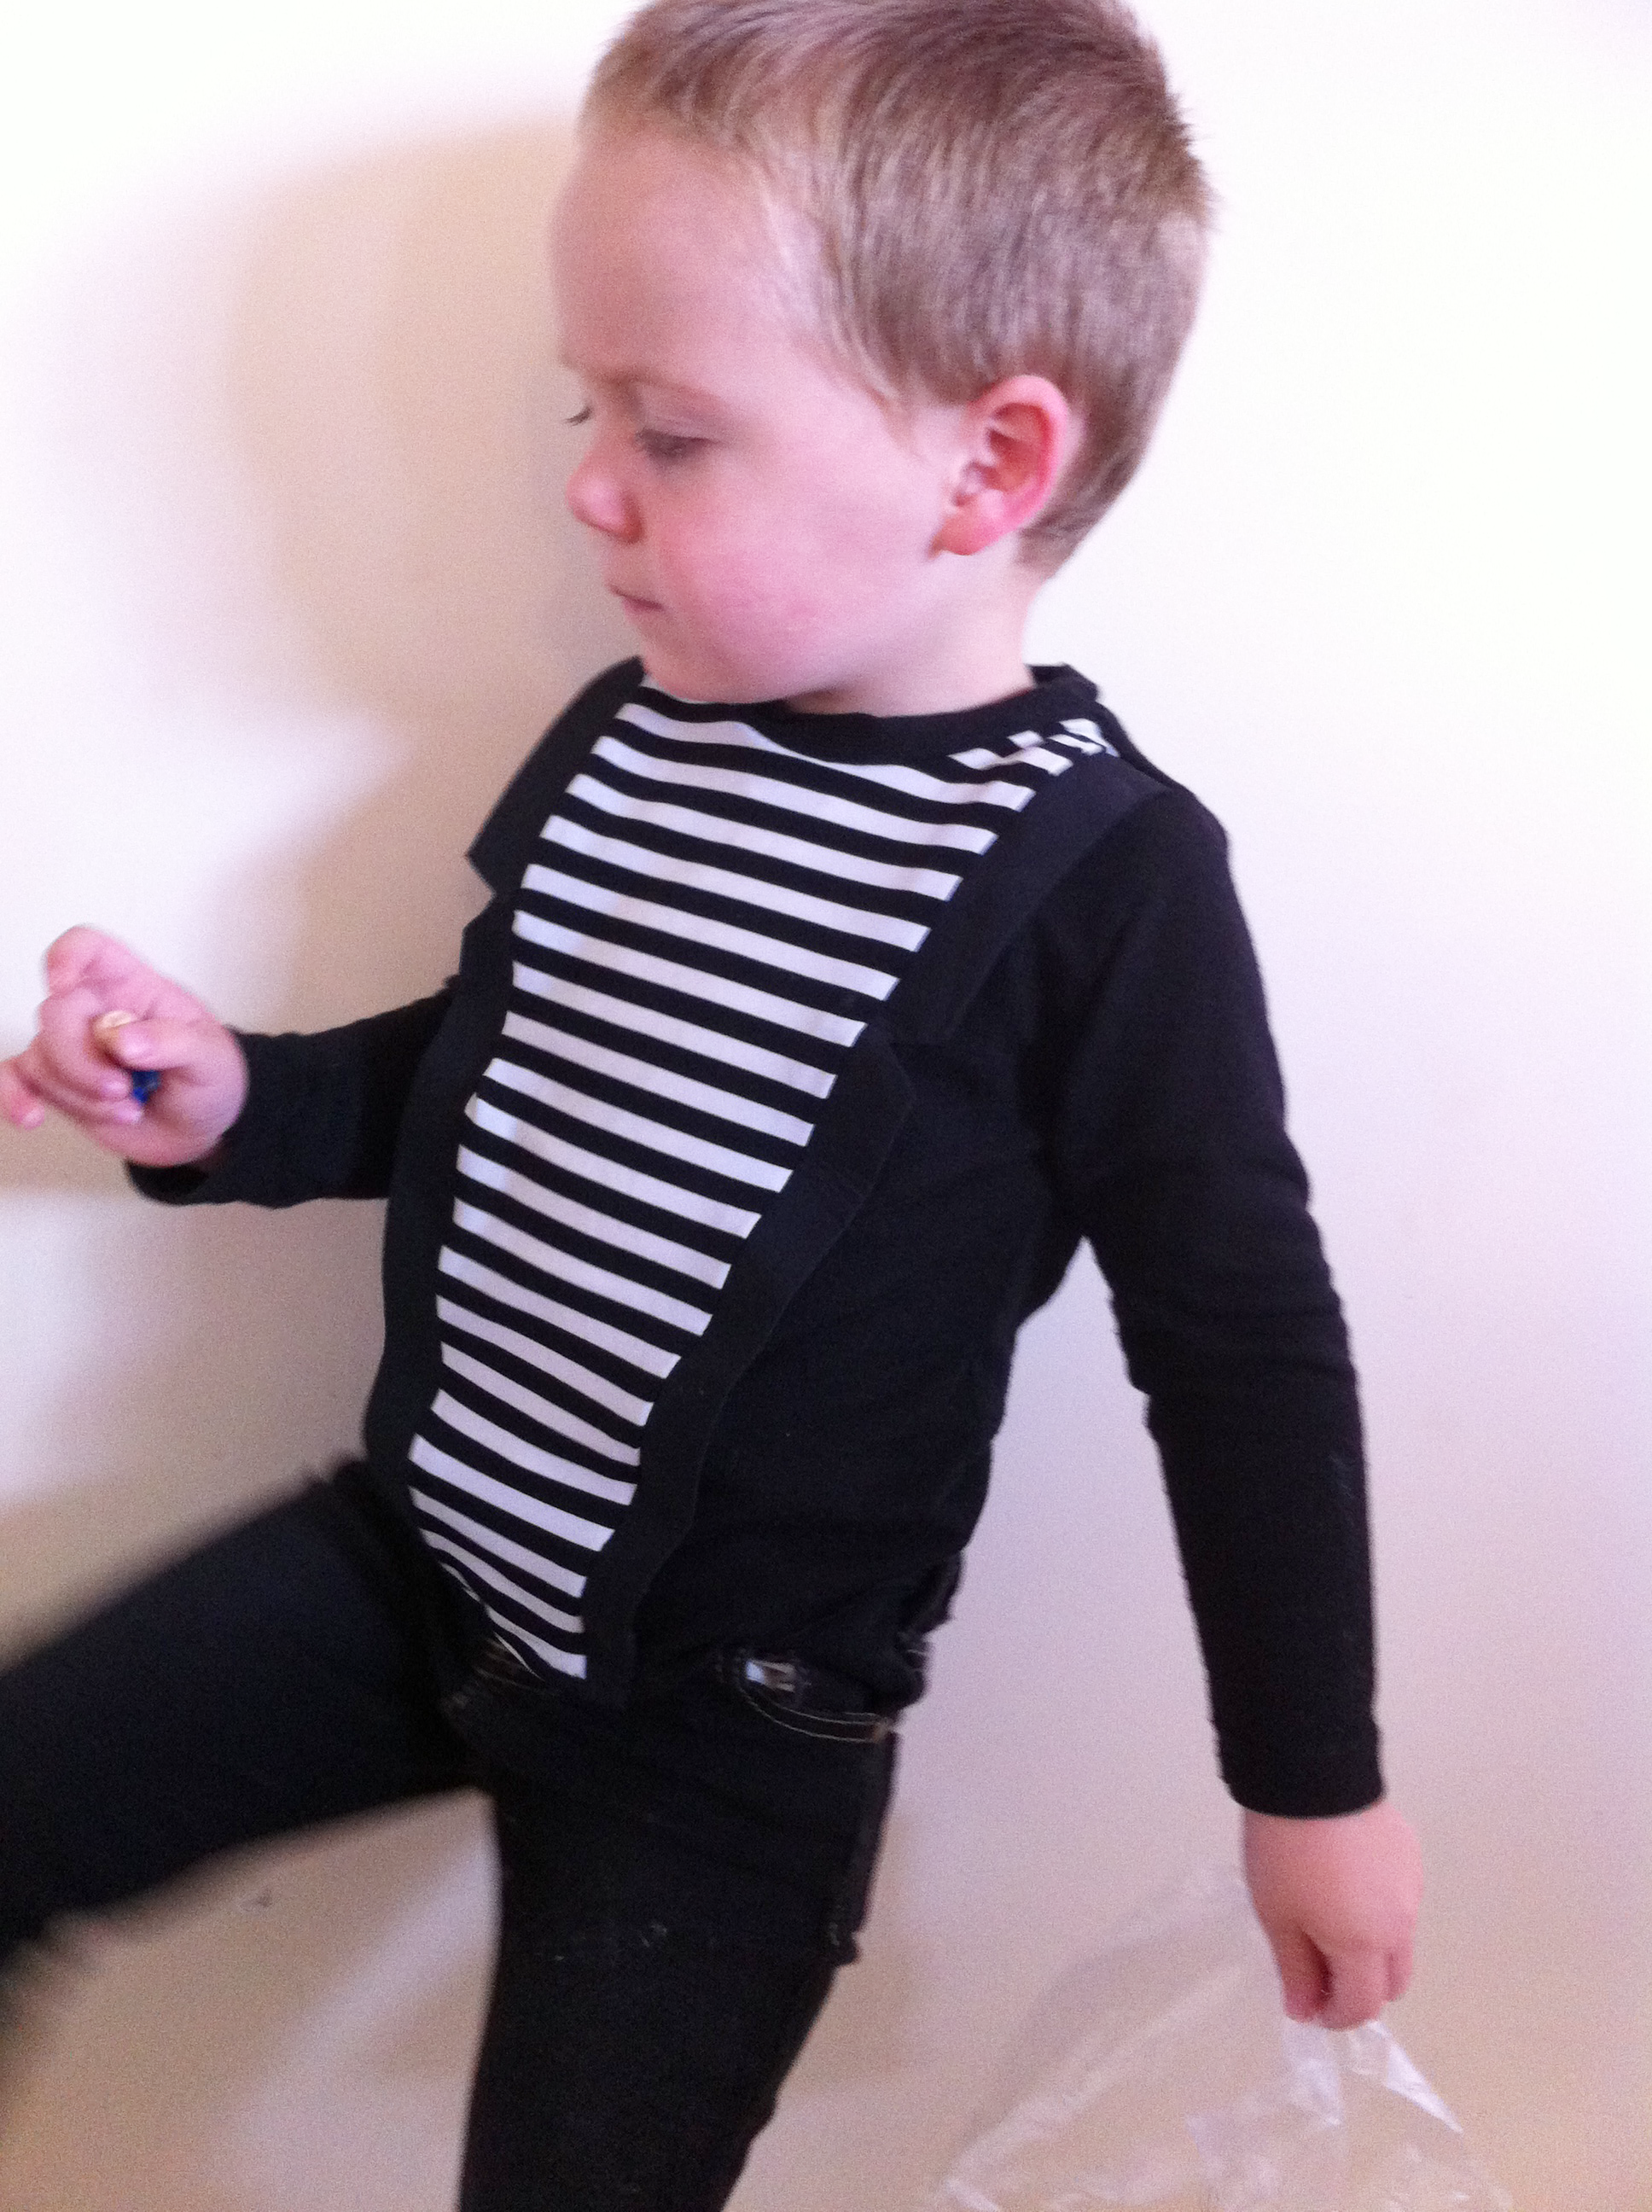
Last weekend one of my friends took some beautiful maternity photos for me. I made my little man this tuxedo tee to wear at the shoot and I am happy how it turned out! I already made one a few months ago but he outgrew it before I finished it for him, so I made him another! I was inspired by
this shirt by Bang Bang.
The pattern is sized 3T, but in a few weeks I'll have a small tute on my own blog on how to alter a t-shirt pattern of any size for this style. So you could make an itty bitty baby tuxedo shirt, or one for yourself! Download the pattern here!
You will need your regular sewing supplies, black stretch fabric, contrast stretch fabric, black non-stretch {I used black satin lining fabric} and iron-on interfacing.
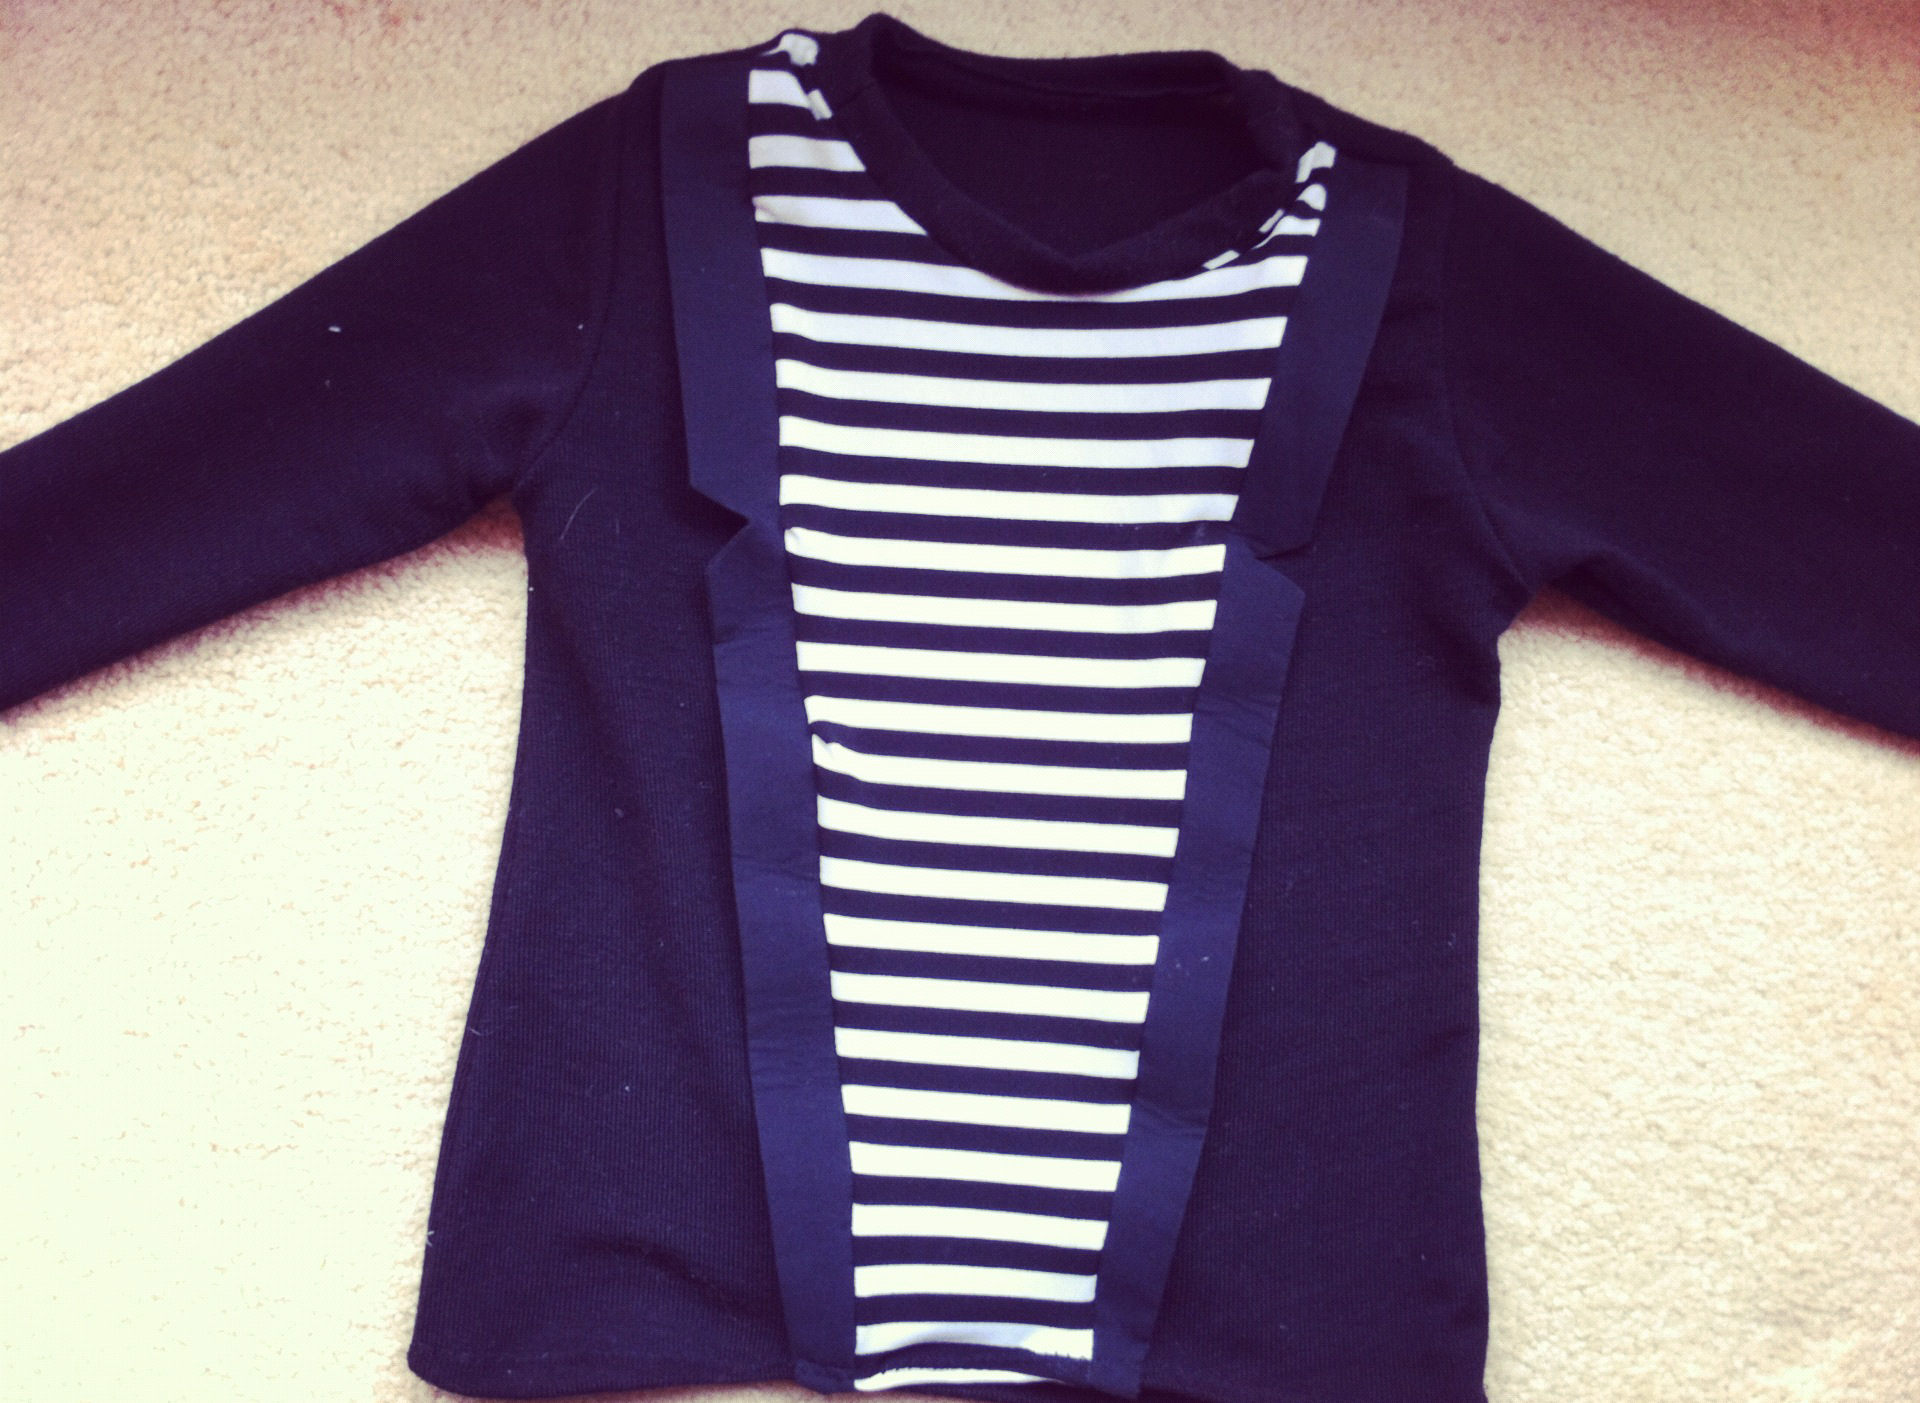
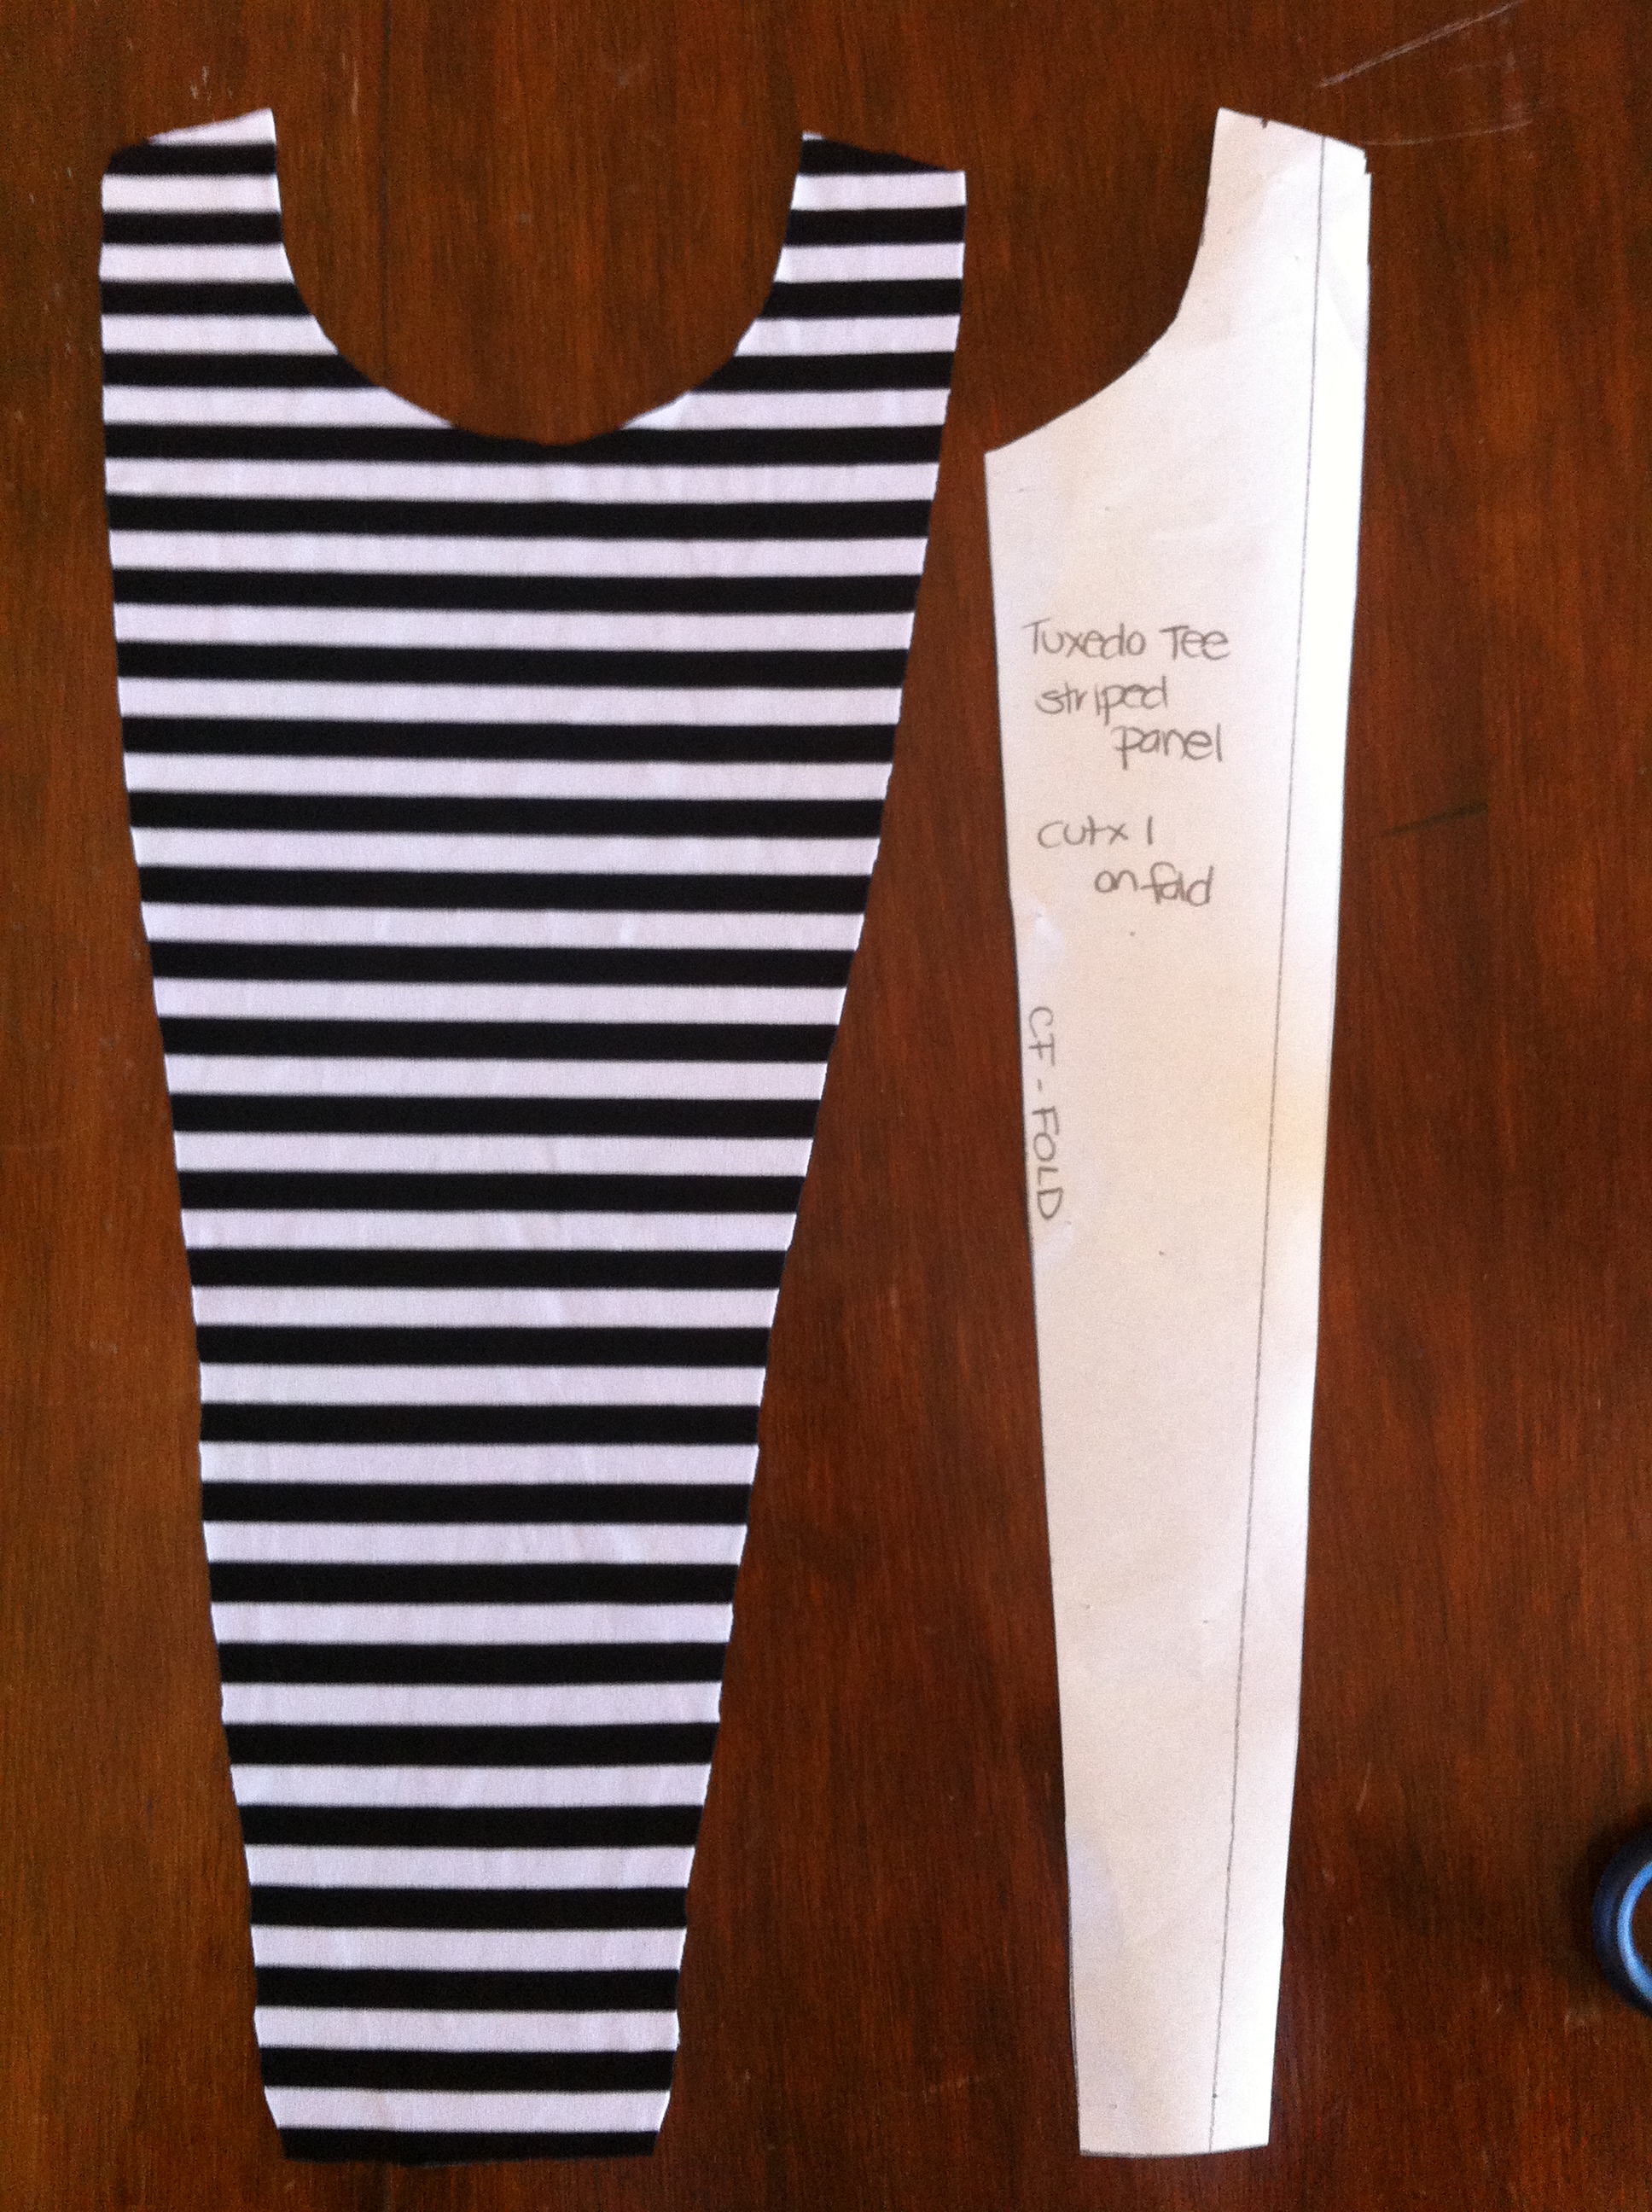
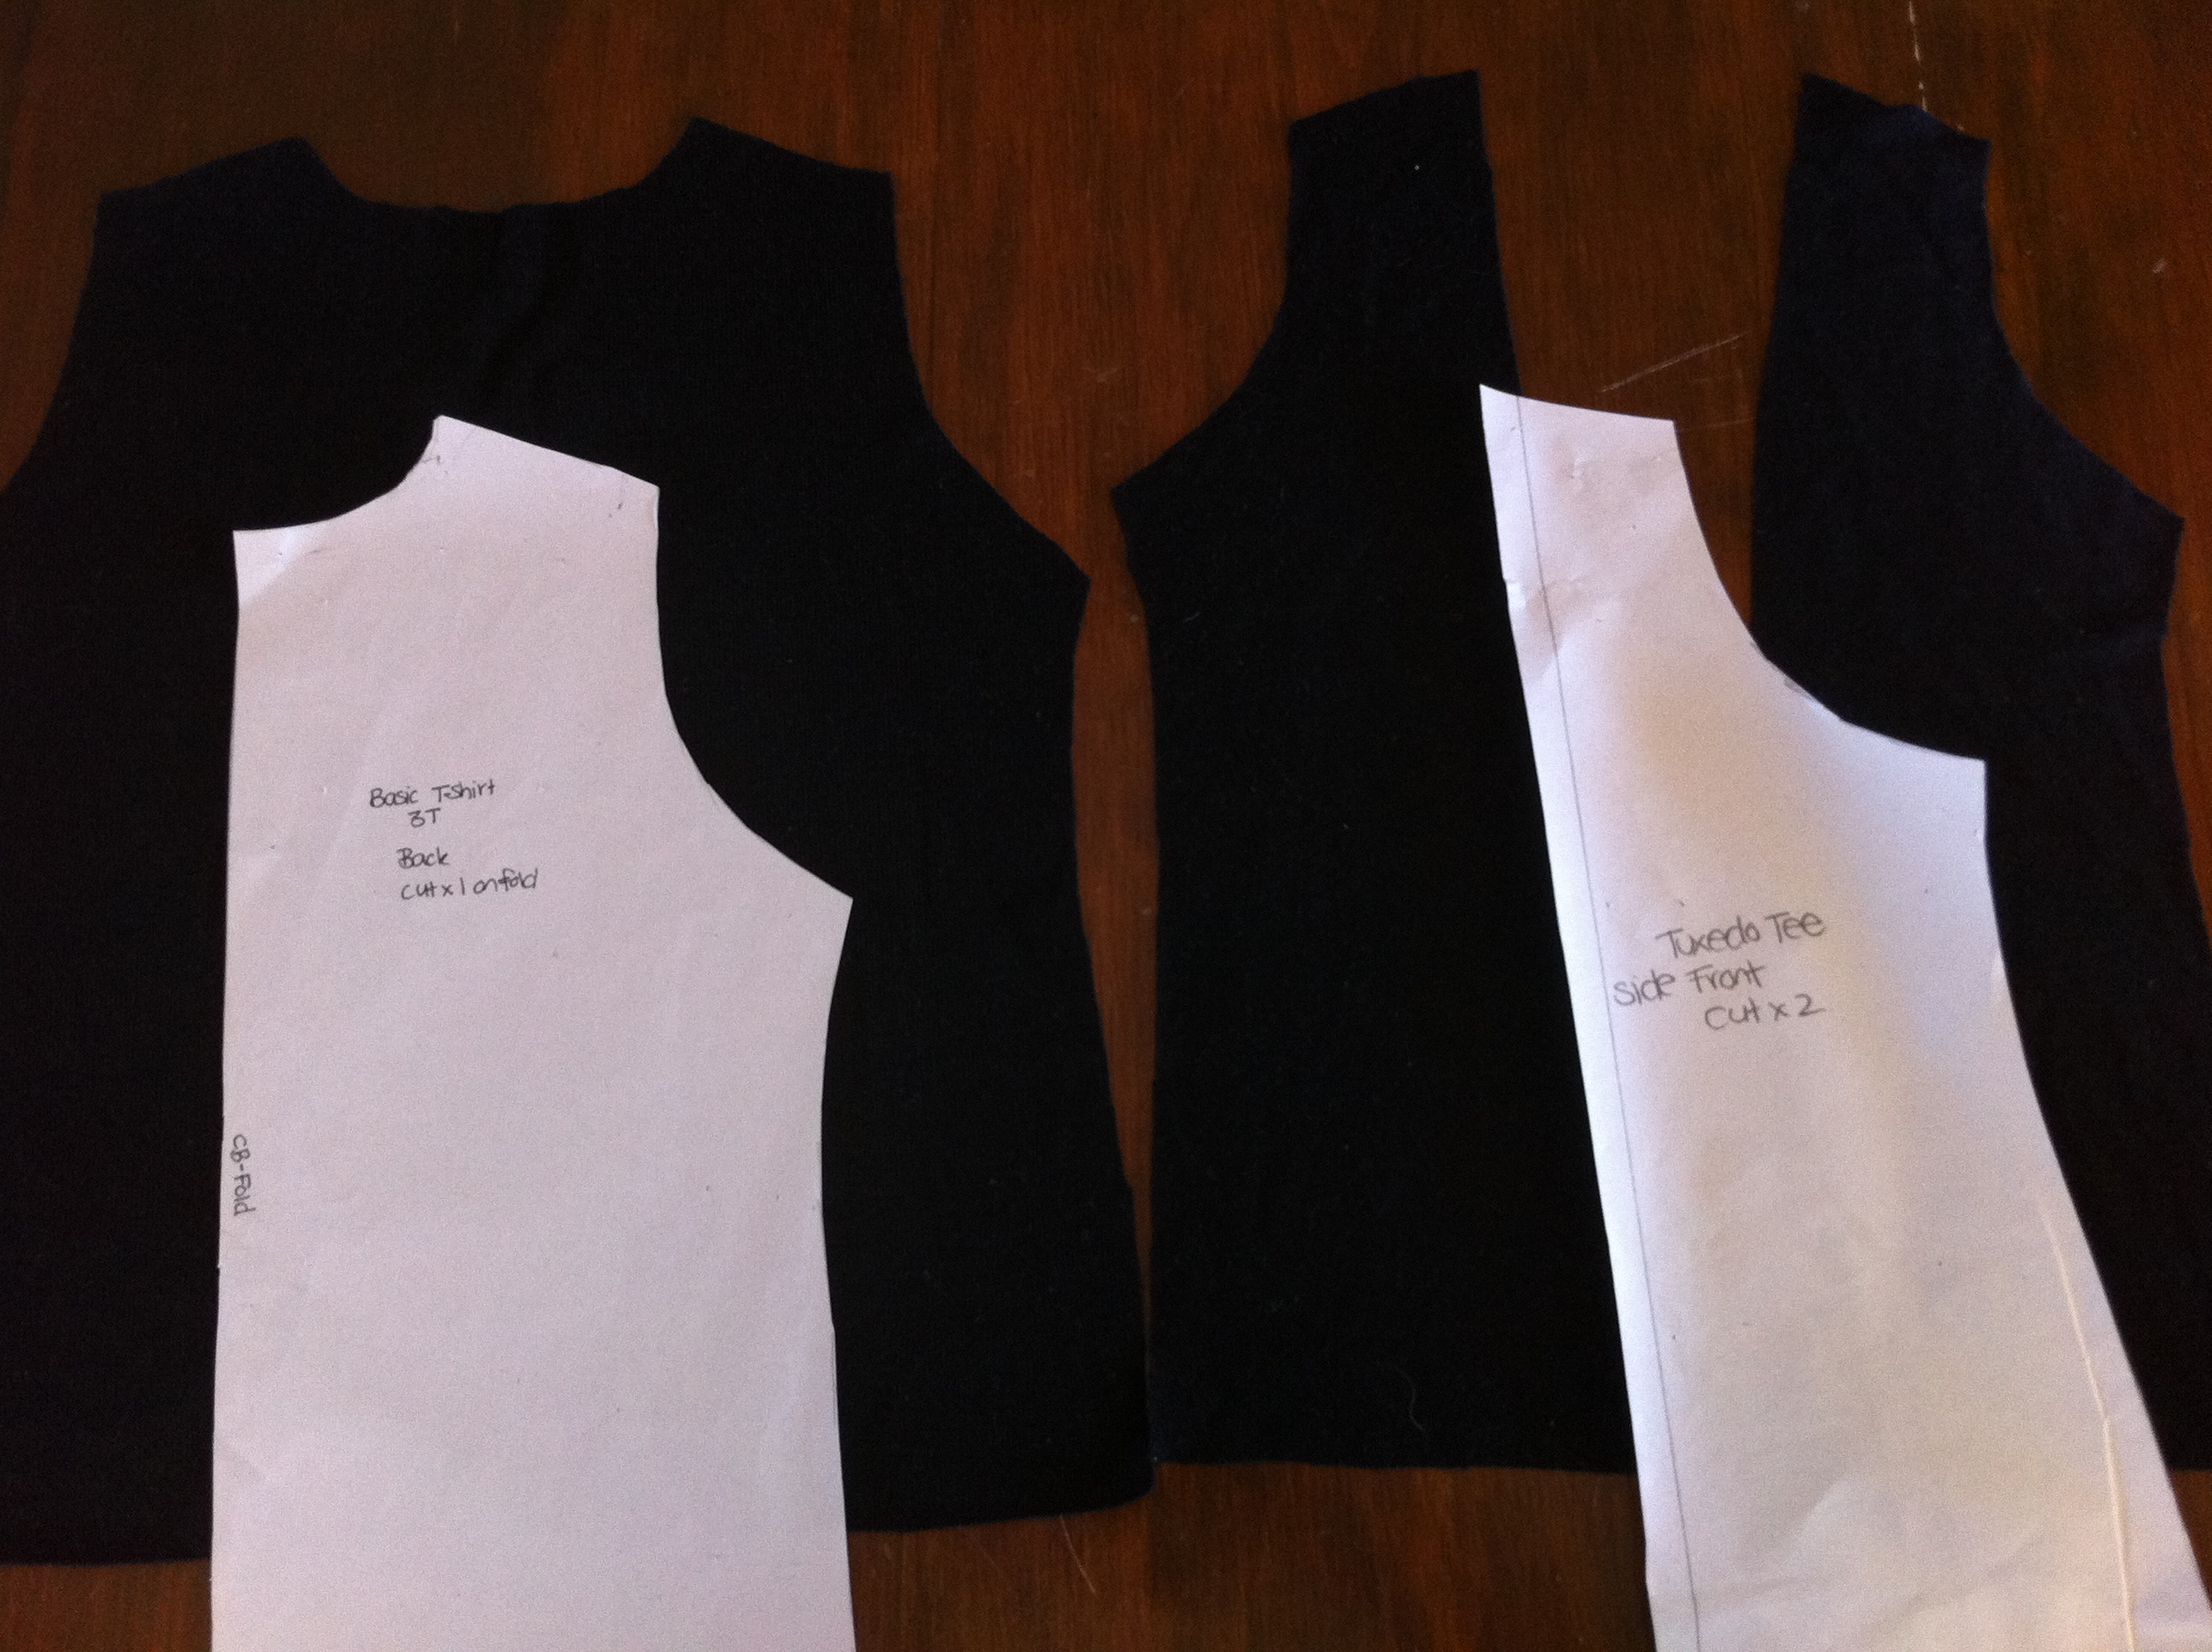
Cut out your pieces Cut out the centre front bib section from a contrast fabric, making sure the stretch goes ACROSS the piece. I used black & white striped fabric but you could really use anything you wanted - a plain colour, a different pattern, whatever you want!
Cut out the side-fronts, sleeves and back from the stretch black fabric. I made the sleeves long sleeves. To do this just measure your child's arm from the top of their shoulder down to their wrist.
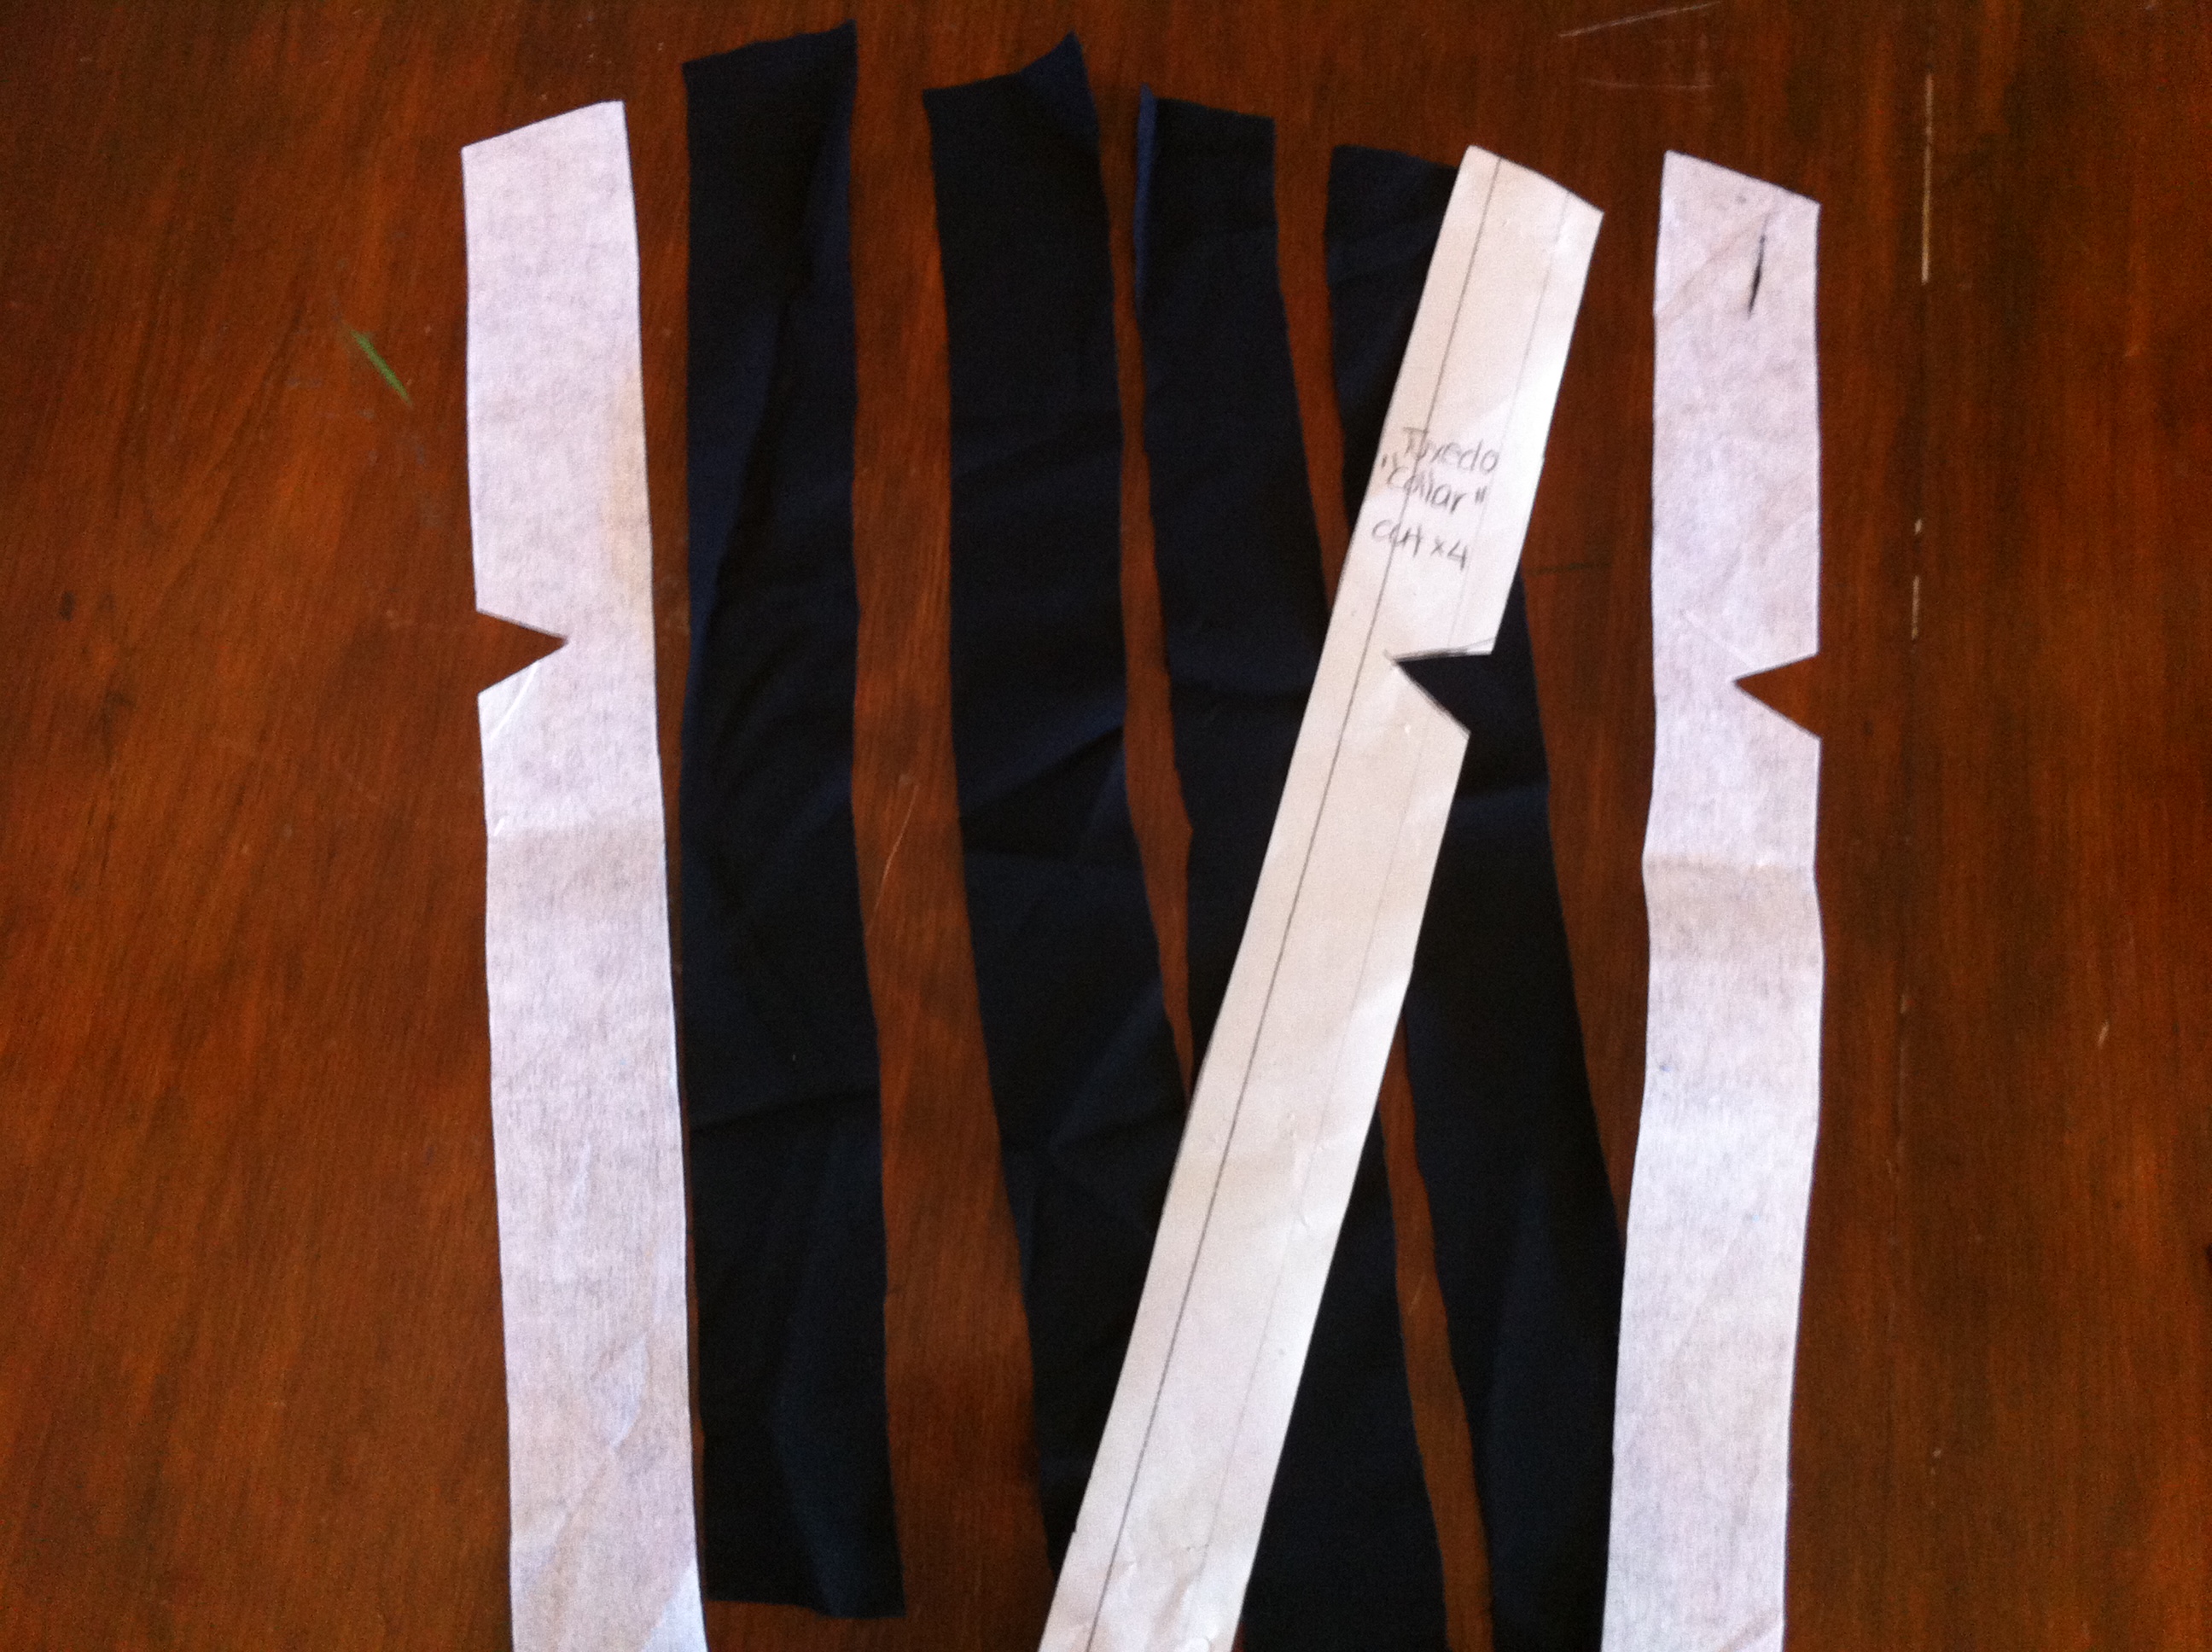
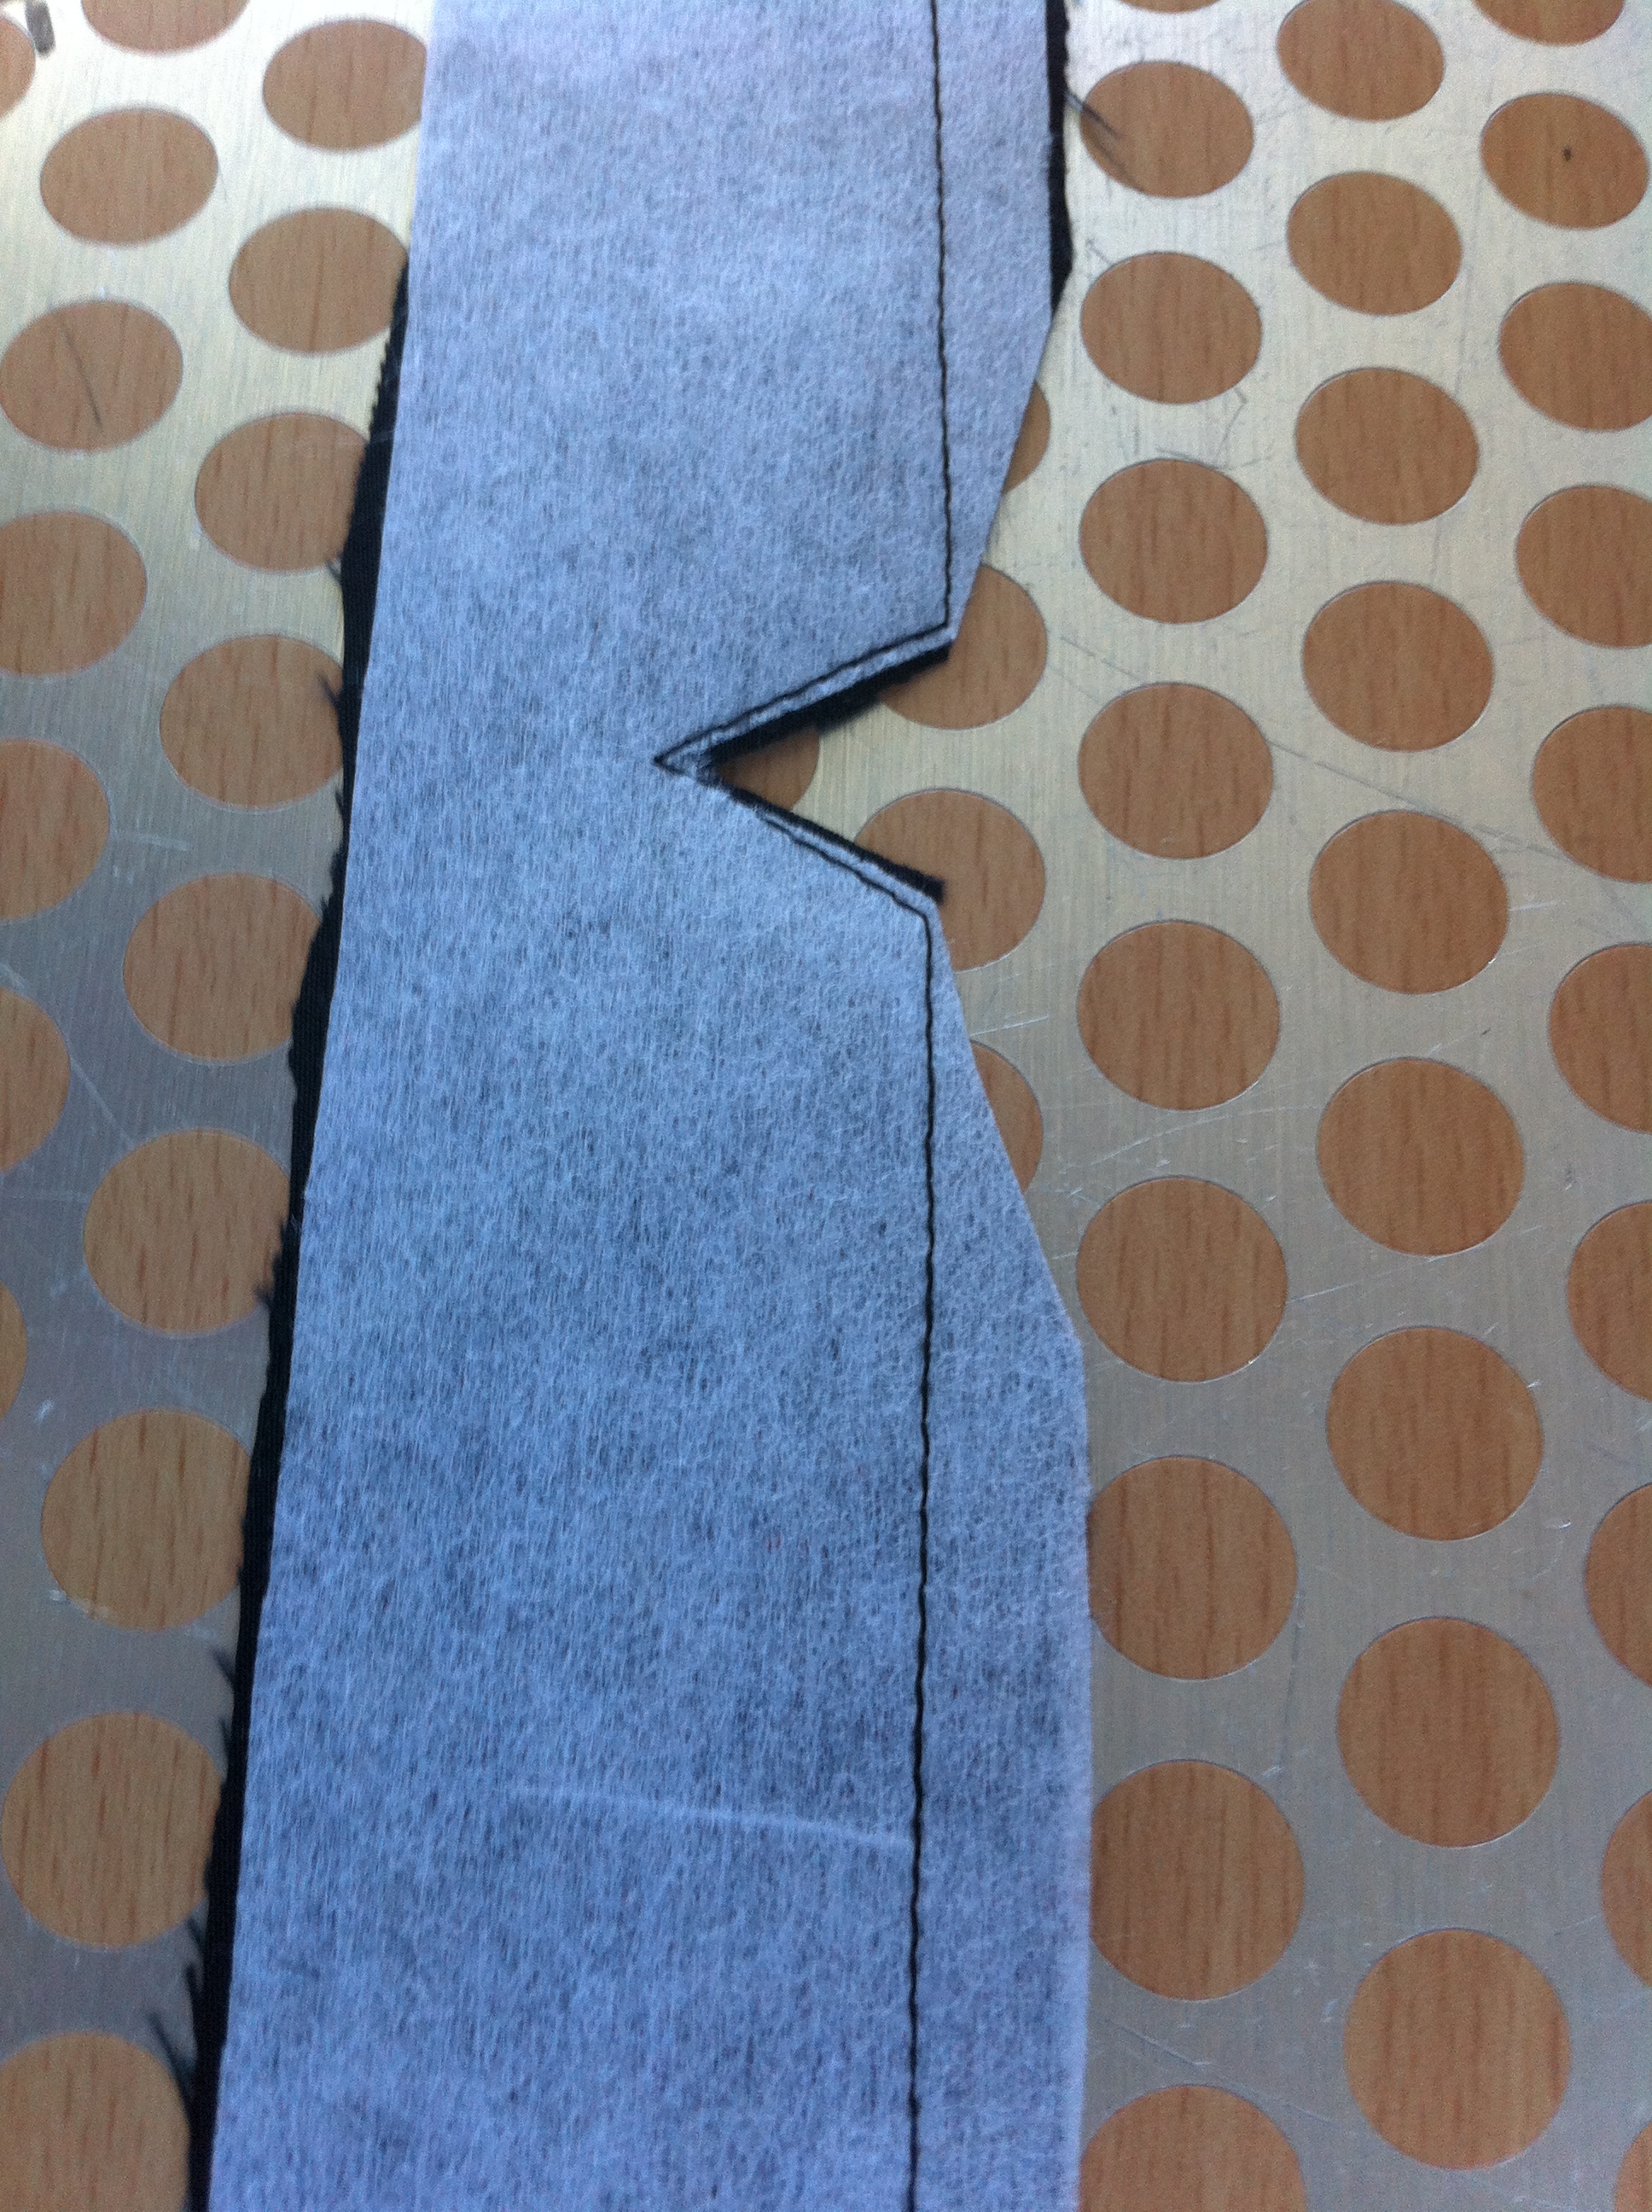
Cut out the collar pieces from the non-stretch black fabric you have. You'll need four {two pairs}. Cut out two pieces from the interfacing {one pair}. The pattern pieces you print out instruct you not to cut out the little indent bits, but on the interfacing I did so it was easy to see where to sew! So cut it out on the interfacing, not on the fabric. Got that?
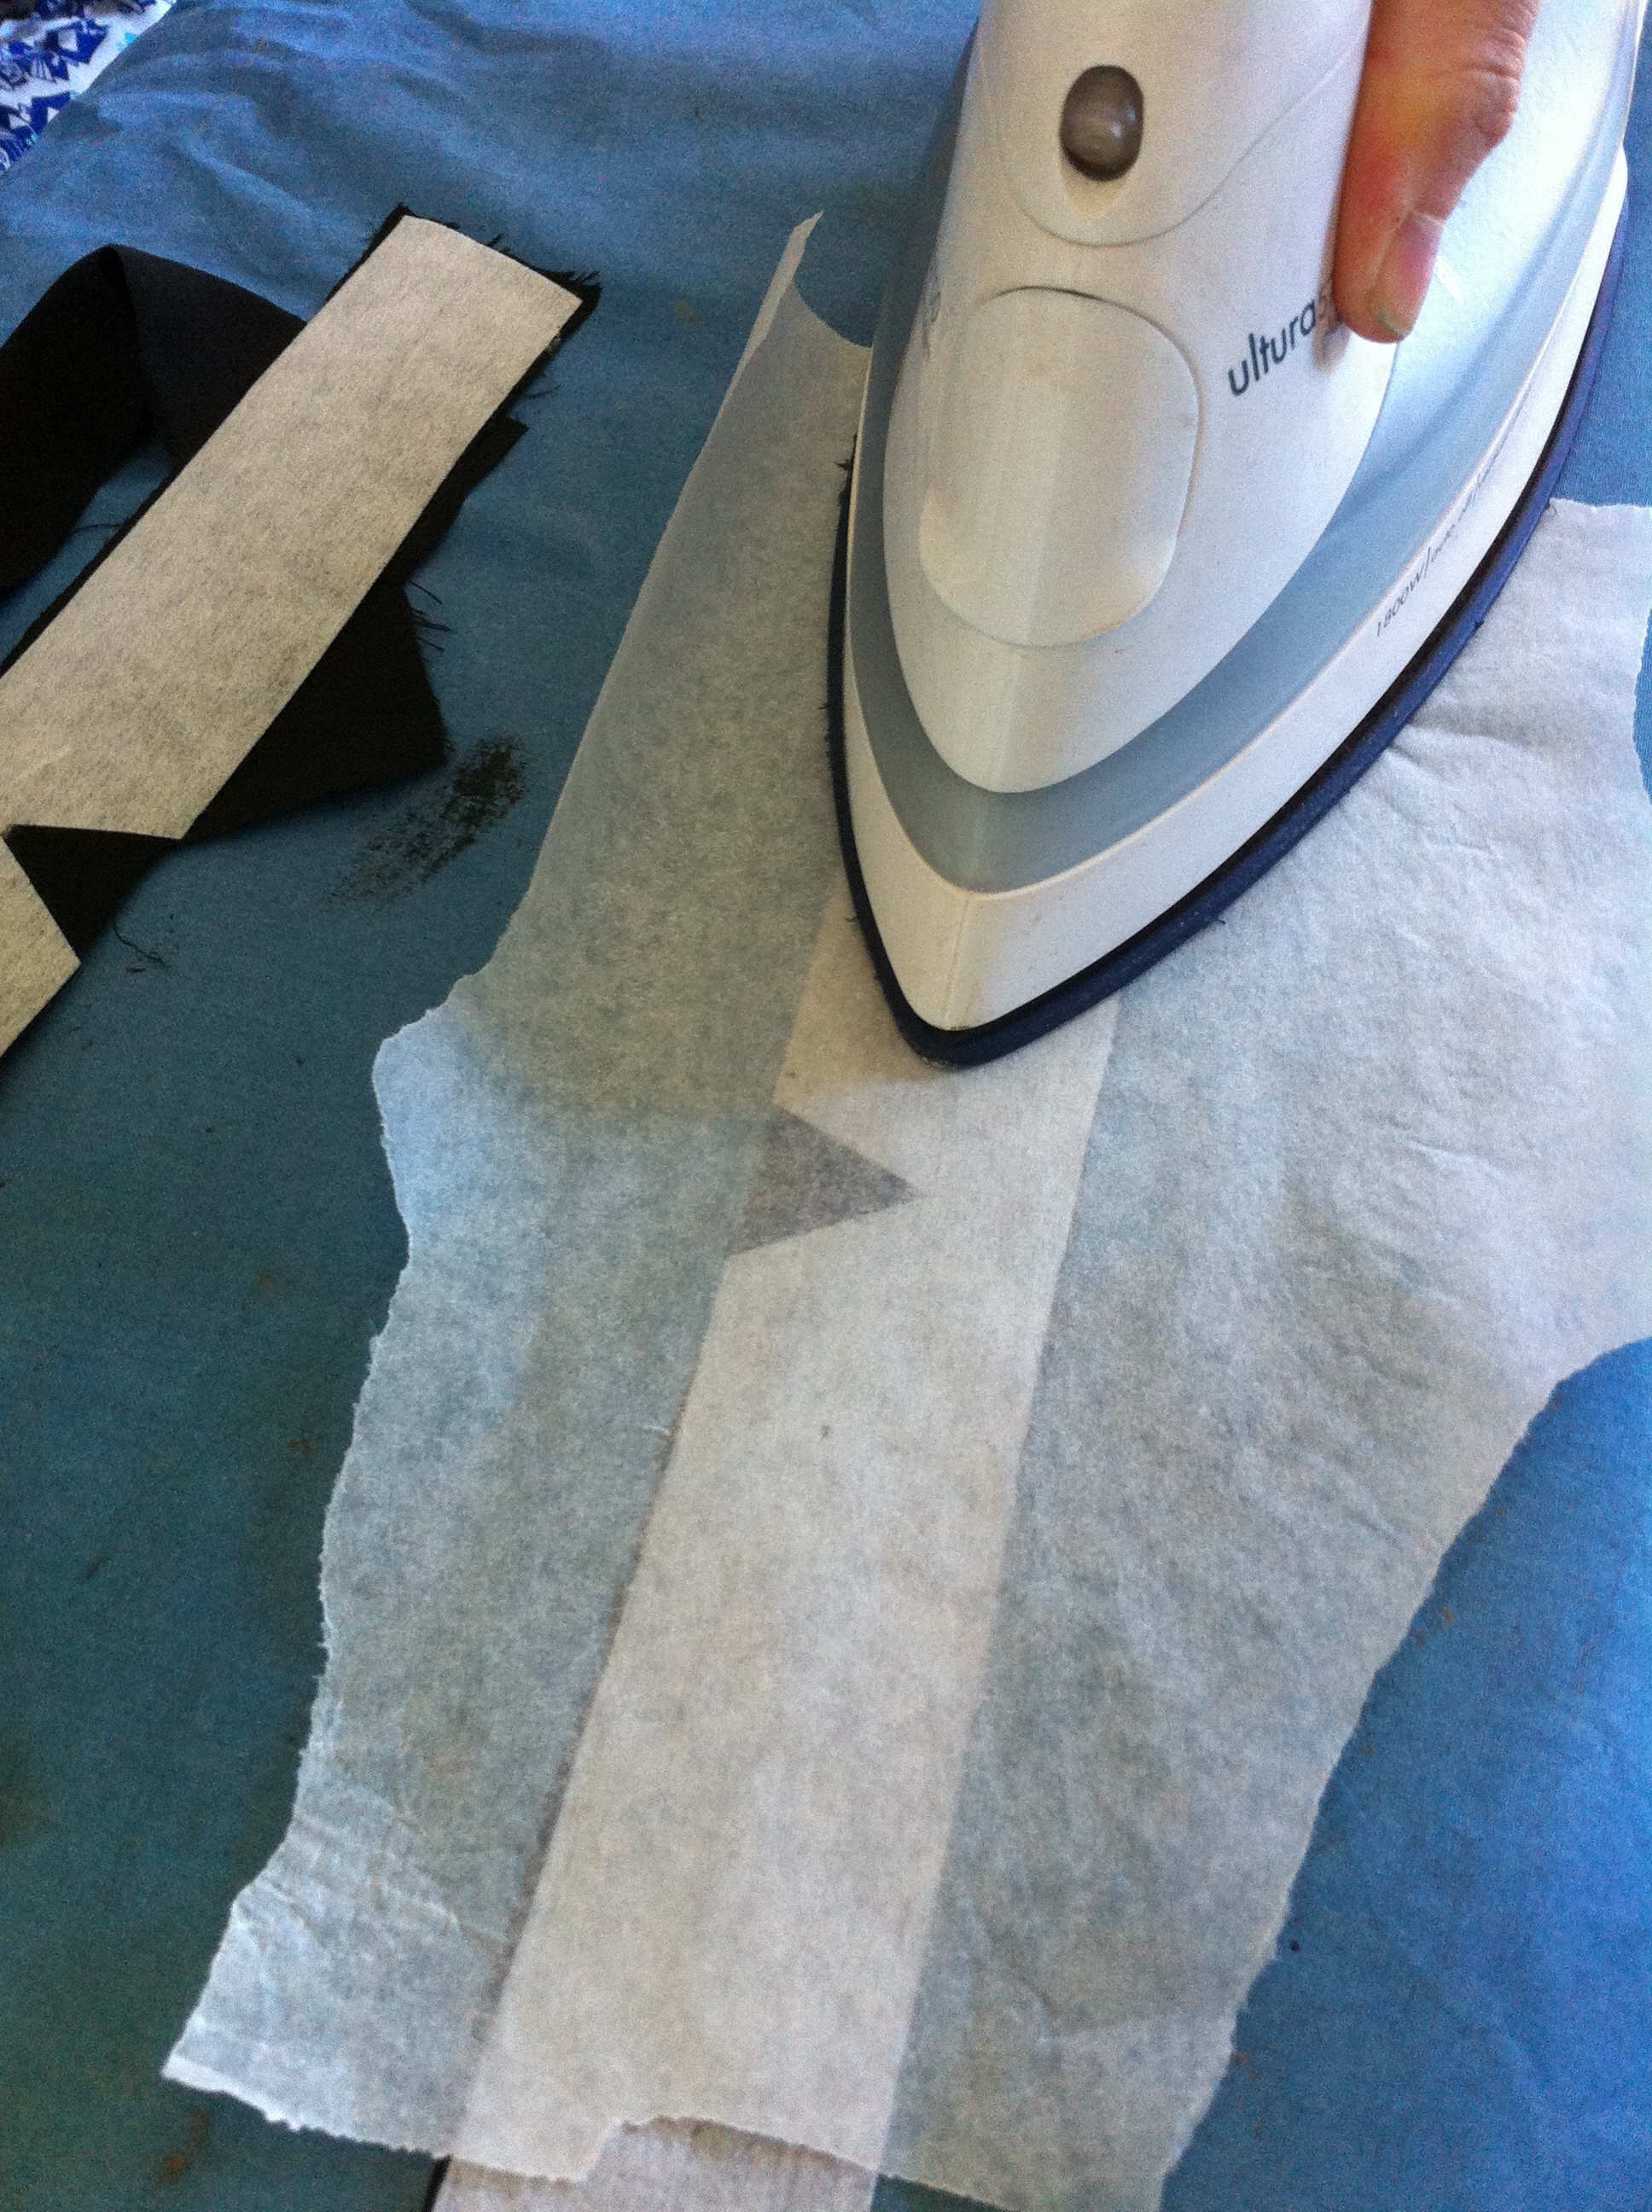
Prepare your pieces Iron the interfacing to the wrong side of one pair of your collar pieces. I use baking paper between my iron and interfacing just because I always have issues with my interfacing actually sticking to the fabric. This way seems to work!
 |
| Check out my delicious ironing board cover... |
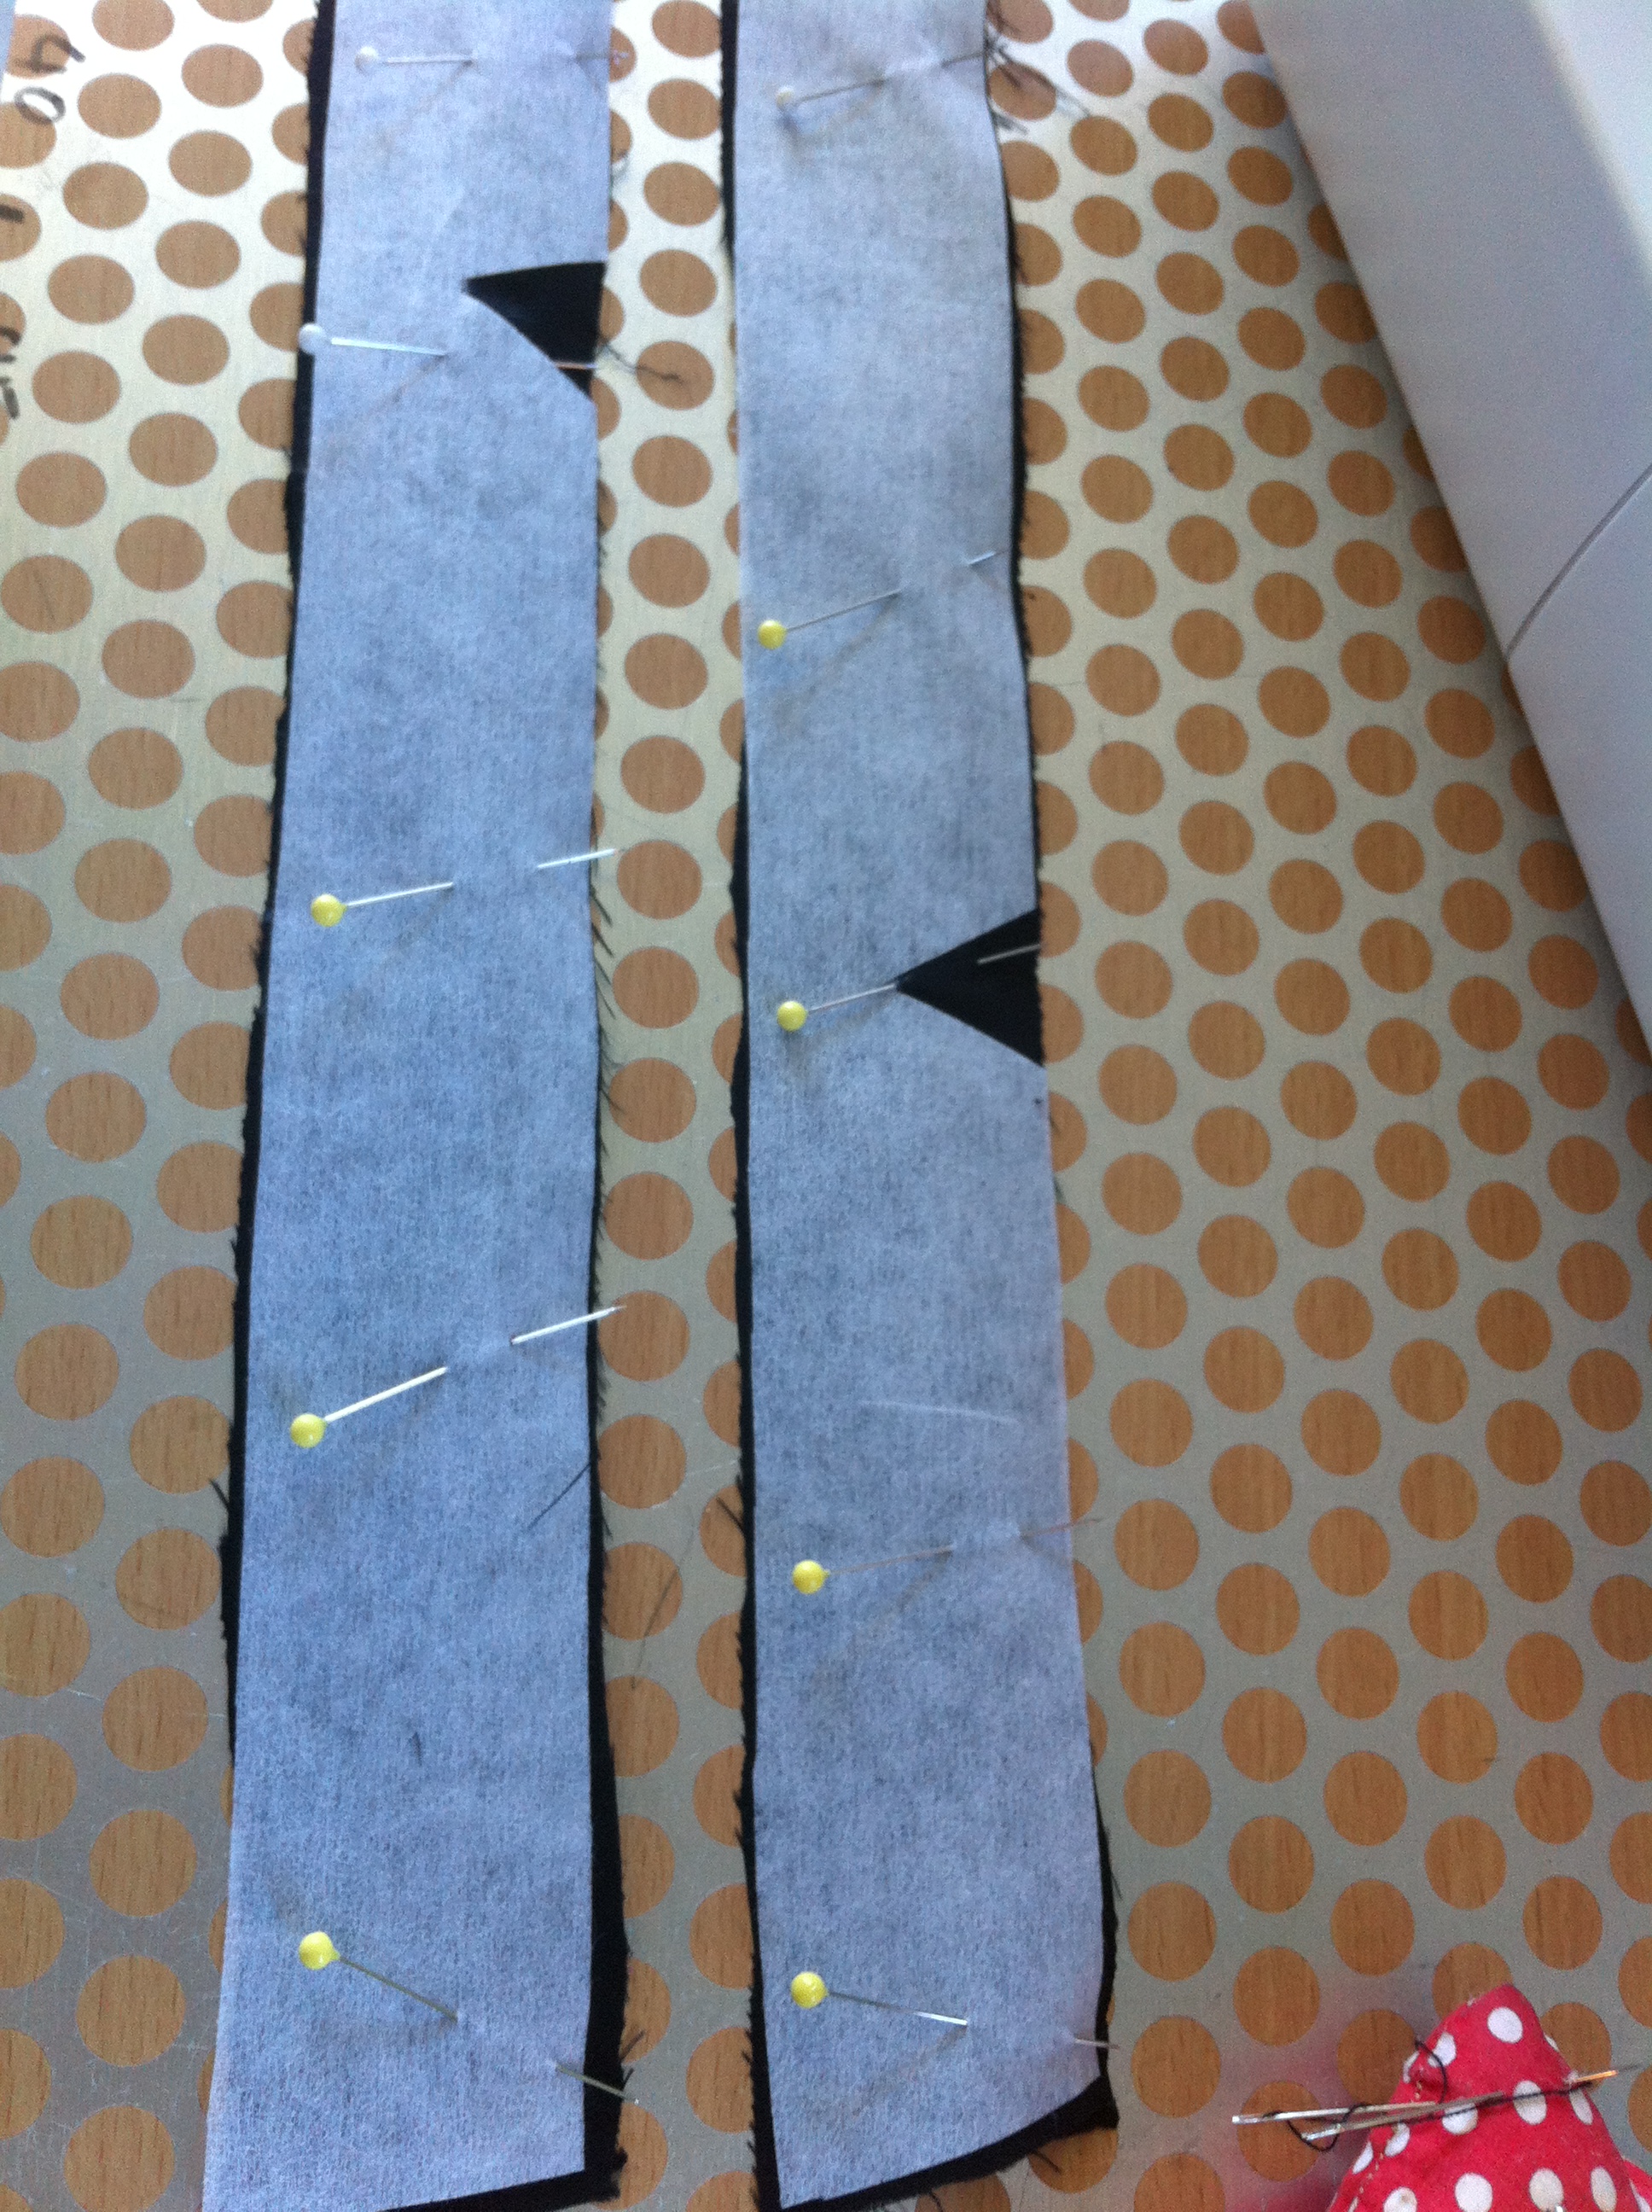
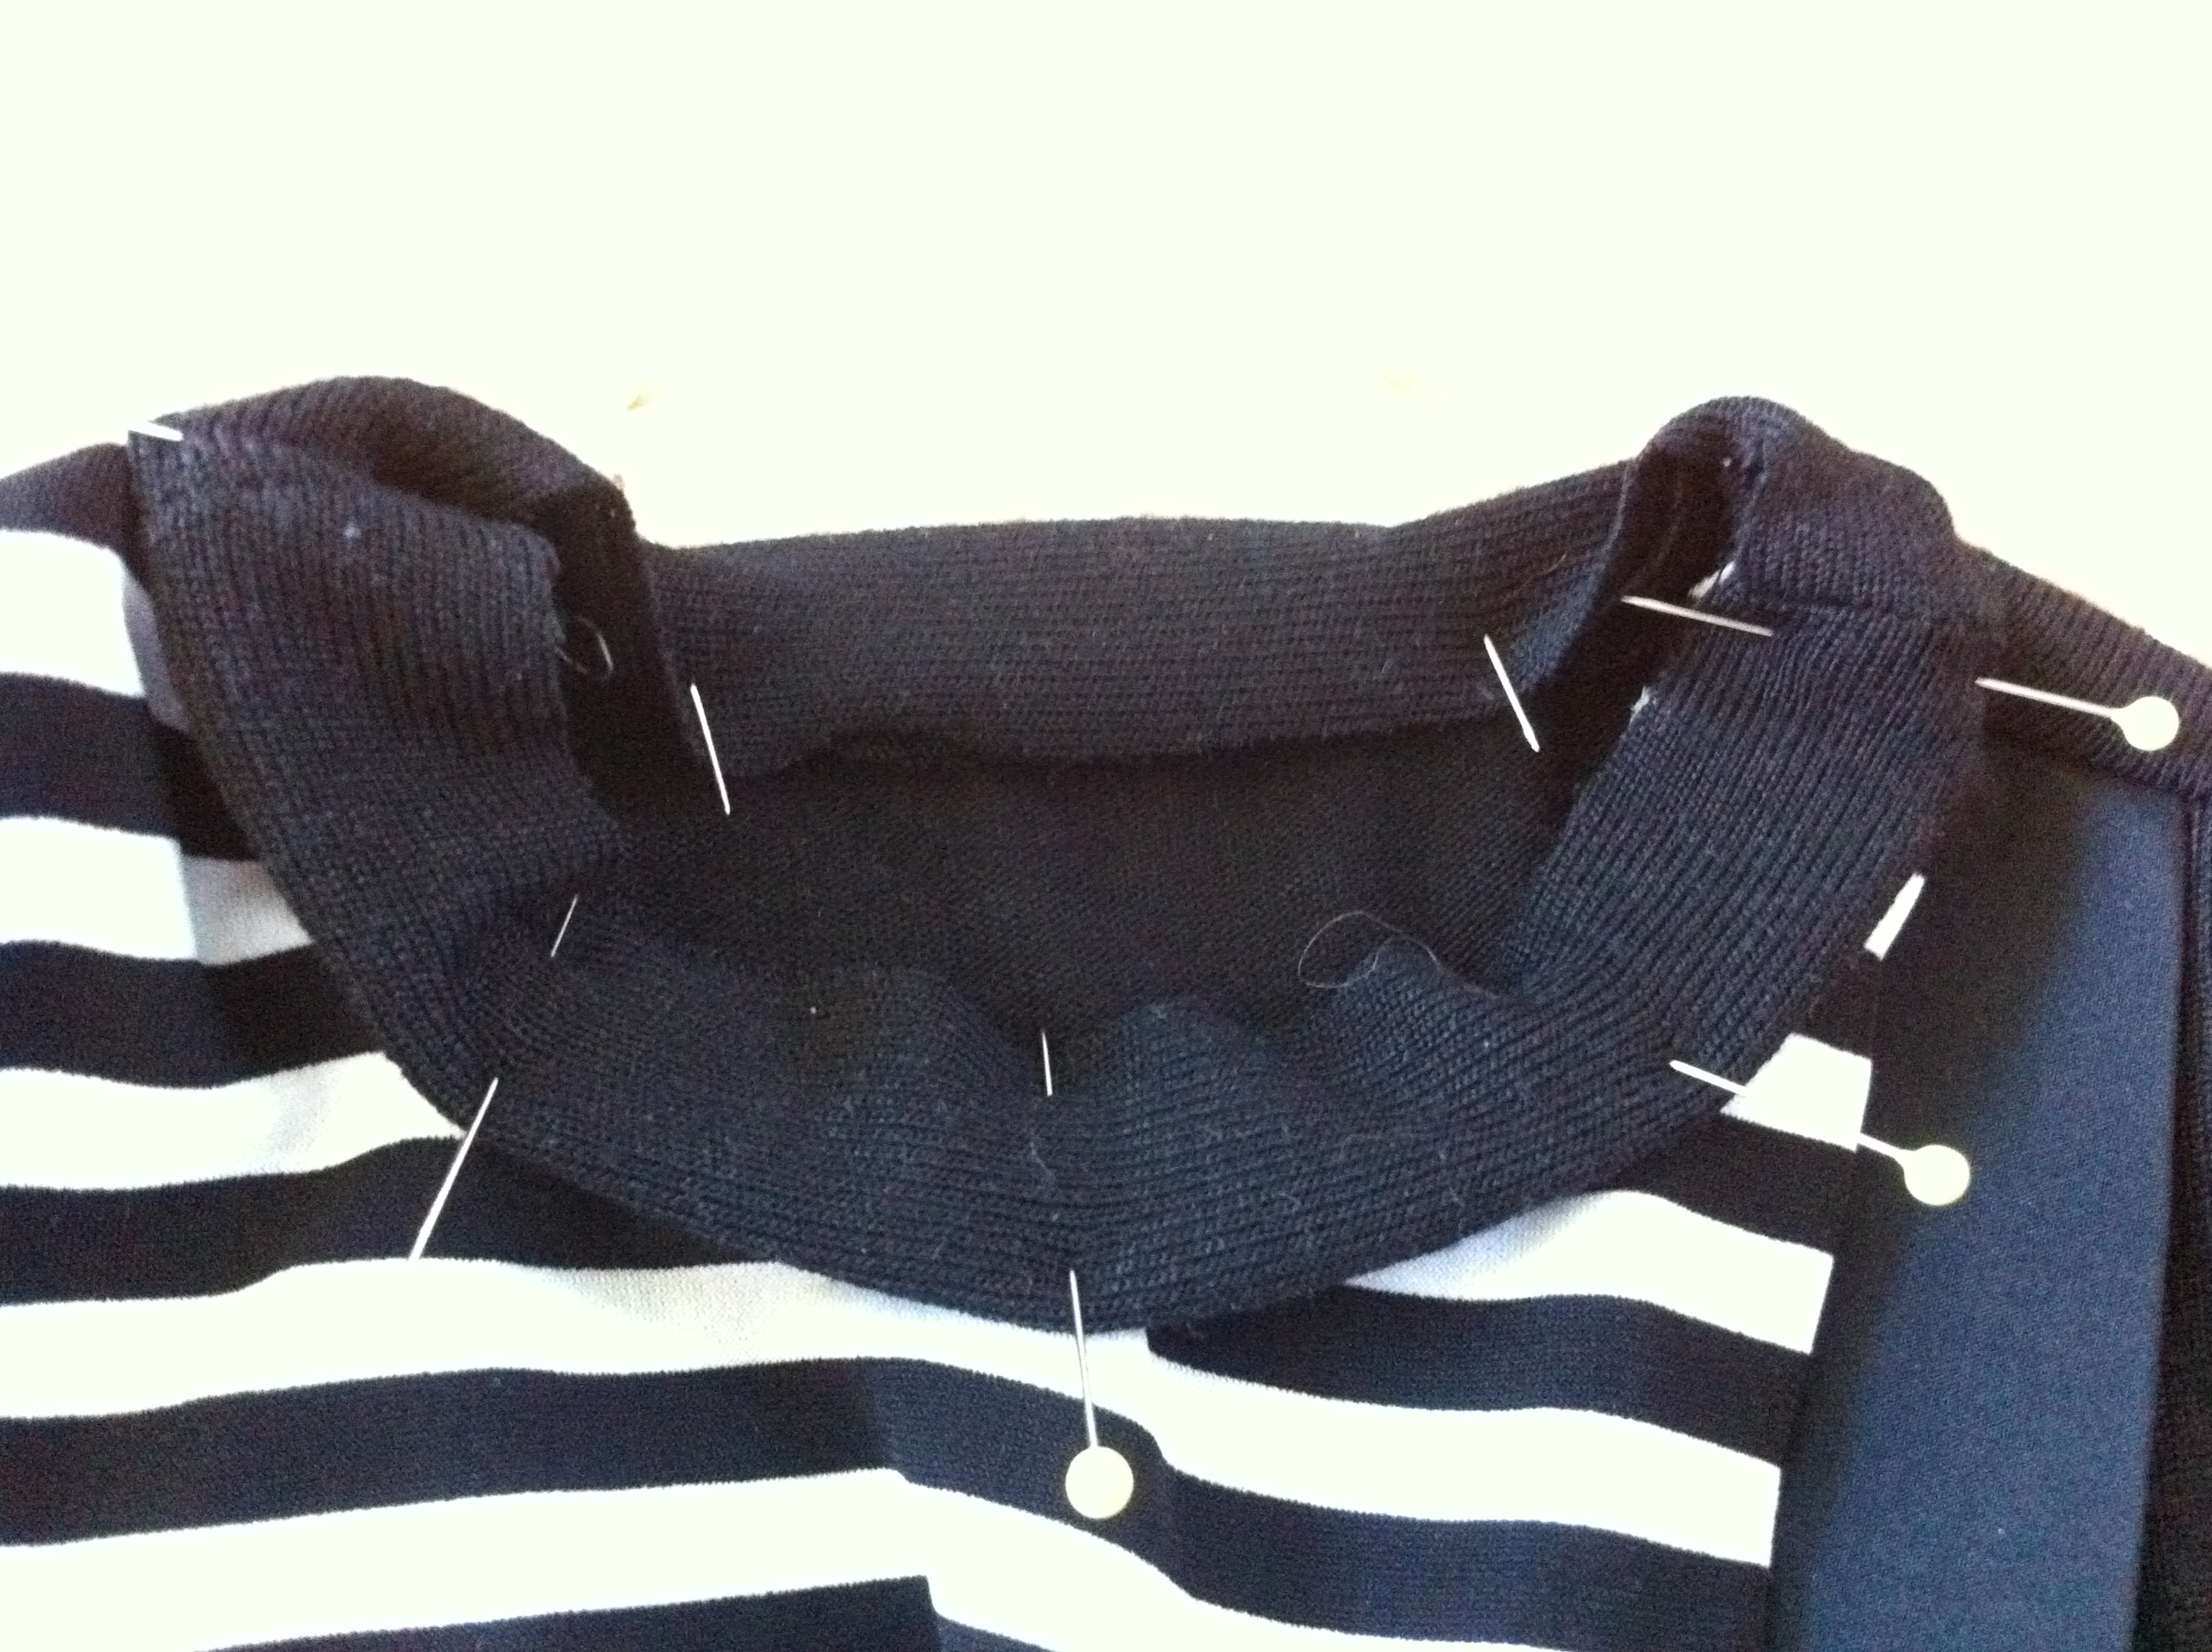
Let's get Stitchin'! Pin your collar pieces together, right sides together. You will have a left and right. These are facing the same way because I flipped one upside down okee?
Carefully stitch along the OUTSIDE edge of the collar, that's the edge that the triangle bits are on. I use a 1cm seam allowance on everything. You know how you cut the triangle part out of the interfacing? Sew along that cut out.
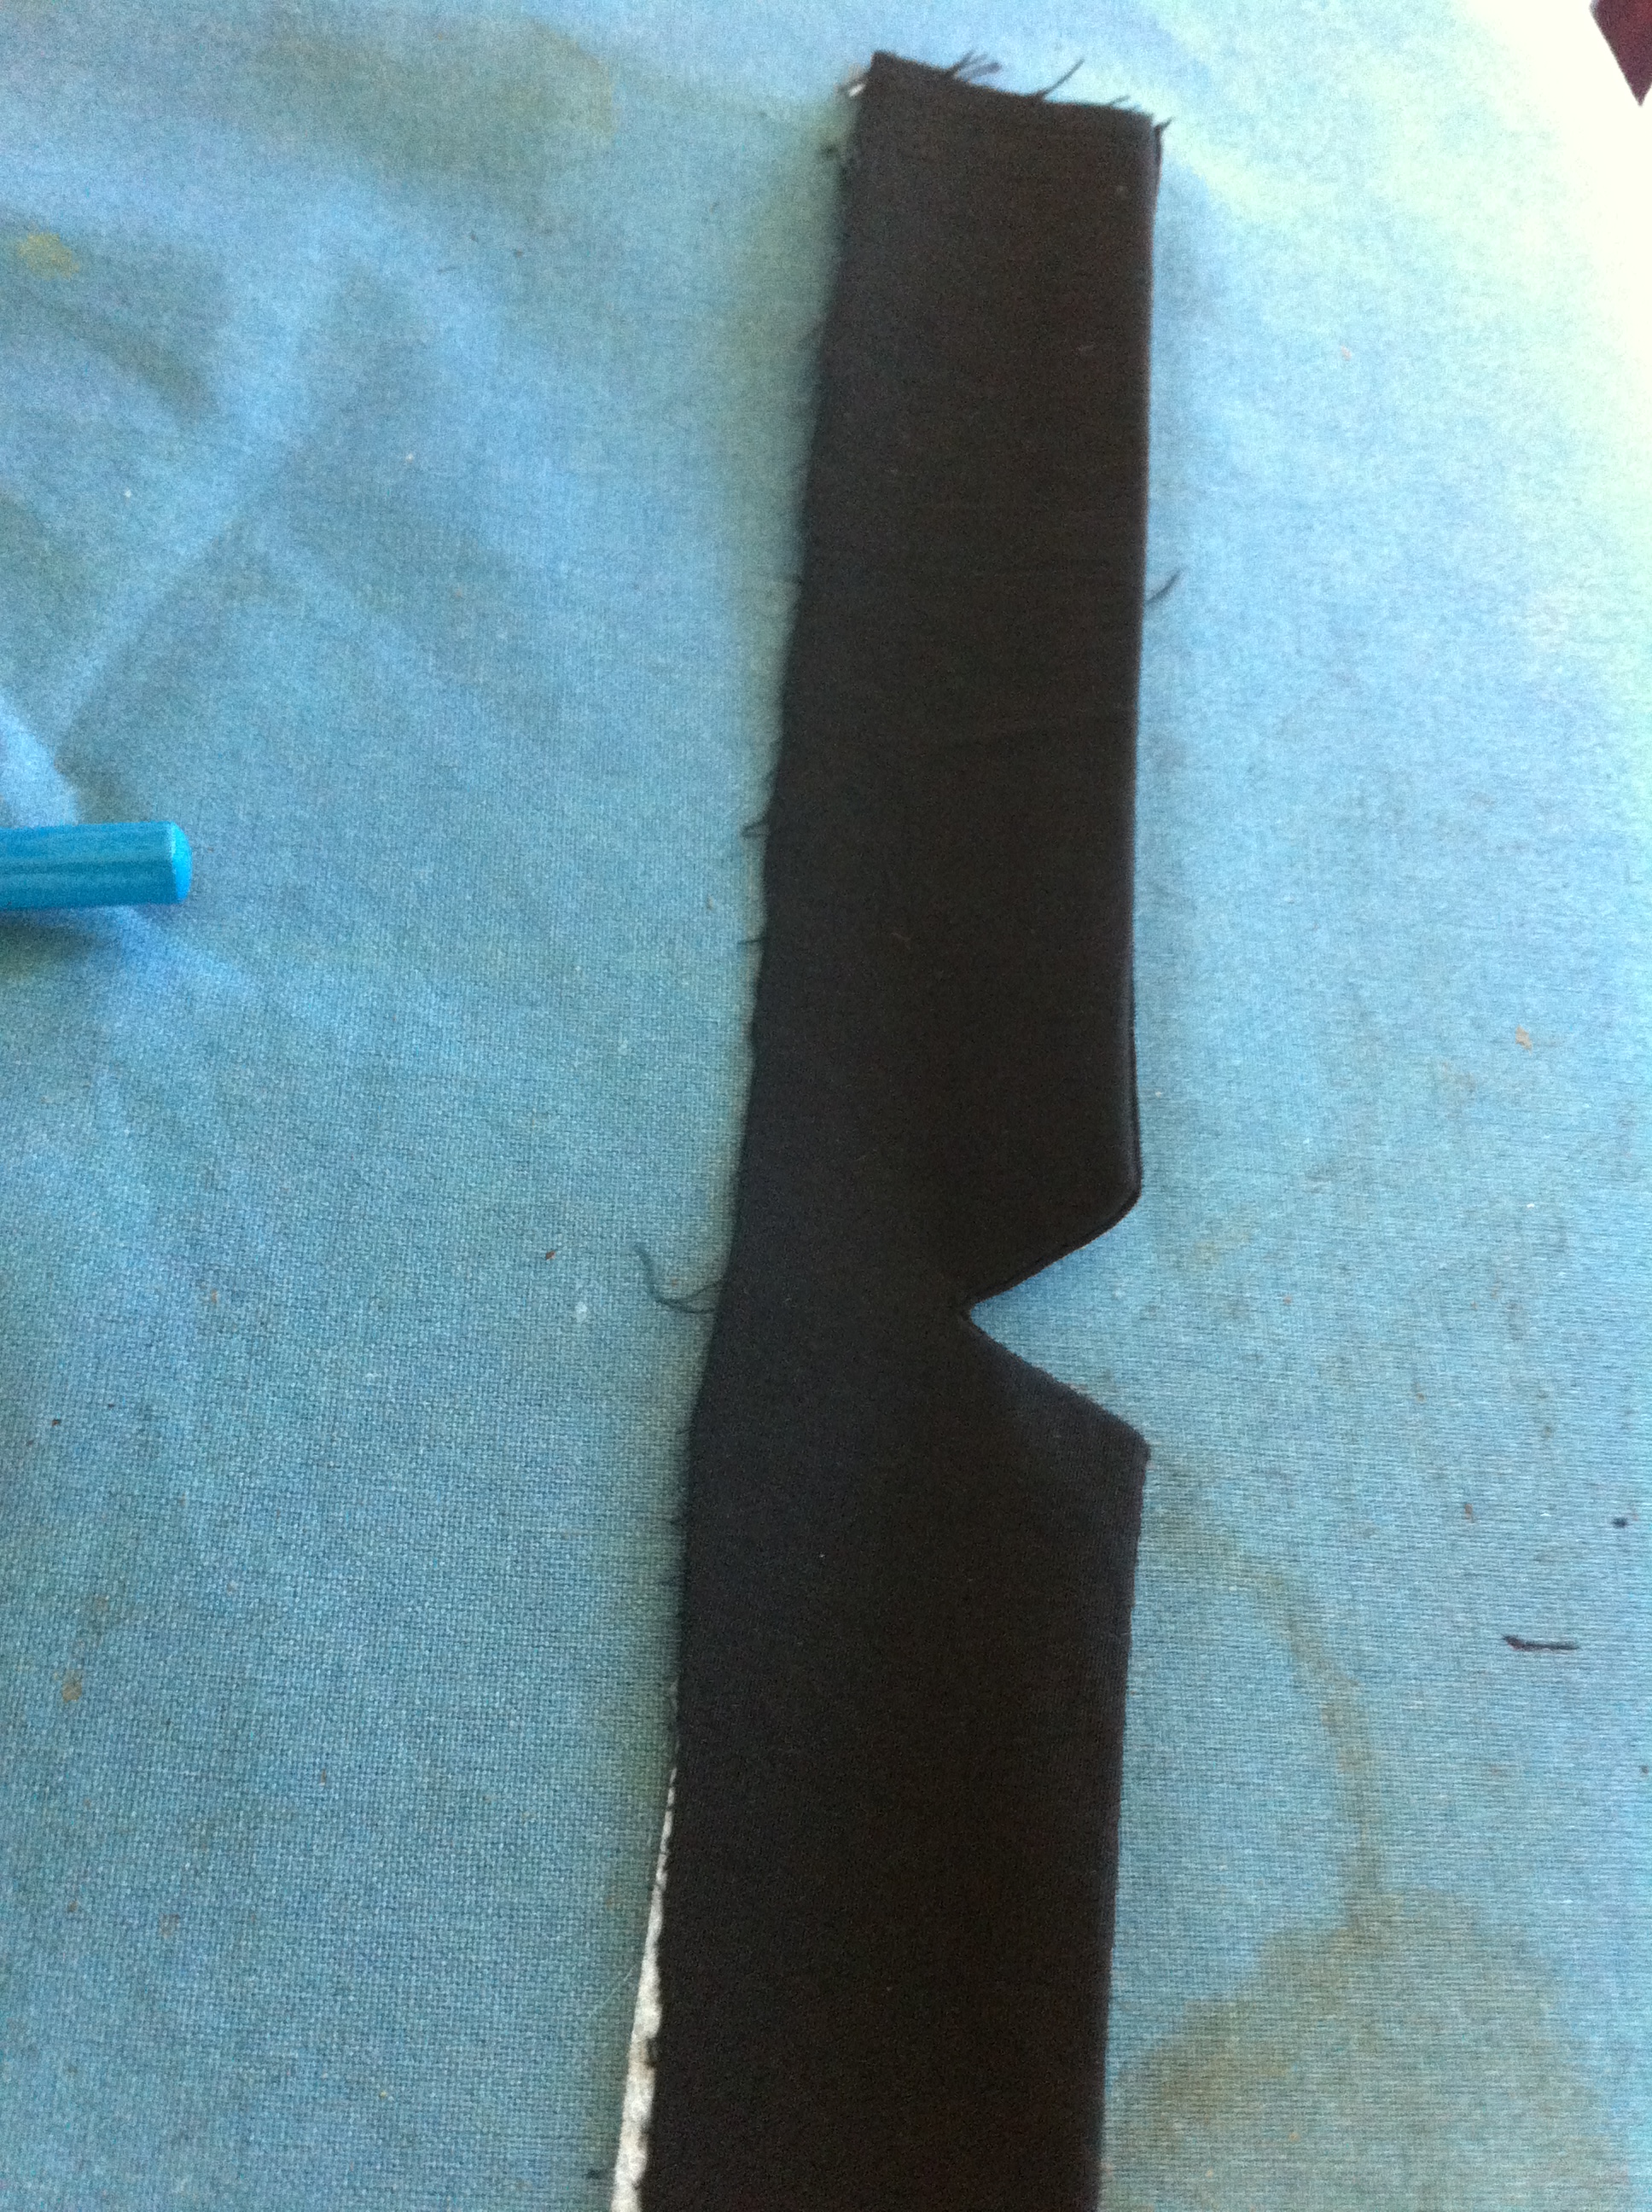
Clip your corners so when you turn the collars the right way out you won't have all crazy bunches of fabric.
Turn your collars out the right way, I used a pencil to poke out the corners properly. Press your pieces so they sit nice.
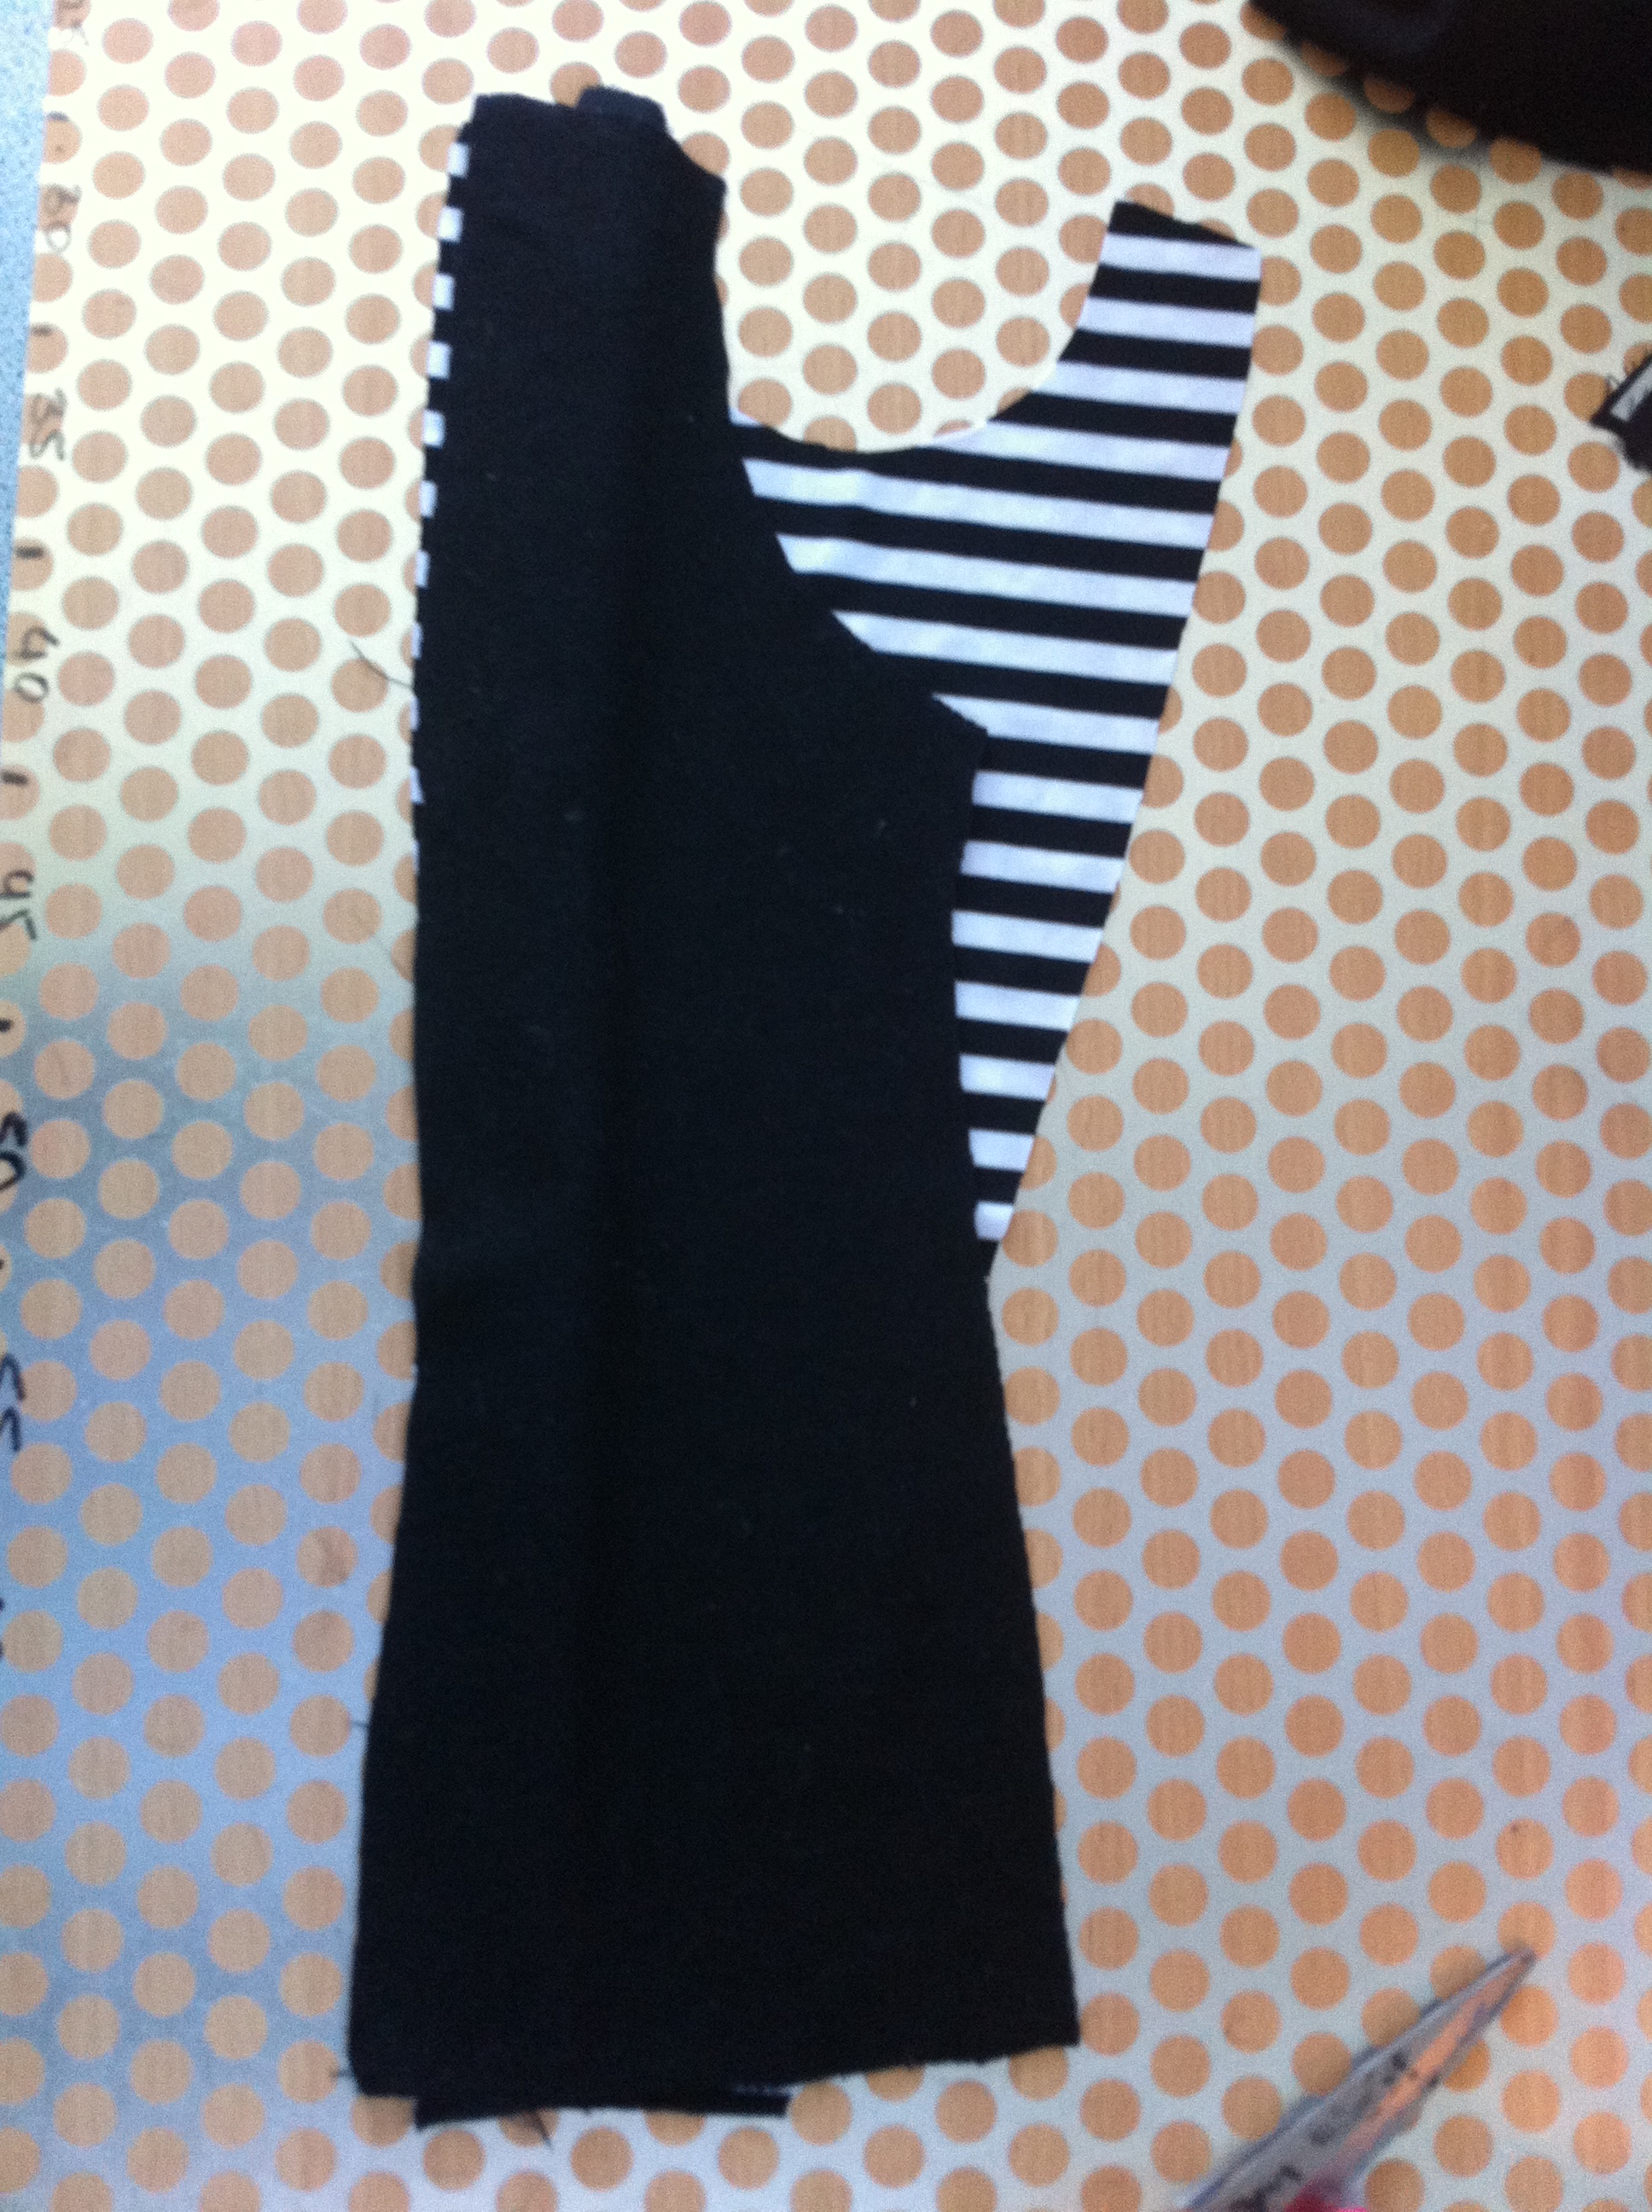
Place a collar face down onto the contrast centre front piece. Your triangle bits will be facing the middle of the shirt and the shorter section will be at the top.
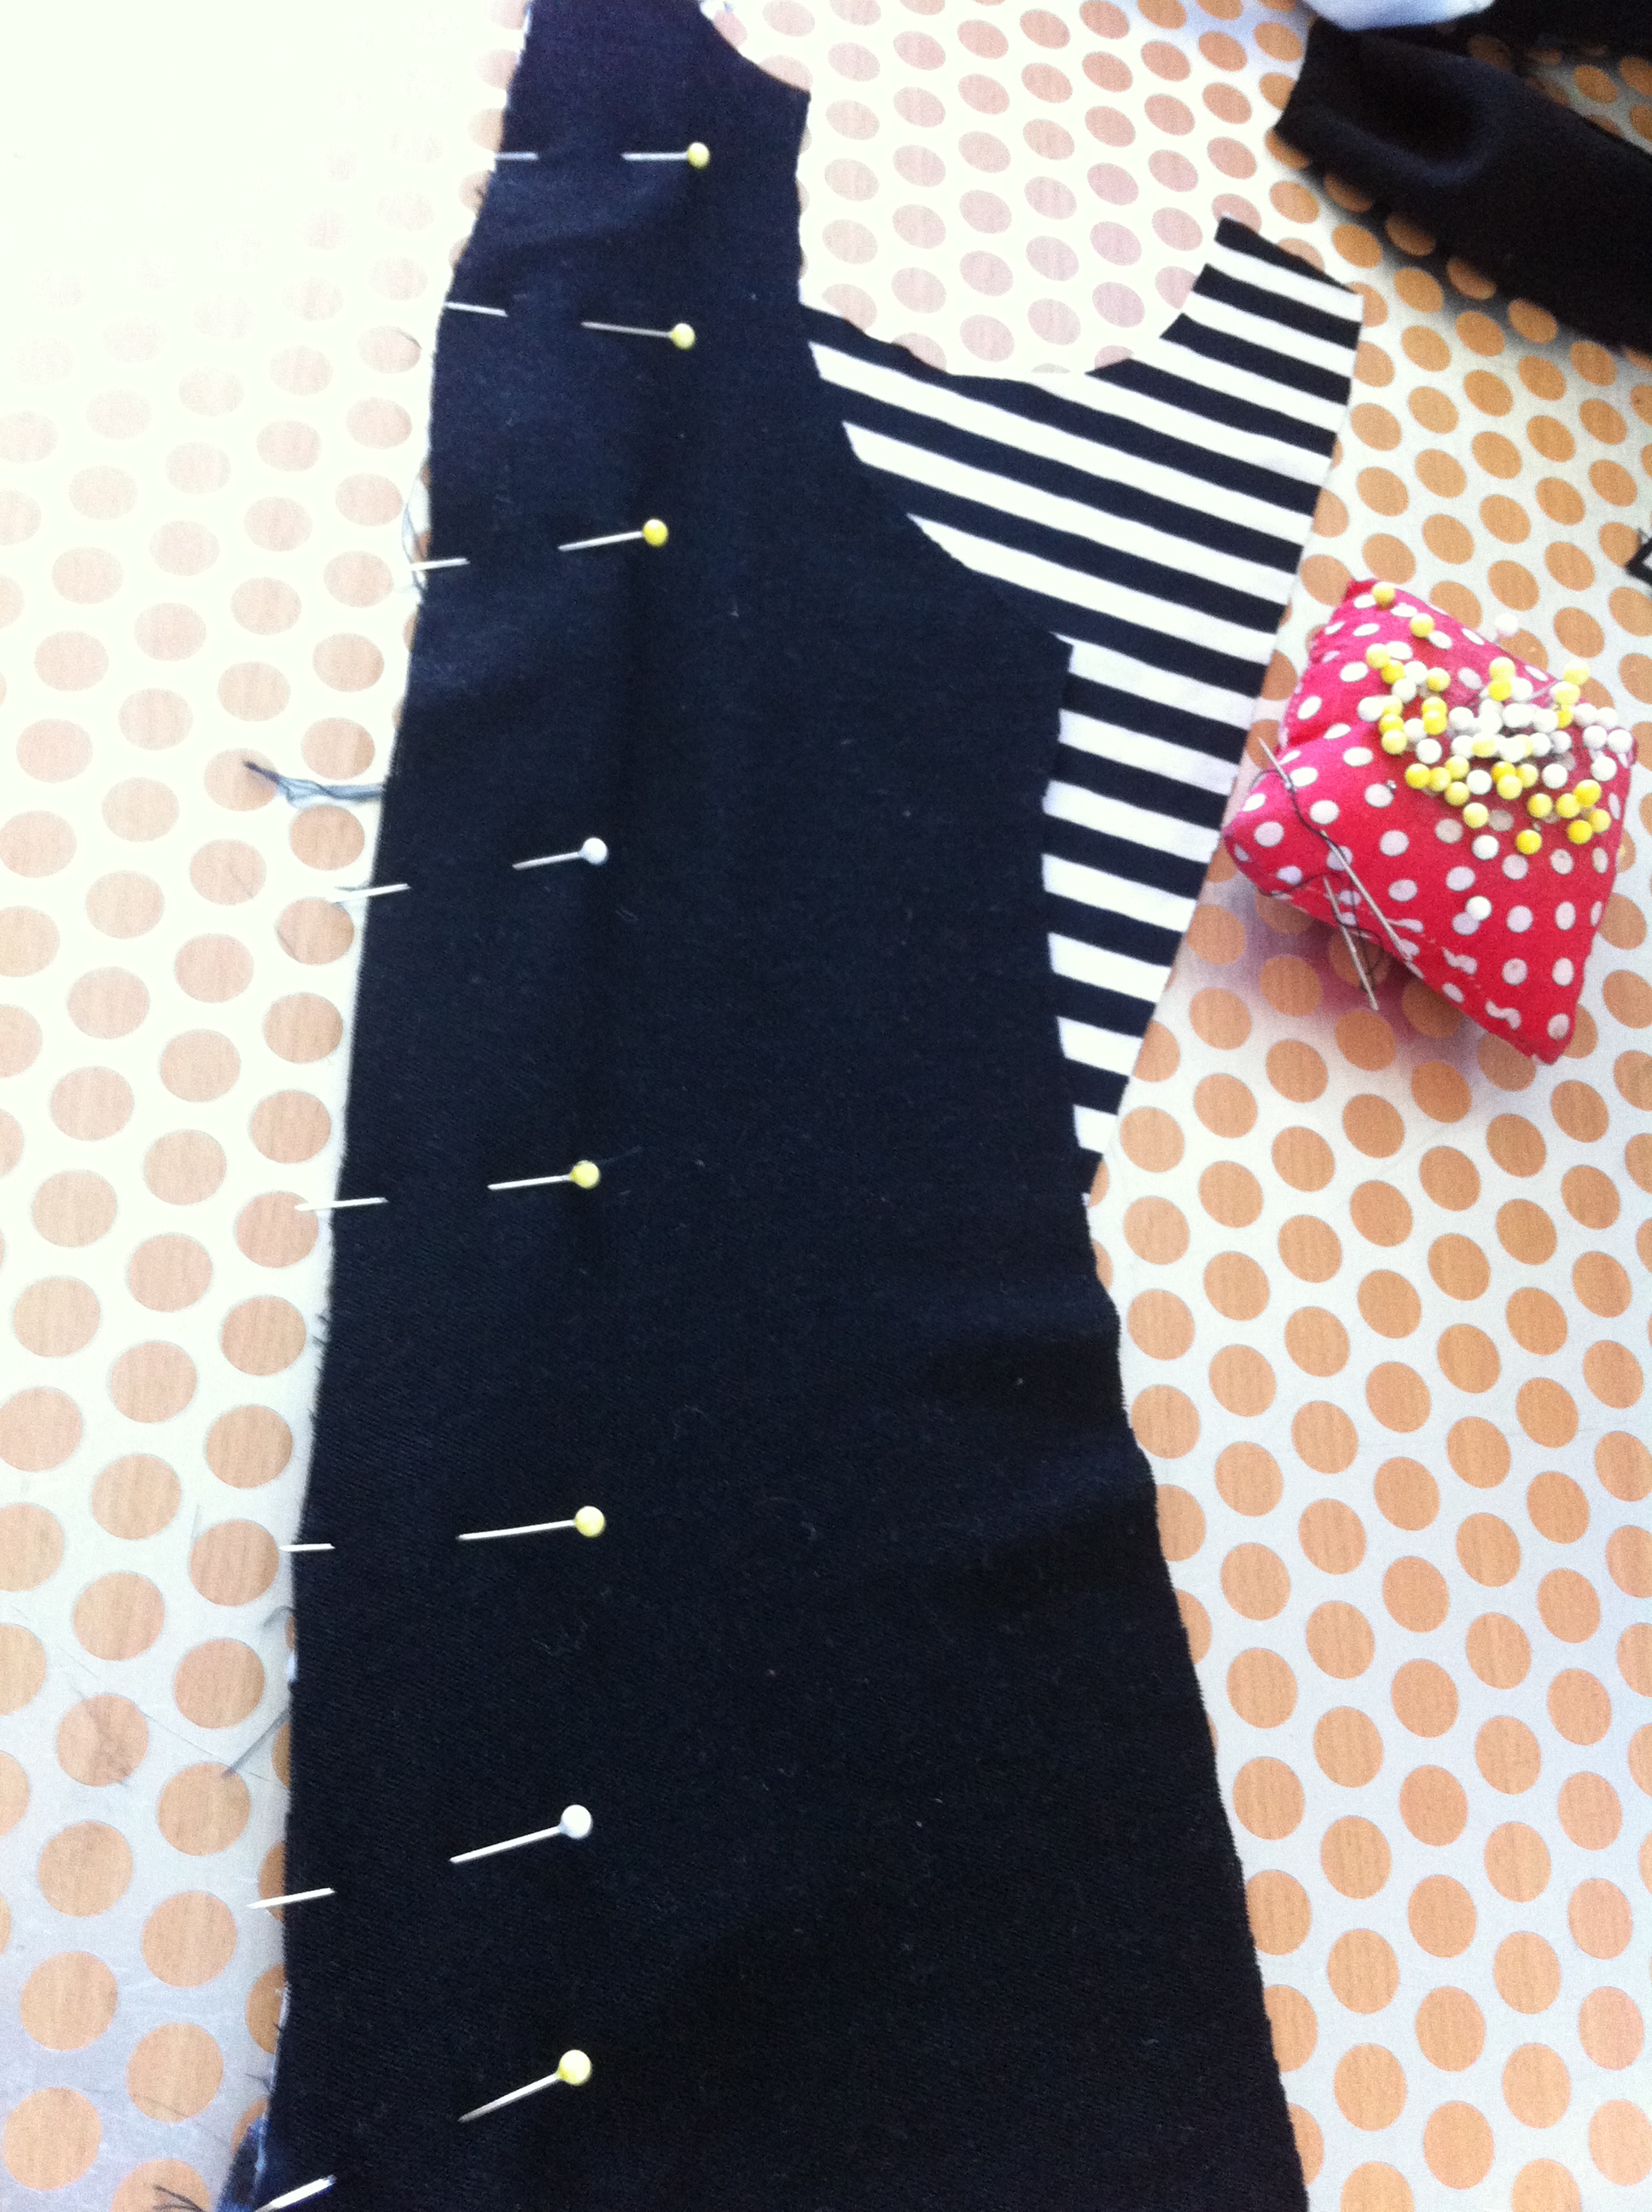
Place your left side front over the top, right side facing down so that the armhole curve is facing toward the centre of the shirt.
Pin it and stitch it!
When you flip it open you'll have half a front! Lookin' pretty awesome hey? Now do the same to the other side.
I overlocked/serged these front seams just so they stay nice and neat.
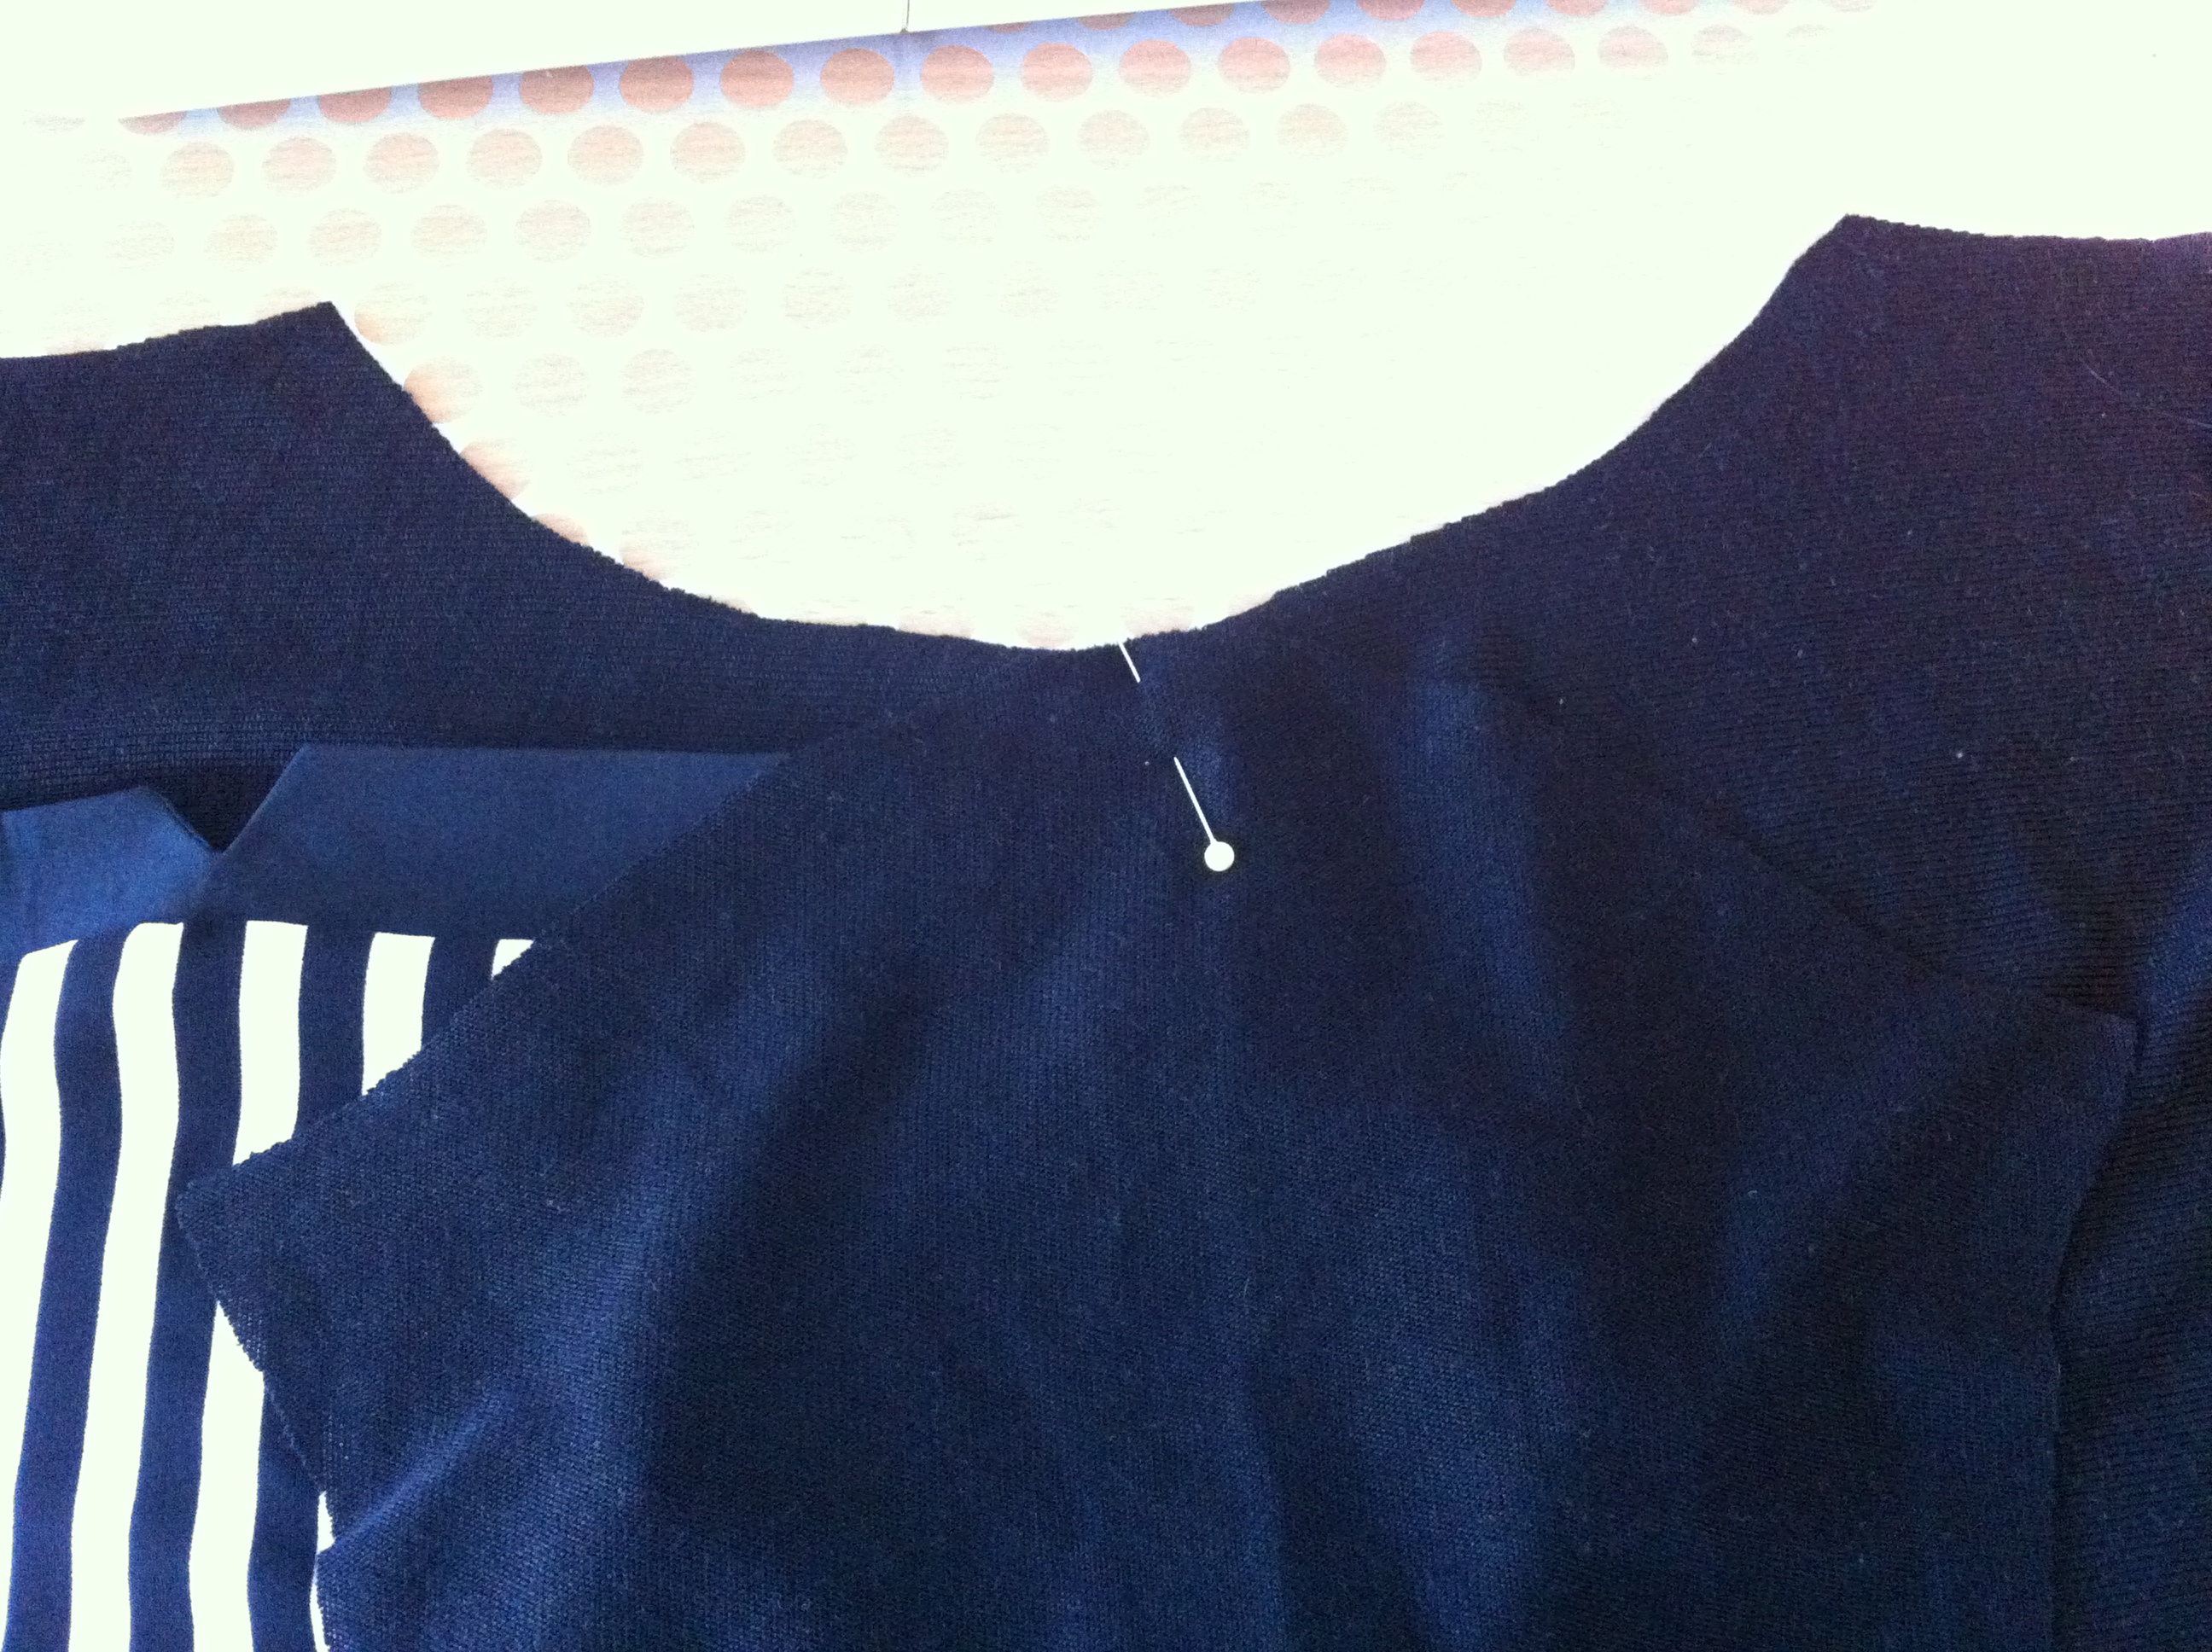
Now place your back face down over your front and stitch the shoulder seams.
Measure your neckline, take 1cm off that measurement and you have how big to make your neckband. Cut from your black stretch fabric a rectangle that is these measurements:
Make sure the stretch of the fabric goes along the LENGTH of your piece! Stitch the short ends together so you have a loop
Fold the loop in half width ways and pin the not-folded edge to the neckline of the shirt like so!
Stitch it with a zigzag stitch so it will stretch over your pumpkin's head. When you flip it up it will look pretty swish!
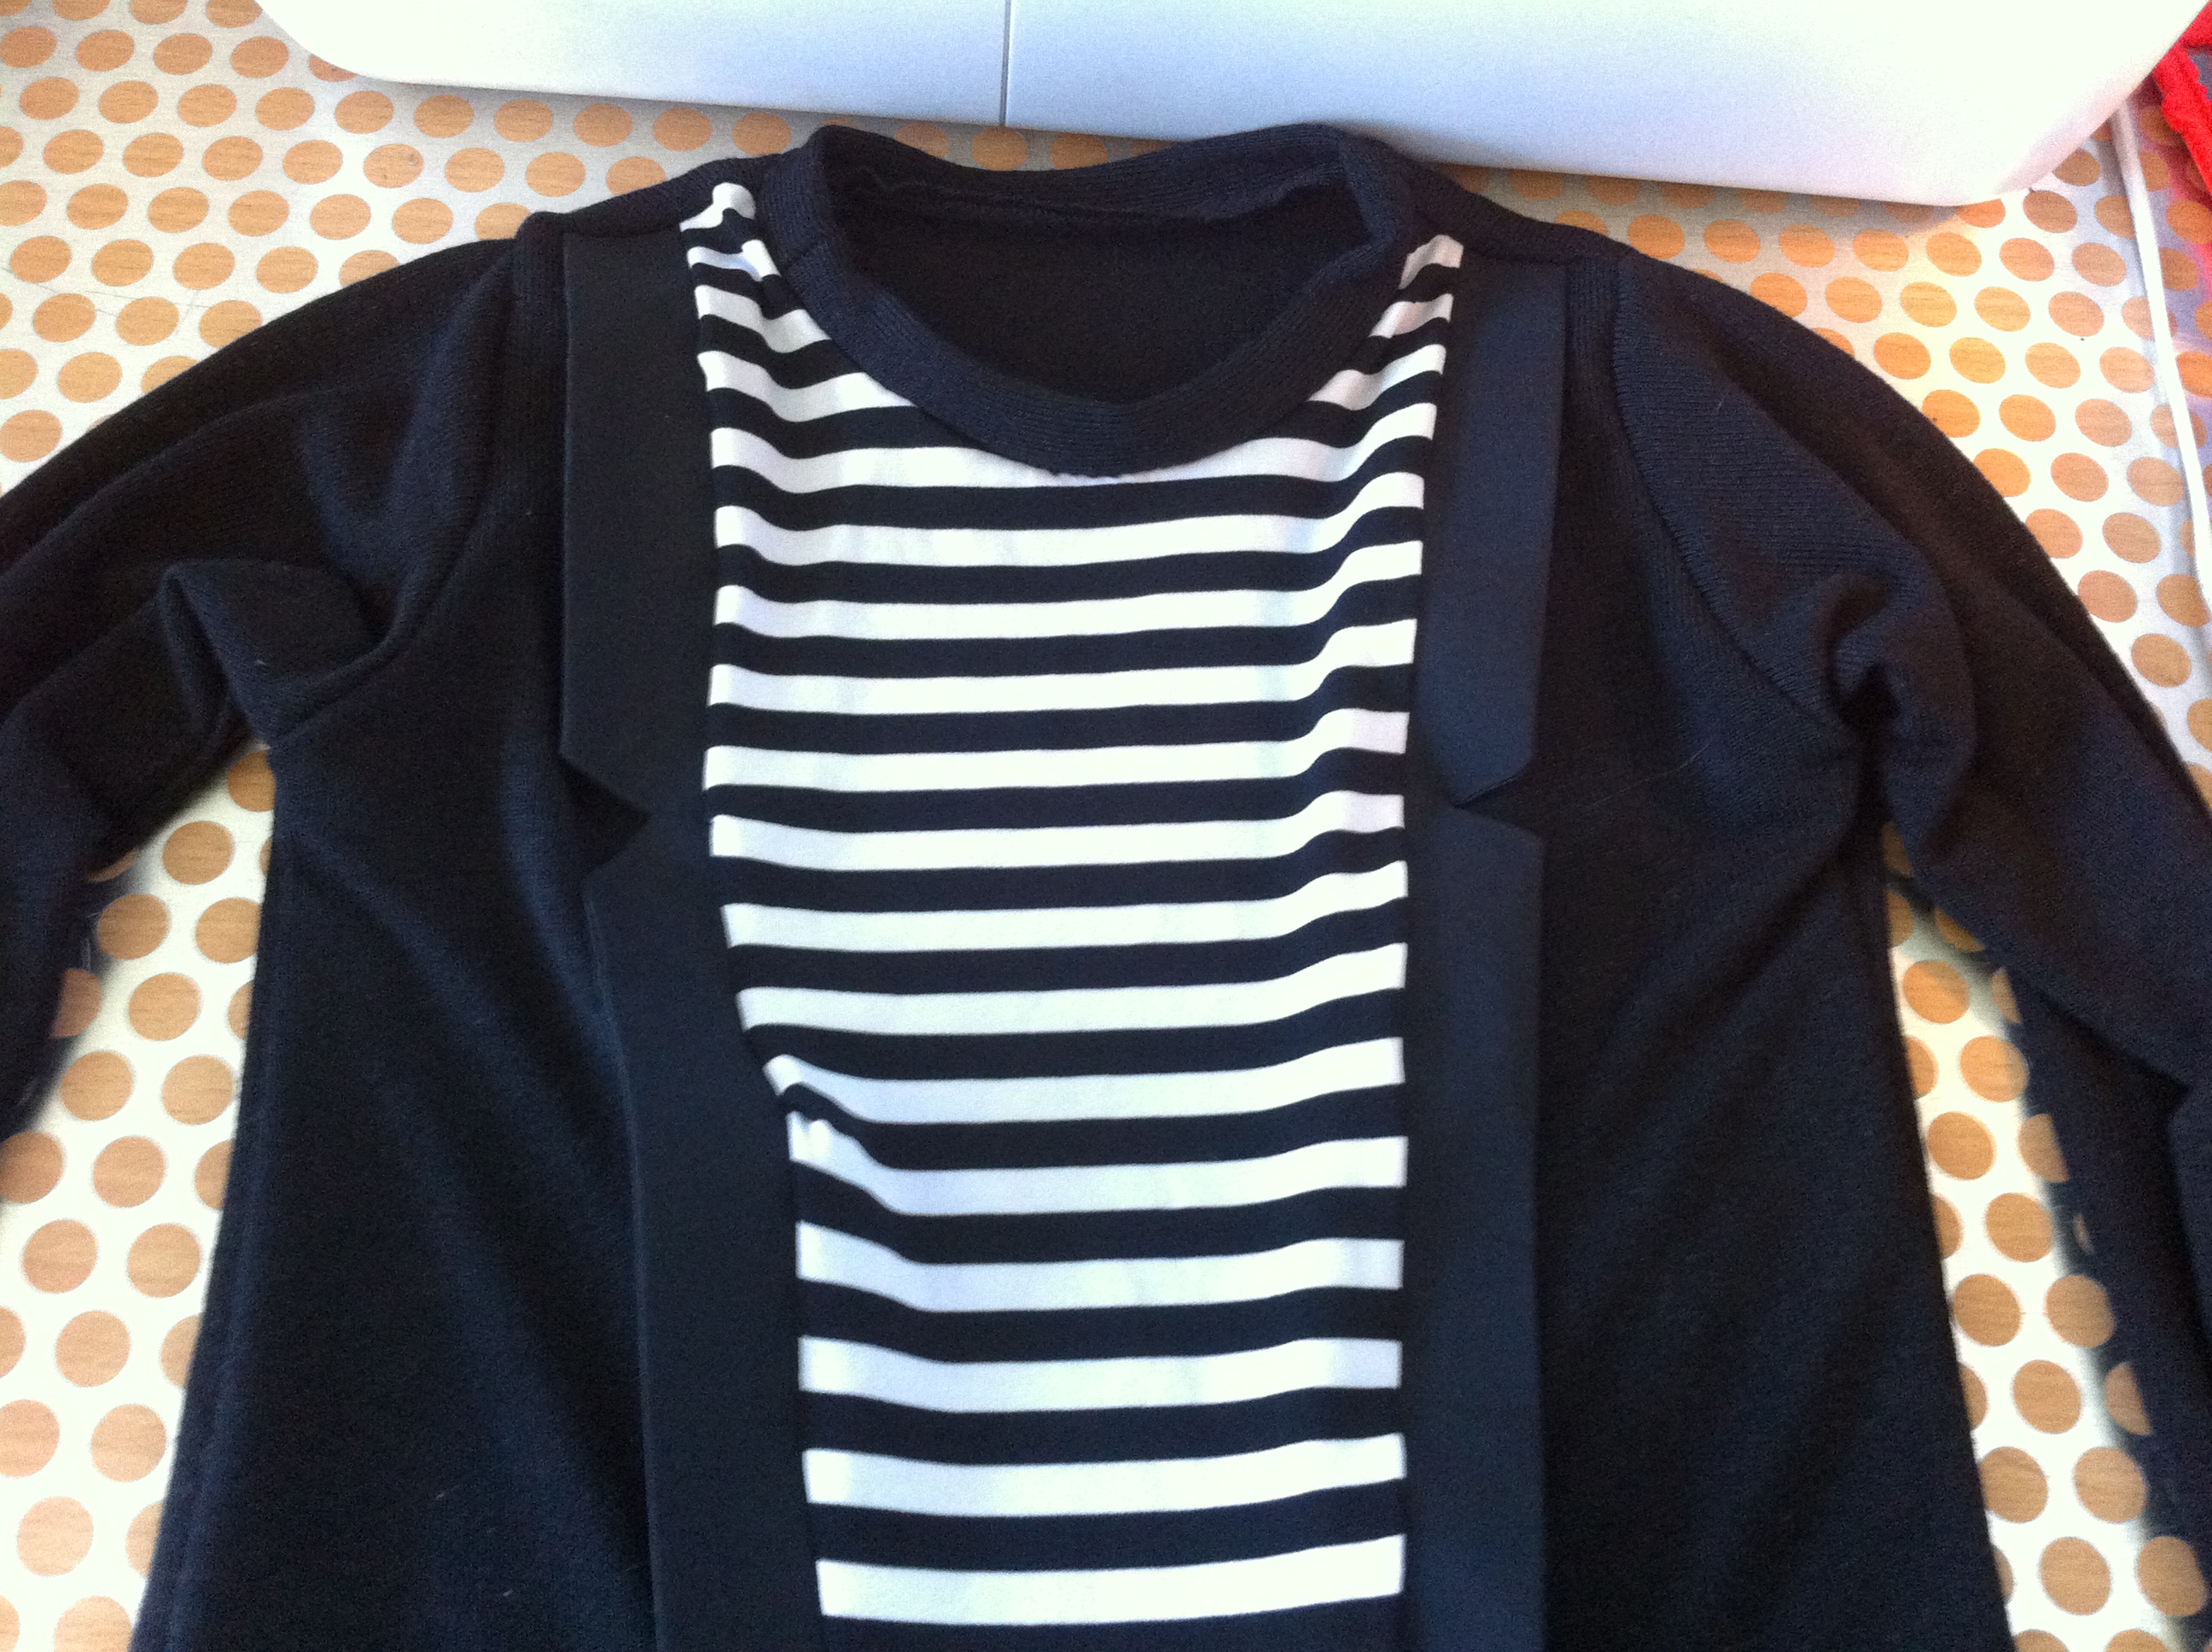
It totally is looking like a shirt already!
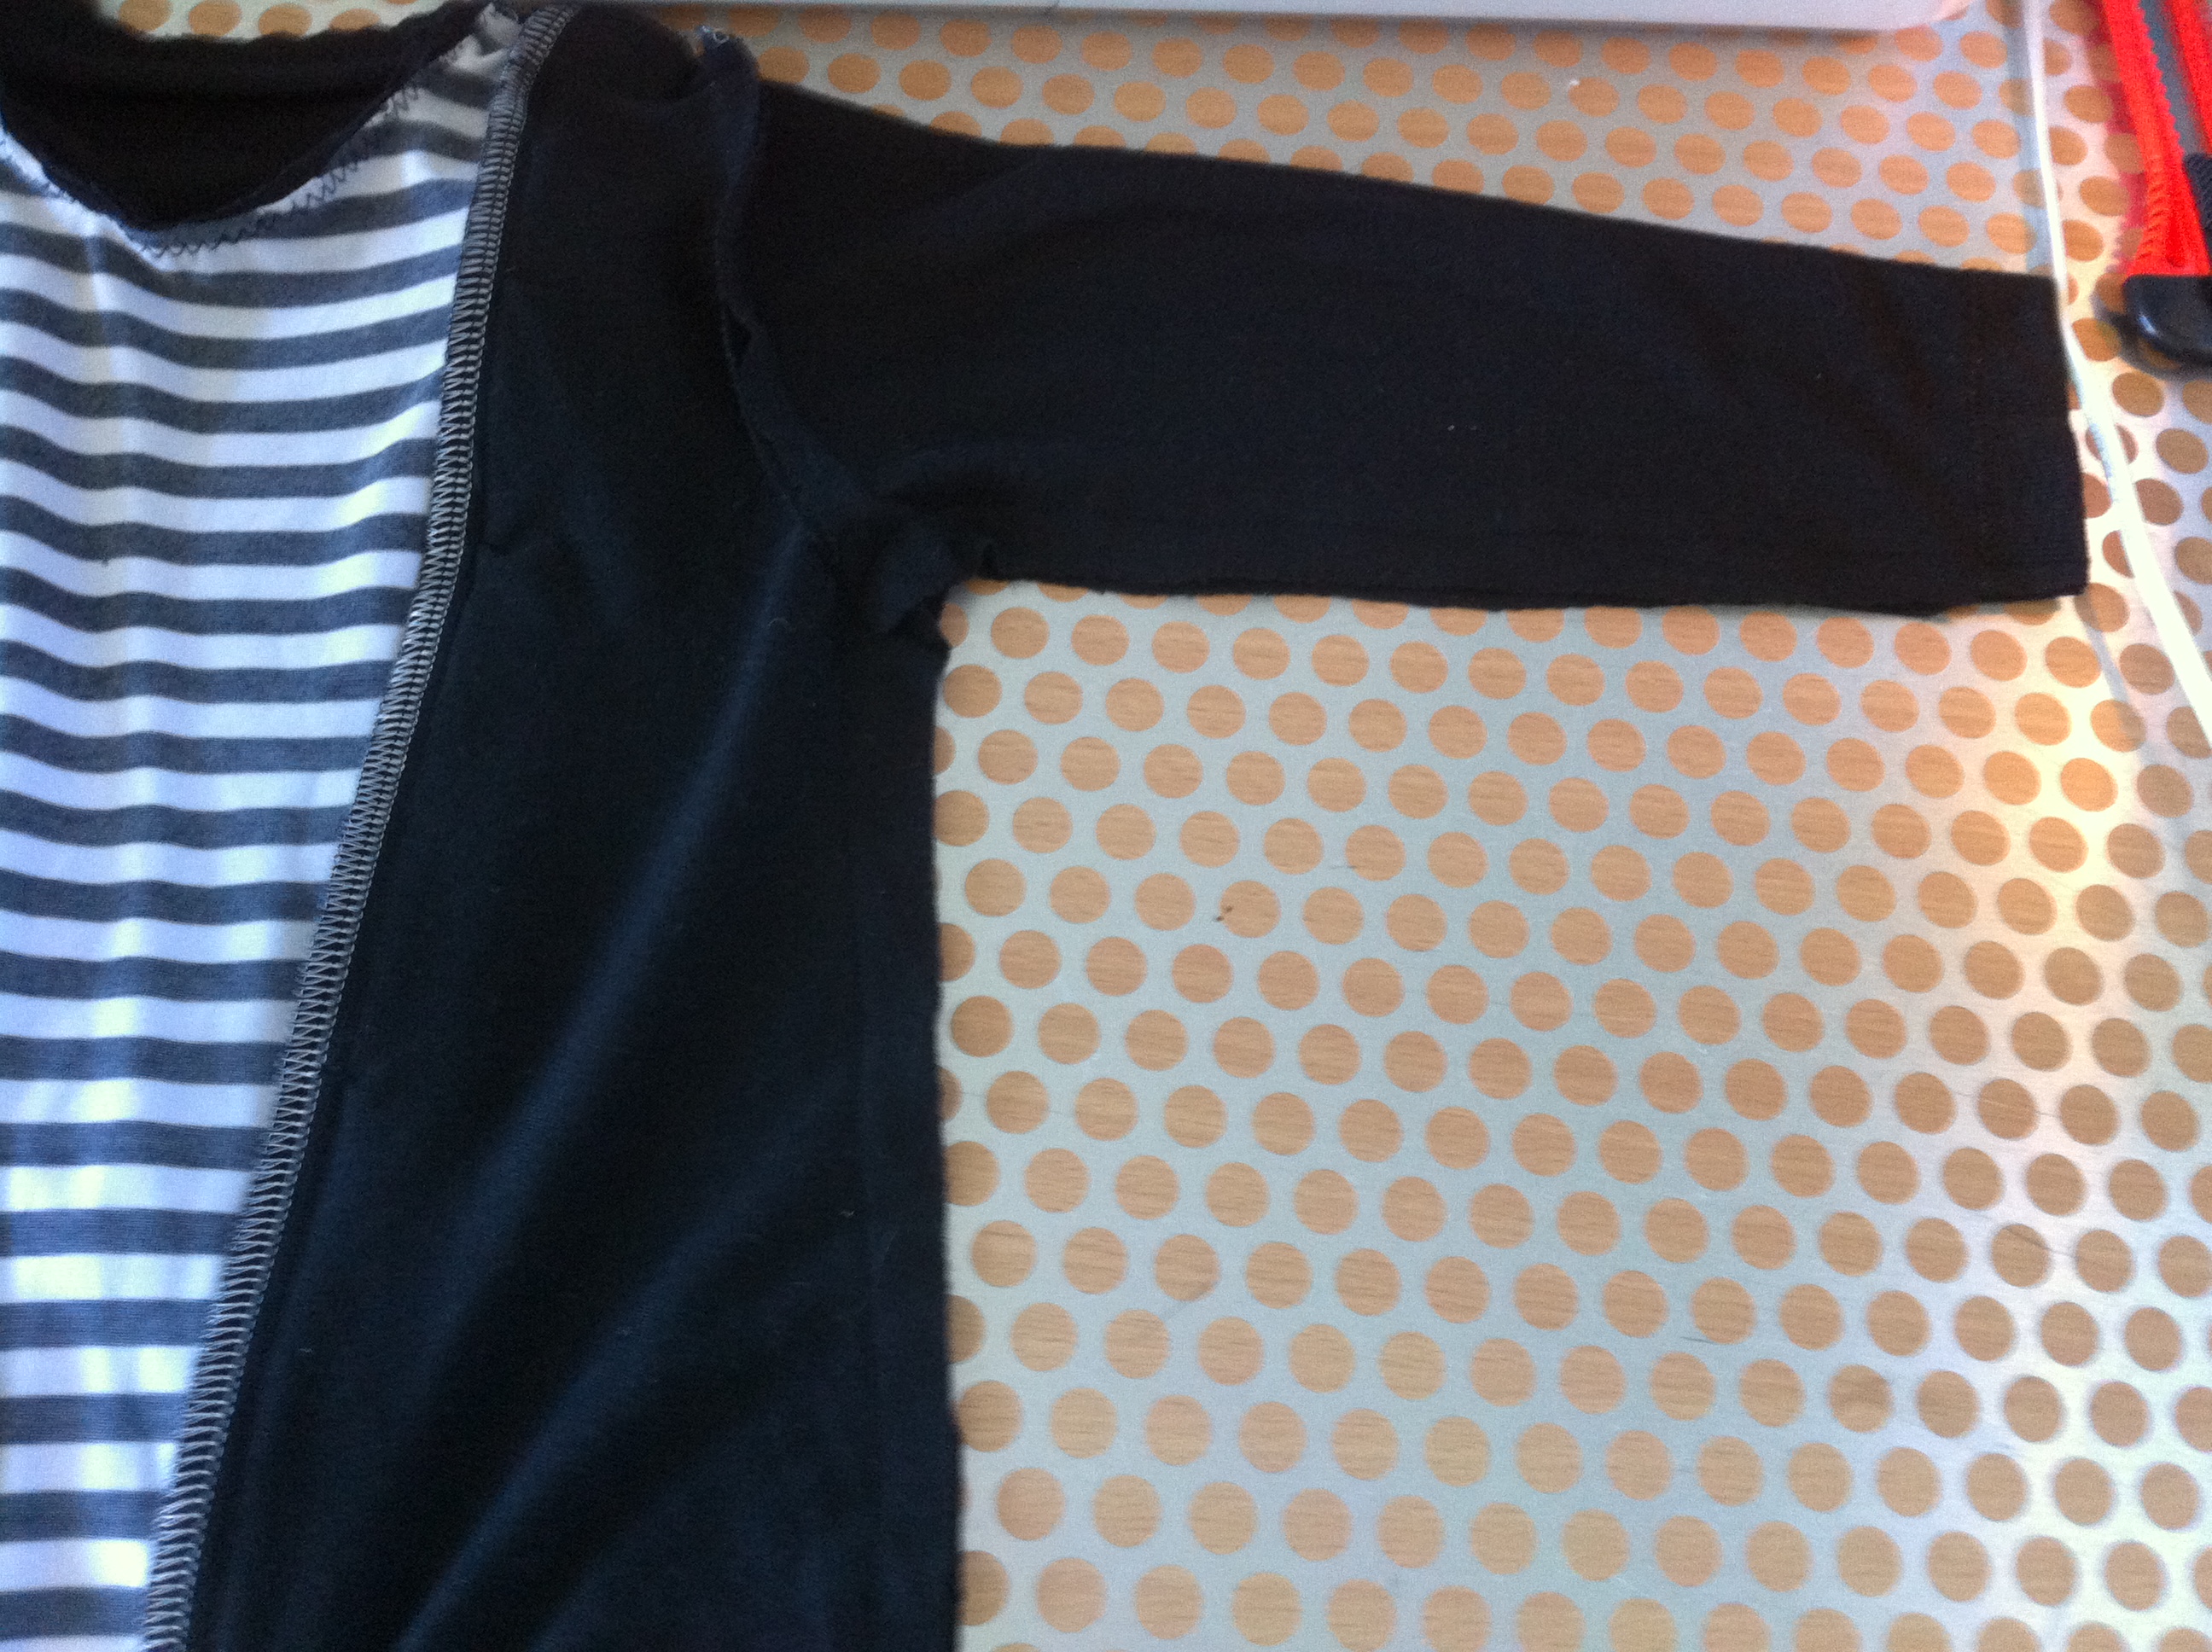
Sleeve Time! Pin the centre of the curve of your sleeve to the shoulder seam of your shirt. The curve of the sleeve and the curve of the armhole will be going away from each other.
Pin the corners of your sleeve to the corners of the armhole. It's going to be bunchy and look totally stupid but place your trust in lil ol me!
When you sew, keep your edges together and soon you'll have that sleeve in and it will look great!
See? Told you!
Now I recycled the fabric for this shirt from a dress my mother wore once {silly mummy}. The sleeves I cut from the original sleeves, so I used the existing hem already. If you don't have an existing hem just fold up the end 1cm and zigag stitch across. Fold your shirt so that it looks like a shirt {see picture, I really couldn't figure out a better way to phrase it ahah}. Stitch from the hem of the sleeve up the arm, through the armpit seam and down the side of the shirt. So easy right?
Fold up the bottom of the shirt 1cm and zigzag stitch all the way around. You just hemmed your shirt AND finished it!
High-five!
Come visit my
blog for other rad boy tutorials, mama tutorials and the part that I successfully kept a secret from you in this post - my nerd life!


So Stintin' CUTE!
ReplyDeleteI love finding other Aussie Bloggers!
love, love, love this shirt!!! Thank you so much for sharing, I think it is fantastic!
ReplyDeleteI would totally make this for my girls too! This would be so cute with a circle skirt added to it to make it a dress in some rad colors! I always love seeing pics of your fam! So stinking adoreable with your pink hair and buddha belly!! Much love and thanks for the sweet tute dear!!!
ReplyDeleteWOw! I'm a beginner sewer and would have thought this was way beyond me but with your great tutorial I think I can do it! I'm going to try!
ReplyDeleteMax I love your style... it is so refreshing! Great shirt and you put together an awesome tutorial.
ReplyDeleteYay, boy stuff! Thank you so much for this cute tutorial, and congratulations on the little one on the way!
ReplyDeleteCute! it reminds me of one of my favorite films as a teenager, A Clockwork Orange.
ReplyDeleteThis is such a cute shirt! Thank you so much for the great tutorial! I have two boys and sometimes it's hard to find things to sew for them now that they aren't babies. BTW, I adore your family photo and your cute hair and matching boot laces!
ReplyDeleteFantastic T-shirt and I love your son's hat. You all look so cute in the maternity shoot.
ReplyDeletei love this a lot!
ReplyDeleteThat is so cute! I think my nephew needs one of these. :)
ReplyDeleteWowzers! That. is. awesome!
ReplyDeleteACK! So cute! I love it. Your family is beautiful. Congratulations on your upcoming addition :)
ReplyDeleteI love this shirt! I'd love to make one for myself actually, hahaha.
ReplyDelete