
This week our signature style guest judge is Stefanie from Girl. Inspired. Thanks Stef for joining us...and celebrating signature styles!
Hi there guys! I am so excited to be back here sharing at PR&P!! So...Signature Style Week!!! I have to tell you that I was surprised and extremely flattered when Liz and Elizabeth asked me to guest judge for this week. I have always considered myself as someone seriously lacking a specific style; choosing clothing, decorating my house, finding where I fit in, it definitely doesn't feel natural to me. BUT, through sewing and designing clothes for my girls, and especially through the Project Run and Play experience, I have become more comfortable with my style.
Hi there guys! I am so excited to be back here sharing at PR&P!! So...Signature Style Week!!! I have to tell you that I was surprised and extremely flattered when Liz and Elizabeth asked me to guest judge for this week. I have always considered myself as someone seriously lacking a specific style; choosing clothing, decorating my house, finding where I fit in, it definitely doesn't feel natural to me. BUT, through sewing and designing clothes for my girls, and especially through the Project Run and Play experience, I have become more comfortable with my style.

I don't know that I could specify exactly what my style is, but we'd be safe to say that most of my sewing falls somewhere in the classic, shabby chic, vintage, "pretty" realm. I don't think that having a "signature style" means that you can't experiment in other areas, it just provides a home base of sorts. I feel the most comfortable and the most satisfied with my finished product when I stick to "my style."

A particular style can be reflected in so many aspects of design including pattern style, fabric selection, color palette, fabric pairing, and finishing details. And to take it one step further (or ten steps further, at times), I like to design the whole setting surrounding the outfit, too. Since special occasion clothes are my favorite thing to sew, I find myself incorporating my design style into every aspect of that special occasion - the decorations, the food, the accessories. From a visual standpoint, the more that I can squeeze out to highlight the style of the event, the better. The setting and the clothing together create the look and make it work . . . for me. Seeing the complete picture is what fuels my creative process.


Also important, perhaps of utmost importance, we must incorporate the style and preference of the persons for whom we're sewing - our little people! Lucky for me, my girls are very much into pretty things, so my designs go over well most of the time...with at least one of them.

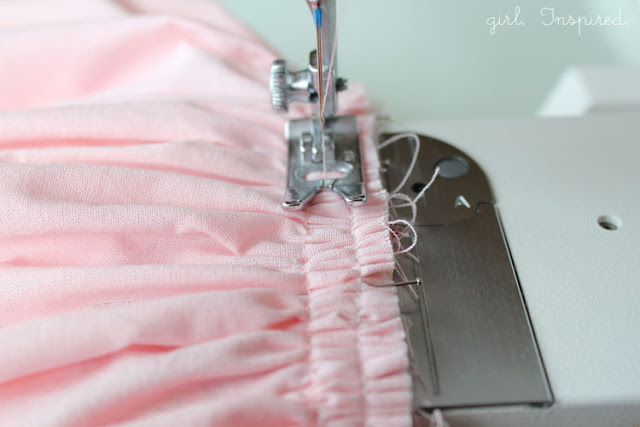
I feel a little weird blabbing on and on about myself, so I'm going to throw in a little tutorial here, too. Clearly, I like a lot of ruffling to accompany "my style." And while it may be old hat to many of you, gathering and stitching fabric can be an intimidating process for others. I'm going to show you the process of gathering a skirt to join it to a bodice that will give you the cleanest results with (hopefully!) the least amount of frustration and/or mess. The trick is this: sew two lines of gathering stitches, press and steam your gathers, and pin a lot!! Incorporate those three things and you'll be good! Ready?
So, you've got your skirt pieces ready to attach to the bodice. First, you'll sew two parallel rows
of long (gathering) stitches around the top of the skirt.

Now, mark the center front and center back on your skirt and your bodice, and pin the two together,
right sides facing, with your skirt piece facing out (so you have easy access to those bobbin threads
and you can see the gathers while you're working) Four pins total - front center, back center, side, and
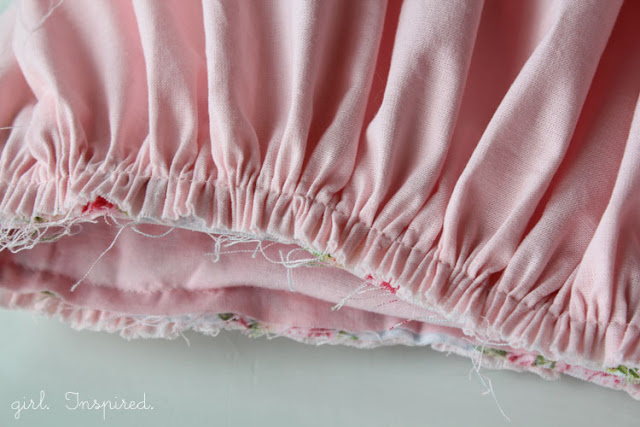
side. Now, start pulling your bobbin threads. Work on one section at a time. Press
your gathers and shoot them with some steam while you're working. You'll see how this helps
you to gather the fabric without it folding down and without the gathers overlapping.


Now, pin the gathered skirt to the bodice. The more pins that you use, the more even your
gathers will stay when you sew the pieces together. Add more steam as needed to make sure
that all the gathers are lined up nicely. Then, you're ready to stitch the bodice to the skirt.
Line up your needle so that you can stitch directly in the center of your two rows of gathering
stitches. You'll see how the two rows of stitches hold everything in place. Go slow and
make sure that your gathers stay even and then your raw edges stay aligned.

When you have stitched all the way around, pull out all the pins, then remove both sets of gathering
stitches.

Serge around the raw edge if you wish.

Now, press your dress open (press the seam up toward the bodice) and admire your perfectly gathered
skirt! I like to finish the dress off by top stitching around the base of the bodice (not shown).</
div>
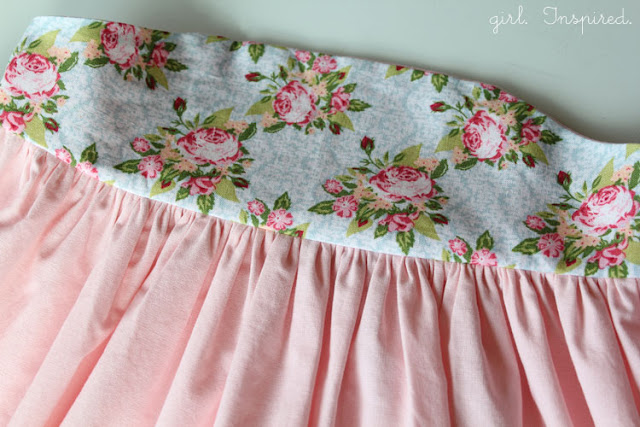
Use this gathering technique for perfect ruffles added to anything! It's not necessarily limited to attaching a gathered skirt to bodice.

And now that I've covered a million scattered thoughts in my brain, I hope I've shared something relevant to this week's "Signature Style" theme. I CANNOT wait to see what these finalists have in store for us!! Congratulations to all of the designers this season for their hard work, excellent designs, and especially, for putting their personal style out there for all of us to be inspired by!

Oh I LOVE your style and I am so glad to see you on here this week. I actually think you really do have a signature style and I recognize your items right away. Beautiful!
ReplyDeleteI too think you have a well defined style - and no matter what you make, your finishing skills are immaculate!!! Gorgeous creations and beautiful little models.
ReplyDeleteI have never pressed and steamed while gathering... thanks for the tip!
ReplyDeleteLove your style! Must try pressing and steaming before sewing it on.
ReplyDeleteAre you kidding me??? You have such a style--and talent for making beautiful dresses, party decor, themes. I first picked up on your site when you did the party dress for your eldest daughter (was it Sarah Jane fabric) and it was featured on Cottage Mama? You do an amazing job and I feel you should be very confident in who you are and what your style is! Love your site--I check in daily as a morning wake me up before getting on to mom duties and my Etsy shop. Beautiful girls too--as you well know:)
ReplyDeleteInteresting. I have never heard the steaming/pressing tip before. I'll have to try this next time
ReplyDeleteI surely did learn something from this today - thank you for teaching an old dog some new tricks.
ReplyDelete