Sunday, October 31, 2021

Teronia from Sew Haute Blog: Kitty Chromium Hoodie

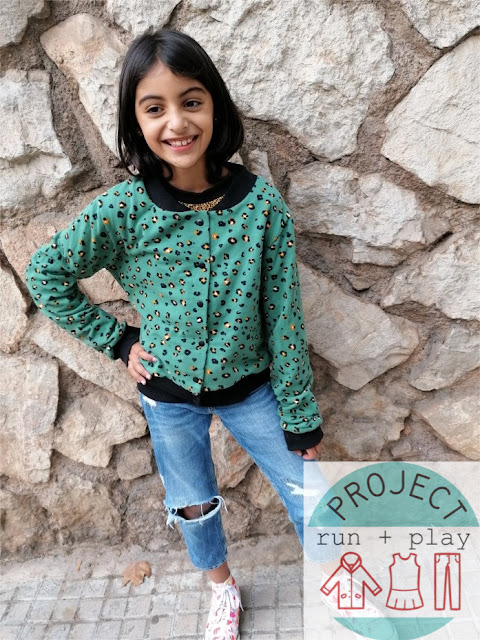
 Today we have Teronia from Sew Haute Blog joining us with a Chromium Hoodie that could be a great last minute Halloween outfit or just a cute everyday pullover. 


October is the month that always becomes a sort of no man’s land for me. I have all the ideas and intentions, but our fall is so celebration heavy that my kids often end up wearing store bought casual things unless I have a compelling reason to sew something up. Costumes are usually a semi-handmade mix of mama made and store bought. Throw moving into it and my husband and I essentially scrapped the holiday season this year. BUT my mama maker heart couldn’t let spooky season go by without SOMETHING fun for my littles to wear. 


Today, I’m sharing one of my favorite patterns: the Chromium Hoodie from Designs by Call Ajaire. It’s a super quick sew with some very fun details. 


3 hem options: crop length, full length and full length with vented hem band. 
Short and Long sleeve options
MK Fully lined hood with or without animal ears (Bunny, Cat and Bear included) or a cowl. 

For this version I wanted black sweatshirt fleece. Normally I’d order from Raspberry Creek Fabrics, but their black was sold out so I ended getting this from Girl Charlee. Both companies have such cozy lush sweatshirt fabric! The purple cat print came from Joann Fabrics. 


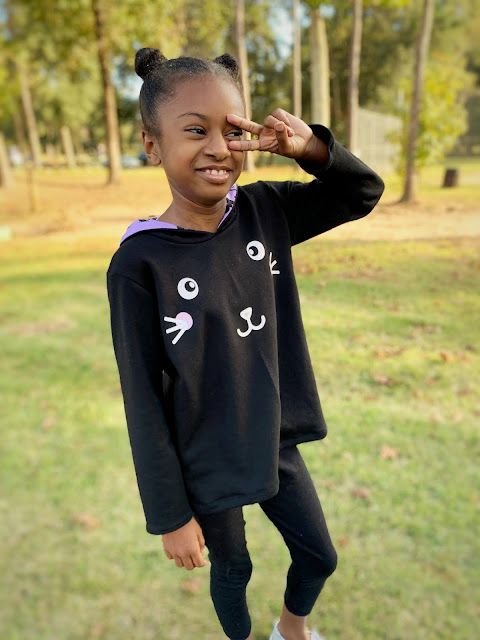
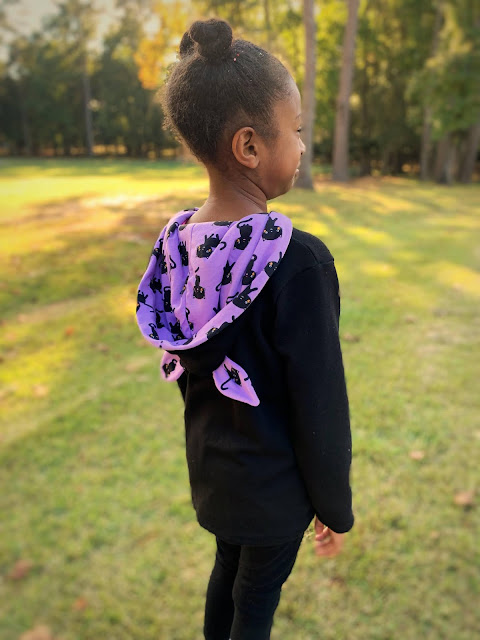
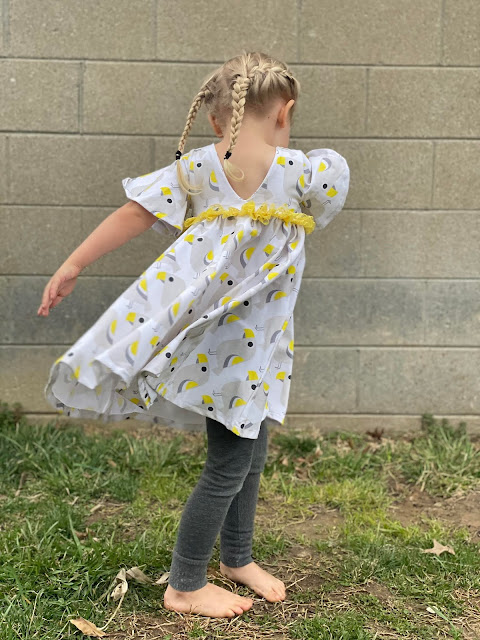
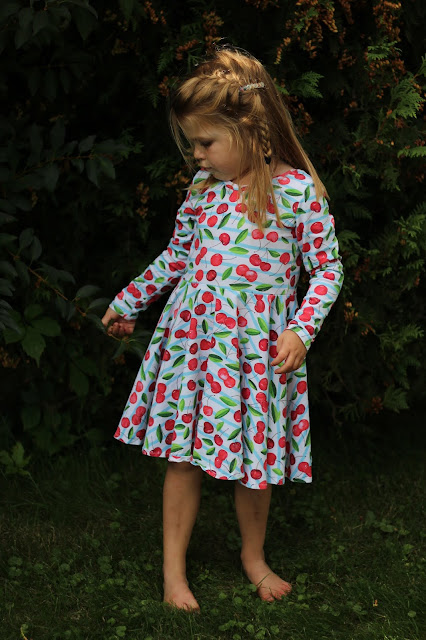
My daughter is wearing the full length option with about 1” of length added. The hood is View A with cat ears added. I pleated the eats my own way and probably would just follow the pattern next time. Also, I didn’t topstitch the seam where the ears are because I missed that in the instructions. Instead I pinched and did a zigzag in front of them. I couldn’t for the life of me find my interfacing, but I think it’d be so much fun to interface the cat or bear ears so they stand up. 


My favorite fun little add-on was making a kitty face in HTV for the front. I was inspired by a hoodie I saw for sale, but made my own face and mine is way cuter. 


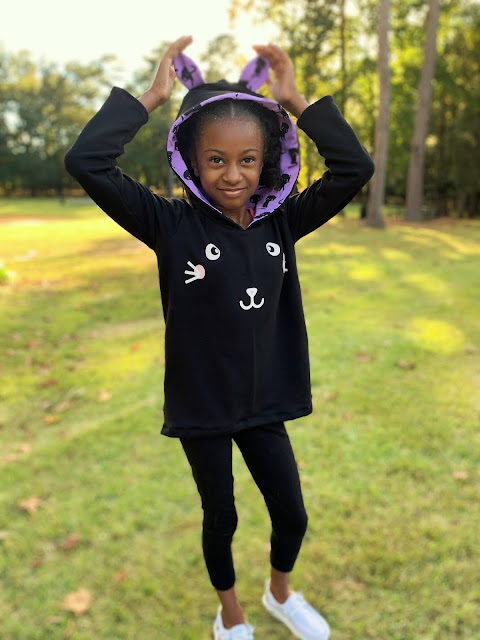
Chromium is a staple pattern at my house. I add the hood to basically any pattern I want with no mods. The ears are so fun and I love featuring prints for the hood lining. If you haven’t picked this one up you definitely want to. Hope you were inspired to try it yourself. 


Saturday, October 30, 2021

Woven Indigo Hack: Lindsay from PA Country Crafts

 Today we have Lindsay from PA Country Crafts joining us with an upcycle and a hack! 

I have been wanting to try the Indigo pattern in a woven instead of knit fabric. The deep V back looked like it would work ok and I love when woven patterns don’t require buttons or zippers. 


To make this work, I figured that I would need to size up a bit. I looked at the finished chest measurements and chose a size that would accommodate my daughter’s chest and waist measurements with a little extra wiggle room. I used the main bodice patterns for the lining as well- I don’t know if that makes a difference, but it was less pattern pieces to cut. 


I also under stitched the seam allowance around the neckline to keep it from flipping. It all went together very quickly and I would love to try it in a fabric with more drape than cotton poplin. You can get the details on how I used a men’s button down dress shirt to create this top on my blog.

Upcycle Men's shirt to girl's peplum


Saturday, October 23, 2021

Anita from DIY with Manneken: Senpai Bomber Jacket

 Today we have a post from Anita from DIY with Manneken on the Senpai Bomber Jacket, from Sew Chibi Designs. It’s a very versatile and complete pattern. 

There are 2 full options you can sew, one with a hoodie and one without a hoodie. And then you have all the add-ons, such as:

All- in. one welt pockets
Lining 
Chest/sleeve patch pocket
Cllegiate appliqué options in 3 sizes for back, chest and sleeve
Piece or solid hem banding

This version shown in the pictures below, is the easiest version - no pockets, no appliqué, yes lining and solid hem banding. 

dav

This was literally sewn in one hour (plus the cutting time, which in my case always takes longer than sewing).  What we loved the most of this pattern is the lining, it gives it a very professional finish, and keeps the child a lot warmer. 

We used a medium weight sweatshirt fleece, which is quite warm, for the outer layer. A regular jersey fabric for the lining, and rib knit for the cuffs and hem banding. 

The instructions are really good, very well structured. One thing to highlight is that the pages you need per size are listed in the instructions. I chose size 9-10 to sew, and I did not have to print all the pattern pages, just the ones I needed according to the instructions. That’s very handy, and sustainable. As in many other patterns, you can un-check the pattern sizes you do not need, and just print the ones you want to sew. The sizes are on the bigger side, so I would chose the smaller size if you are doubting between 2 size ranges. 


Kat, is the designer for the @sew_chibi patterns, Kawaii PDF patterns. The fabric she uses for the samples, her style is really cheerful and this reflects in her designs, patterns and instructions. She even thinks about the little ones and added a color me in page, so our children can design their own Senpai Bomber jacket. 

You can download the PDF pattern at our PR&P shop. We really recommend this jacket for the Autum season!


Tuesday, October 19, 2021

Whitney from Sew Whit: Indigo Separates Hack

 When I found out the Indigo was the feature pattern of the month over at Project Run and Play I was super excited to try it! Rompers/Jumpsuits are all the rage right now and I love the look! The one issue I have is they are a bit tricky for bathroom breaks. So I decided to hack the Indigo so we could have the look of the romper with the ease of separates.

With minimal modifications I created 3 different looks with one pattern. I used a light/medium weight Olive Green Rib knit from my stash. Perfect for fall.

For the top I lengthened the bodice to be long enough to be a tuck in tee and then raised and rounded the neckline. I banded the neckline and cuffed the long sleeves.

For the pants I knew I wanted to do a paper bag waist. I compared the length of the pattern to an existing pair of pants and conveniently, because of the high waist on the pattern I didn't have to add anything. I cut the pattern without any alterations and then folded down 2.25" stitch near the edge of the folded length and leave an opening for a casing. then stitch again 1" from the top of the fold all the way around. I added 1" elastic and stitched up the casing.

And there we have it! The pieces can be worn separate or together for a romper look. Join us over in the facebook group for the Indigo Sew Along. You can grab your pattern over here. Its $3 off with a discount code in the newsletter. Enter your make for a free pattern!


Want to save this tutorial for later? Pin the image below: 


Friday, October 15, 2021

Jenny of Made of Starlite: Indigo Sleeve Hack

Today we have Jenny of Made of Starlite with a hack for our Pattern of the month, the Indigo Dress and Romper! Come join our sew along in the Facebook group to make one yourself and enter to win some fun prizes!

The Indigo is such a versatile knit pattern! I love it as is, but with all the statement sleeves I've been seeing, I wanted to try my hand at putting one on our Indigo. It was super simple, and you don't even need to alter any of the pattern pieces! I'm all about easy.

We begin by cutting out the pattern, choosing the angel sleeve. In addition to the regular pieces, I also cut two strips, 2" x 10.5". To determine how long, I measured my daughter's bicep where I thought the sleeve would hit, and then added seam allowance.

Before assembly, I sewed two rows of gathering stitches along the curved outer edge of the sleeve, making sure to start at least an inch from the edges so they wouldn't be caught in the seam allowance.

Then assemble the bodice according to the pattern.

Iron the strips in half lengthwise. Unfold, then sew the two short sides, right sides together. Flip right side out, refold, and mark the center line, opposite the seam.

Pin the band, right side to wrong side, to the inside of the sleeve.

Gather and pin, then sew along the pinned edge. I found it easier to turn the sleeve inside out to sew. Trim excess to 1/4 inch.

Fold the band out away from the sleeve. Then fold up 1/4 inch, and again 3/8 inch, to cover the raw edge.

Pin and sew! Although I walk on the wild side, and skipped pinning. Luckily, this fabric is pretty stable, so I didn't have to break out the seam ripper or sew through my finger trying to hold everything in place!!

Turn right side out, and admire your new statement puff sleeve! Now that I'm looking at it, i think we need some tassel trim on the hem...

Fabric is designed by Erin Ann Designs, printed on the new Medium Weight Cotton Jersey From Hawthorne Supply Co.


Tuesday, October 12, 2021

Indigo Dress: Fabric Comparison

In keeping with our feature pattern this month, we are showing you the Indigo Pattern in a few different bases. The Indigo can be made in a variety of medium weight fabrics. Check out these examples to see how the garment wears in different fabrics.

First we have a cotton spandex. Cotton spandex works well for this pattern because it has the required stretch and structure. It does make the circle sleeves more stiff but cotton spandex fabrics make great play dresses. They wear and wash well and as you can see, twirl well also. 


Here we have a couple examples of this pattern being sewn with a rayon spandex. Rayon spandex is lighter, has more drape, but not as much recovery. The drape of RS makes the circle sleeves really dreamy but I found that the lack of recovery makes the neck opening too wide by the end of the day. With fabrics like this, I like to use a cotton spandex or something with more structure for the bodice lining. I have found this helps the garment from 'growing' too much. 


For holiday sewing, I have found that Indigo looks lovely in stretch velvet. It's a great mix of drape and structure and looks very elegant. 


Rib knit has recently become popular for apparel sewing. I tried the romper and dress version with rib knits and love the results. They look so comfy! Both are lined with cotton spandex for added structure. 


Indigo can be made with many different types of fabric. The pattern states that medium weight fabrics with a stretch of 25-40% are recommended. I bet a french terry would be super cozy for winter, a double brushed poly would be great for a kid who loves soft fabric, or use a bamboo blend if you like more natural fabrics. 

If you feel inspired, please join our Indigo sew a long in the Project Run and Play Fans group. We would love to see what you make! 

Save the image below on Pinterest: 


Friday, October 8, 2021

Janie Dress: Fabric Comparison

 How often do you read fabric recommendations and wonder how well each would work? Today I am showing you the Janie Dress in two different fabrics. 

The dress on the left is made from a sweater knit from Joann's and the dress on the right is made from a cotton lycra from Raspberry Creek Fabrics. The Janie Dress and Peplum says this about fabric recommendations: "Knits are needed for this dress.  Wovens can be used for the gathered circle skirt, if desired.  Wovens, lace, or knit can be used for the peter pan collar.   Suggested knits are 40%-50% stretch and the stretch guide is included in the pattern, along with some handy tips." 

I've made this dress and peplum a few times before in a cotton spandex but this was my first time using a sweater knit for it. This fabric is super soft and snuggly but almost too heavy for the dress and pulls it down a bit. You can notice the difference in where the skirt hits my little one. 


The pattern includes two options for backs- a regular back, and a scooped "ballet" back. For the sweater knit dress, I choose the regular back knowing the fabric was a bit heavy and would drag down the ballet back. Although the fabric does not have great recovery, it is very warm and will be in heavy rotation when the temperatures drop. 


Janie is such a cute twirly dress and the peplum version is adorable as well. My favorite feature is the ballet back. This cotton spandex from Raspberry Creek has the recommended stretch and is a very nice weight for play dresses. I prefer cotton bases for fabrics and love the ones from RCF. They have a great recovery and are soft- perfect for little ones and adults alike. This is one of my kiddo's favorite dresses. I let her wear it before photographing it, which lead to me having to remove stains beforehand. 

The pattern states that woven fabrics can be used for the gathered skirt portion and I would love to try that next. Other options include a peter pan collar, a cowl neck, and different sleeve lengths. All of these options make it easy to dress Janie up for a nice occasion or down for everyday play.

This dress would be beautiful in a stretch velvet for the holidays, a double brushed poly for added softness, or a rib knit for a pretty play dress. Which fabric would you choose for a Janie dress or peplum?


Fabric comparison girls circle skirt dress