Showing posts sorted by relevance for query Flat Lay Photos. Sort by date Show all posts
Tuesday, June 4, 2019

Flat Lay Photos {Part 2 - Styling}

This week our Season 20 designers are discussing flatlay photos.  Up today is the STYLING of flay lay photos.  Scroll to the bottom for the schedule and links to each post.

I was asked to show you how I did my flat lays.  I have te be honest and tell you am I no expert.  I just followed my gut and looked at other flat lays I liked.  The first thing I noticed in others flat lays was that they add little details.  Details like toys, scarfs anything to make the outfit complete.  Shoes are one of those details a complete flatlay has.  I'll get to that on my third week flat lay.  Fitst lets check out week 1.

In week one I was making my first flat lay.  I wanted the outfit to show all I made plus the theme.  So I played with adding little details.  In my flat lays I added coins.  Tulips, because you see a lot of flowers added to flat lays and the contributed to the theme.  The whale was added by my son because of the water fabric.  As you can see in the pictures below it took me a while to lay it all in a good one.

Left to right.  As you can see I played with different back grounds.  I found that plain white works best for me.  I used a white paper back ground.  Placed this on the ground.  Climbed on top of a bar stool and balanced while playing with iso and F-stop settings.


As you can see in the first picture the flat lay is missing something.  Next flat lay it just does not seem to add up.  At the last flatlay the sleeve seems to be holding the flowers and it all connects.  Everything is touching each other making it one whole outfit.


Week 2 I did not have shoes but had the dress and other items to show.  I wanted to add flowers again and choose one that is similar to the dress shape I chose.  The dress had to be the center of the picture.  Also, with this one I used my external flash that I pointed towards the ceiling to get rid of the shadows you can see in the week 1 flat lays.  An external flash does not have to be expensive and is worth the money.  My first thought was to complete the circle in the circle skirt.  Now the key to showing a skirt well is to actualle add the creases.  Lay it out like the way you see it when it is worn.  Check out the week 1 flat lays and you will see I even added them to the straight skirt there.  It will make your flat lay less 2D and more 3D.
With the week 2 flat lay I tried to see what it looked like when I made it all a bit more messy.  Can you see how it works better making it all connect again due to the circle?  Again I added a toy.

With week 3 I initially forgot to add the shoes. You can see in these pictures that after I added them it looked much better. See how the last one works best. The jacket is holding the bag making it all connect plus there is a square shape in it all making it easier on the eyes.

As you can see I added something extra to each flat lay that adds to the outfit that is shown.  You want it to be subtle.  Flowers almost always work, though with the last outfit flowers would not be the best choice.  The light box however added to the Roar theme the outfit had.  After these three weeks I can honestly say that getting a good flat lay is a work of art.  I can't wait to create one of those running flat lays Christina made. They look so fun!
~ Anne of Sofilantjes

If you are planning your flatlay photo, first think of your outfit.  Is it colourful, classic, modern or inspired by nature?  For me, this is the first item I check. 

For the nature inspired flatlay I just walked around and collected things I found beautiful.  My boys found some gorgeous feathers, they kept in their rooms, but they were so kind to lend me them for a while.  I also found some driftwood, which matched perfectly to the colours of the outfit.  Sticks, stones, pinecones or other natural things are always a great deal for an outdoor outfit.  Please keep in mind, which things are kind of modern at the moment (as driftwood or pinecones) - this could sometimes be more appealing than other things like normal stones or some ground. 


For the green outfit it was clear that I only would collect greenish things.  So I found an old wooden robot at my kid´s room and bought some wooden green beads.  I only buy things I know, they would be useful in the future.  As I am teacher everything can be useful ☺.  The green penny board I found by accident.  I wrote on facebook, if anybody has one to lend me for a photo shoot and it was a friend of mine, who had a total green skateboard.  This was luck, but I proved the experience  that you only have to ask and people love to help for creating a great photo.  Maybe you can make some nice photos of them in return. 


The third outfit was really hard. It was the baptism outfit for little E. and it is very classic.  So if you have a very classic outfit you can´t add crazy stuff on it.  I went into the forest and collected a really old stick.  This would be something like a clothes line.  I was searching for really cool clothespins, but wasn´t successful.  So I had the idea to take my cord, I sometimes use for hoodies.  I just cut off two little pieces and wrapped it around the stick.  I let the other ends of the cord disappear under the clothes.  My husband suggested to add two little wooden animals, little E. was given, when he was born.  I thought, this would be a great meaning for the picture.  For a classic outfit, it is necessary to keep the photo clean.  The two little animals are enough.  More of them would make the flatlay too restless and overloaded.


For my last outfit, it could be a crazy flatlay.  Colours everywhere are allowed.  I kept the rainbow theme to direct the view on the beautiful rainbow fabric.  So I bought these really yummy rainbow sweets and arranged three of it for my three boys.  Of course they ate it afterwards.  I also had that wooden rainbow for my baby at home, which was a great ingredient for the flatlay.  Only the camera was bought – I bought it for M., because it was such fun shooting photos with him.  I think, kids could sometimes get presents without an occasion. 
I hope I could help you a little bit for finding the right ingredients for your flatlay.  Please always remember, that there is no right or wrong.  Flatlays should be fun and I am sure, there are tons of ways to create your perfect flatlay.
~ Christina of Käferlgschaft 


Flatlay photos arrived on the Project Run & Play scene a relatively short time ago.  Their purpose is to level the playing field by helping the public focus solely on the clothing when they are voting.  But flatlay photos are hard!  Perhaps they can even be described as an art!  

The extremely artistic flatlay photos of the Season 20 designers are undisputed in quality.  So I asked them to put together a series of posts to help the rest of us in our flatlay photo game!  Here's the schedule and the main contributors:

by Monica of MaMeMiMo and Iris of Iris May Patterns

Day 2 (today) Flat Lay Photos {Part 2 - Styling} 
by Anne of Sofilantjes and Christina of Käferlgschaft


by Susana of Suco by Susana
Wednesday, June 5, 2019

Flat Lay Photos {Part 3 - Editing and Finished Photos}

This week our Season 20 designer are discussing flatlay photos.  Up today is editing and finished photos.  Scroll to the bottom for links to the other posts in this mini series.

Hi, I'm Susana from Suco by Susana, and welcome to part 3 of the Flatlays blog post series!  Today we're taking a look at lighting and how to edit your photos to get beautiful flatlay photos of your creations.
Let me just start by saying that I'm not a professional photographer.  I'm a pattern designer, a mom who sews, and I take my own photos for my patterns, listings, website, and social media.  I take most photos with my phone, and I know a bit of how to use my DSLR camera (so that I don't have to shoot in full automatic mode). :-)  My photographing skills and knowledge have been improving over time, and I'm happy to share some tips that work for me.

As Monica wrote in part 1 of this blog post series, lighting is very important.  Ideally you would set up your gear next to a large window with lots of natural light coming in in just the right angle, and wouldn't need to use anything else.  However, most of us (me included) don't have a perfect setting to take photos in our homes, so sometimes we need to use a flash, or edit the photos later.

Most smartphones today have really good cameras and lenses, and you can even adjust some simple settings while shooting, so you can take gorgeous photos with them.  Iris from Iris May says that "when using a mobile phone (an Iphone or any Android phone) you can manage the brightness of your picture right before shooting.  Tap the screen before taking the picture and a sliding bar with a sun symbol will appear.  You can move the sliding bar with your finger to make the image brighter or darker."

If you have a DSLR camera you can use a specific lens.  Iris uses "a light sensitive lens (50mm) with which you can take very bright indoor pictures by opening the diaphragm".  Lenses can be expensive, but you can find good 50mm ones for around €100.

If you still don't have enough light, for example if you're shooting at night or if it's a very dark day, you'll need to use a flash.  Here the first rule to remember is to not use your camera's built-in flash.  It produces a very bright and harsh light, pointed directly at what you are photographing, so it creates deep shadows and the result is not pretty at all.
What you can use is a Speedlite flash.  It attaches to your camera's hot shoe, and you can rotate it to point at the ceiling or a wall behind you.  This way the light bounces off the ceiling (or the wall) and brightens up the room without creating shadows.  You can find good and inexpensive speedlite flashes on Amazon that fit most brands of DSLR cameras (for my Nikon camera I have a Neewer 750II TTL that costs a little over €50 on Amazon.)  If you decide to buy a Speedlite just make sure to choose one that fits your camera's particular brand and model.


In these photos you can see the difference of shooting with or without a Speedlite flash, and also with a smartphone.  The first one, with no flash, is obviously very dark, and would need a lot of editing.  The second one is bright and has no shadows at all.  The third one, with the smartphone and no flash, is also bright but has some soft shadows giving it a more natural look.


After all that comes editing your photos.  First up you don't need any fancy editing software to edit your photos.  I think that most people use Adobe Lightroom to make simple edits, I have Photoshop but I don't really know how to use it :-), and you can use any program that you have (free or paid).
 If you took care to shoot the photos in good lighting and background, you won't need to edit a lot.  You may need to crop and rotate the photo, and to adjust the brightness or contrast.  If you need to brighten the whites, turn up the exposure just a little.  Simple edits can make a big difference.  When posting on Instagram you can even edit all this right inside the App in your phone.
I took the photo below with no flash because I had sufficient light coming in the window and it just needed a few editing to have it as I wanted.


I hope you liked this blog post series, and that you found our tips helpful!  If you're on Facebook, there's a group where you can learn a lot, share tips and get help with your pdf pattern photography called PDF Pattern Photography Posse.
Happy sewing!
Susana

Flatlay photos arrived on the Project Run & Play scene a relatively short time ago.  Their purpose is to level the playing field by helping the public focus solely on the clothing when they are voting.  But flatlay photos are hard!  Perhaps they can even be described as an art!  

The extremely artistic flatlay photos of the Season 20 designers are undisputed in quality.  So I asked them to put together a series of posts to help the rest of us in our flatlay photo game!  Here's the schedule and the main contributors:

by Monica of MaMeMiMo and Iris of Iris May Patterns

by Anne of Sofilantjes and Christina of Käferlgschaft

Day 3 (today) Flat Lay Photos {Part 3 - Editing and finished photos} 
by Susana of Suco by Susana
Monday, June 3, 2019

Flat Lay Photos {Part 1 - Behind the Scenes}

Flatlay photos arrived on the Project Run & Play scene a relatively short time ago.  Their purpose is to level the playing field by helping the public focus solely on the clothing when they are voting.  But flatlay photos are hard!  Perhaps they can even be described as an art!  

The extremely artistic flatlay photos of the Season 20 designers are undisputed in quality.  So I asked them to put together a series of posts to help the rest of us in our flatlay photo game!  Here's the schedule and the main contributors:

Day 1 (today) Flay Lay Photos {Part 1 - Behind the Scenes} 
by Monica of MaMeMiMo and Iris of Iris May Patterns

by Anne of Sofilantjes and Christina of Käferlgschaft

by Susana of Suco by Susana

So let's get started with the behind the scenes!

Friday, January 13, 2017

Audrey's Sewing Space

Welcome to my sewing space!  This is Audrey from Skirt Fixation, and one of the Virtual Assistants for Project Run & Play, and I’m so excited to welcome you into my sewing space today.

  Skirt Fixation sewing area

Although I have set up my sewing space in many different places, currently I feel VERY lucky to have an entire outbuilding dedicated to my creative endeavors.  Here’s the back story.  This little building right outside our back door was the smokehouse/summer kitchen to the original house on our property, built sometime in the mid 1800s!  Our current home, which was built in 1916, has 3 bedrooms (and we are expecting child #8!) so needless to say, every spare inch of space is used inside the house!

  Skirt Fixation sewing area

Several summers ago, we decided to remodel the old smokehouse/summer kitchen into a guest house so any company could have somewhere quiet to escape our boisterous brood.  Mr. Skirt Fixation further added plumbing and electrical to commercial kitchen standards because we were contemplating a chocolate truffle making business in the little building at some point in the future.  The kids promptly christened it the “Chocolate House.”  This past fall, I made it my sewing space, with the caveat that it is still 1st and foremost a guest house.

  Skirt Fixation sewing area

Because I need to move out at a moment’s notice, organization is the key.  My large, raised cutting table is collapsible, and can be moved out and a bed set up in less than 5 minutes.  It stands 37” high, which I really appreciate due to my 6’ tall height!  I keep my extra large cutting mat on it and usually stage whatever project I’m currently sewing on top.

  Skirt Fixation sewing area

Underneath the cutting table are my knit fabric storage boxes.  I have found that rolling my knit fabric and storing it vertically is the boxes is the best way to keep it organized.

  Skirt Fixation sewing area

My next organizing savior is this tall industrial wire metal shelf.  I have it filled from floor to ceiling with all my sewing supplies and fabric.  Everything is stored in clear plastic boxes of all sizes.  Because many of my children also like to sew/craft, we've found this organization method to be the most successful.

Separate small shoeboxes hold zippers, seam binding, cutting tools, elastic, hardware, and extra sewing machine parts.

Medium sized boxes are the perfect size for ribbons, embroidery, fabric art supplies, felt, and projects in process.

Large boxes on the bottom shelves hold woven fabrics sorted by color.  Since a large fabric purge last year, I have it down to 4 of these boxes.  Bulging, but only 4!

  Skirt Fixation sewing area

All my pdf patterns are stored in binders next to my sewing books.  The wire metal shelf usually has at least one garment hanging on it waiting for me to take photos.

  Skirt Fixation sewing area

I keep my buttons in small glass jars sorted by color.  Personally, I am saving spice jars as I use them up, but if you don’t want to wait that long, here is a set that would work perfectly!

 My mission style computer desk (which sometimes doubles as my ironing station when I’m working) is pretty clean and clear thanks to a 3 drawer organizer and a pretty storage box to hold all the miscellany that blogging requires!

  Skirt Fixation sewing area

Probably the happiest place in the room is my sewing table.  I have a 6 foot long collapsible table.  Often I tease Mr. Skirt Fixation that there is plenty of room on it for more machines!  But since it’s sadly bereft of more machines, I usually manage to fill it with whatever project I’m working on and staging my next project.

  Skirt Fixation sewing area

The wide windowsill holds sewing supplies, including this small 3 drawer organizer where I keep my scissors, needles, extra sewing machine feet, and seam rippers.  The button lampshade was a hand painted gift from a sewing aunt, and the floral artwork is the sole piece of art in the room!  It was painted by my sister-in-law for Mr. Skirt Fixation’s birthday, but because it matches the roman shades I made for the room perfectly, I stole it!  

Because of this post, I’m noticing how bare the walls are…I have several mini quilts that I need to hang up, but I need hanging tips because duct tape probably isn’t classy enough! My favorite thing about sewing in the “Chocolate House” is all the light from every side!  Many of my flat lay photos are taken from the cutting table, and I don’t even need to add any extra lighting. 

 Thanks for visiting my sewing space today, I’m sorry there was no chocolate!  Please link up your sewing space in our link up so I can come visit you.

*Although affiliate links might not be one of your favorite things, a blog that pays for itself is one of ours!  So we’ve included a few in this post.  If you click on one of them, and purchase something, you will be supporting one of everyone's favorite things, Project Run & Play!*
Wednesday, May 2, 2012

Winner's Tutorial--Sew Together's Gored Skirt


Today we have Maryanne and Caroline from Sew Together sharing their darling skirt from last week win with us.  I am amazed at the amount of upcycling they did----I seriously would have thought that most of their outfit was new materials.  What a credit to them!  


Take it away ladies....

We are very excited to share a tutorial from our Earth day outfit  Liberté, Egalité, Frugalité today. All of the outfits from last week’s challenge were so fantastic, weren't they? We were amazed by the diversity of designs and skills seen in the projects last week, all using what would sometimes be seen as useless.  Participating in the Earth day challenge has certainly changed our perspective - moth holes are no longer a tragedy, they are actually an opportunity!!!


Today we have decided to show you how to make a sweet 6 gored skirt from a jumper (pullover). If you don't want to upcycle you could use exactly the same ideas to make a skirt from any stretch fabric.

Please excuse the infrequent and poor quality photos. They were all taken in the middle of the night when we were rushing madly to finish our project!

What you will need:

·         ruler, pencil, tape measure and paper to draft up your pattern

·         an old jumper, the bigger the better. Slightly moth eaten is OK, but you will need to be able to work    around the holes. We were lucky to find a 100% wool very soft fine knit jumper in Madeleine's grandfather's cupboard. Don't be tempted to use a hand knit because it will unravel when you cut it - stick to a machine knit.

·         lots of bias binding - you could buy some or make your own. We used beautiful vintage bias that was 15mm wide

·         Elastic (we used 2.5cm wide) for the waist band

·         an overlocker (serger) makes this project very easy. We'll give you some tips on how to do it with a standard sewing machine but we are sure the overlocker would make the whole skirt a little stronger and less likely to pull with washing.

The first step is to find out how much fabric you have to work with.

Following the seams of your jumper cut the arms off at the arm holes and cut through the underarm seams so they will lay out flat. Cut up the side seams and a cross the shoulder seams of the main body of your jumper. You should end up with 4 pieces - two sleeves, a front and a back. We cut one gore from each sleeve and two from both the front and back


Drafting up the Gore Pattern

You only need 3 numbers to draft up the gore pattern

1.       width of gore at the waist

To work out the width of the gore at the waist use the following formula (sorry, I have a soft spot for maths, but I promise it’s not tricky!!)

(Your child’s waist measurement divided by 6 )+ (2 x seam allowance)

So for example Madeleine’s waist measurement is 60cm

(60 divided by 6) + (2 x 1cm seam allowances) = 12 cm

2.       finished length of the skirt

This one is easy – just measure your child from the waist to where you want the skirt to finish


3.       width of gore at the hemline 

This was determined for us by the size of the jumper we used. We measured the widest part of the jumper front (which was at the bottom edge of the arm hole) and divided it by two (because you need to fit two gores on to each front) Play around a bit and work out what will fit for you.

Draw up all these measurements on to your piece of paper, just like in this picture.

This is your pattern and it includes seam allowances.

 Cutting out

You will need to cut out 6 gores from your jumper – one from each sleeve, two from the front and two from the back.

The waist and arm bands of the jumper will become the casing at the top of your skirt. So, you will need to lay out your pattern like this


Sewing

If you have an overlocker you can sew the gores together and attach the first part of the bias binding all in one step.

1.       Iron out one of the folds of your bias tape

2.       Take two of your gore pieces and lay them out wrong sides together, lining up at the waist band edge. Pin the gores together with the bias on top lining up all the raw edges. Make sure there is a 5cm over hang on your bias binding. This will make finishing off the casing easier and neater.

3.       Being careful to remove the pins as you go, overlock all three edges together

4.       Iron the seam out flat

5.       Iron the bias binding back so it sits flat and covers the over locking. We find the more ironing you do the flatter the final seam.

6.       You will need to fold the bias binding over the seam edge

7.       We found it necessary to baste the bias binding in place before we could top stitch it flat. A very rough hemming stitch did the job. It doesn’t need to be flash so it won’t take you long.

8.       Top stitch your bound seam flat

Do this for all six gores and you should end up with something that looks like a skirt!

If you don’t have an overlocker, we would suggest that you complete steps 1 and 2, sewing the seam in step 3 with a straight stitch. Then edge stitch all 3 edges together with a zig zag stitch. Keep going from step 4 as described above.

Finishing the waist casing

The top of the skirt should look like this


Fold the waist band in half, to the wrong side of the skirt. Tuck in the extra overhanging bias binding and then stitch in place.


Don’t forget to leave a small opening in the casing to thread your elastic through. Once it is in place and you have checked it is a good fit you can sew up this little opening.

Hemming

Use exactly the same technique described in the sewing steps to add bias to the bottom edge of your skirt to hem it


Aren't you excited to make one?  Thanks ladies!
Friday, September 17, 2021

Cover Model Contest

 We're having a cover model contest!  Here's a secret: our pattern shop is getting a face lift, and you can be part of it!  Each of the patterns will be getting a new cover, and not only could your gorgeous child be on the front, but YOU could win some fun prizes too!  Okay, okay, here are all the details:

Sew up ANY patterns in the Project Run & Play shop.

Take a bunch of cute photos of your model!  Be sure to include the 3 following pictures:


1 modeled photo against a white background.

Caraway Cardigan and D'Anjou Dress pictured above


1 modeled photo where your model is seated (white background optional)


1 flat lay photo of the pattern (white background optional)
Up Beet Tee & Dress pictured above

Everyone who links up will receive a special discount code for the shop as a thank you!

If your photos are chosen for a cover model, you will get to giveaway a copy of the pattern(s) you sewed AND

You will win 2 additional patterns of your choice from the shop!

Enter your pattern to the contest by linking up below:

You are invited to the Inlinkz link party!

Click here to enter

Cover model contest will run through October 31st.  Sew and link up as many patterns as you want from the shop!

Tuesday, September 17, 2019

Season 21 Week 3: The Sound of Fashion

It's time for you to sit back and listen. Can you hear it? It's the sound of fashion!
(Be sure to scroll all the way to the end of the post for the voting widget.)

Striped Swallow Designs - Blue Skies & Free Spirits


When I heard Week 3's theme -- Sound of Fashion -- it immediately took me back to a memory of dancing under blue skies with my girls at a music festival. Their carefree movements that day re-inspired me to go with the flow and to live life to the fullest. Drawing on that inspiration and my family's love for indie music -- rock, reggae and folk -- it was only fitting I created a pair of flowy festival designs with a bohemian vibe for my look.


For my first outfit, I drafted a new flowy, hi-low top and added an exposed zipper with the sweetest feather pull. I paired it with my first and most popular pattern the Coachella Shorts.
I was drawn to the colors I chose for this week, the gorgeous peach and blues, as they remind me of being outside as the sun is setting listening to great music.


For my second outfit, I drafted a new skirt with a v front waistband and a hemline that dips down in the front and back. The lace blue bralette underneath is from a dance wear pattern I drafted for my daughter a few weeks ago. Lastly, I used my Hideaway pattern as the starting point for the white top. I changed the neckline a bit, added casings and ties to the sleeves, and cut the length off the top to make it a crop and shirred the bottom.


More photos and info from our shoot over on our blog. xo - Mandalynn


Made of Starlite - We Never Go Out of Style


I can't believe I made it to Week Three! I am so excited for you to see these looks, they were so much fun to put together. 😄😄😄

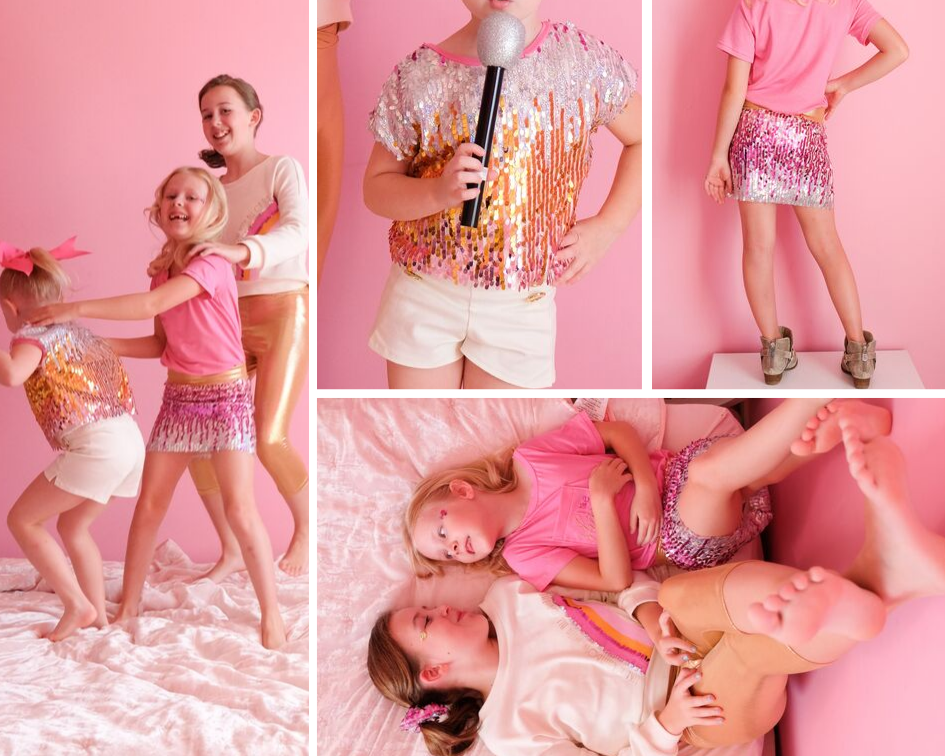
Music has a special place in my heart. It's in my blood! I grew up on a healthy diet of the the Beatles and Paula Abdul, between my dad's cover bands (he's an awesome guitar player) and my mom's dance studio that she ran out of our basement. When trying to decide on an inspiration for this week's theme, I had literally a MILLION ideas! I settled on something pink, sparkly, and inspired by the artist that has dominated our sister dance parties for the past 10 years: Ms. Taylor Swift! 🤩💃🤩💃🤩💃🤩💃🤩💃🤩


Do you ever feel like sometimes people just "get you"? Love her or hate her, Taylor Swift is one of those people. Her lyrics cut straight through to the heart of a situation like few songwriters can! Each of my four sisters and I have spent precious bonding time with our dad, learning to play Taylor's songs on guitar, attending concerts together, and singing along to music that speaks to us and is *super fun* to dance in the kitchen to! With this challenge, I wanted to create some looks that my daughter and her cousins (also avid TS fans!) could play, go to school, and have dance parties in!


These looks are specifically inspired by the outfit Taylor wore to perform at the 2019 Billboard Music Awards. I found this almost identical sequin fabric at JoAnns, and crafted my designs from there. Since she is so tall, Taylor Swift loves to show off her legs, so I went with shorts, a miniskirt with bike shorts attached, and some gold leggings for the middle schooler. The tops are loose fitting and more casual in design, perfect for both playgrounds and concerts!

The pink tee is a heavily modified Talulah tee from Violette Field Threads, made with bubble gum pink rayon spandex. She says it's super soft and "bouncy" and was dying for me to take the flat lay so she could wear it to school! The skirt is a pair of Rocky Shore tights from Sofiona Designs, shorts length, with a self-drafted skirt attached and a flat waistband. The sequin tee is the bodice of a Tatum dress from Violette Field Threads, lengthened an inch, with neckbands, armbands and a full lining from jersey so that no scratchy sequins actually touch skin! The shorts are Avery shorts from Violette Field Threads, modified so they are fitted all the way around, not elasticized at the back waist, and finished off with oversized gold buttons. For the sweater, probably my favorite piece of this collection, I started with the Tatum dress again, drafted a hi-lo hemline, widened the body a bit, re-drafted the sleeve to be a drop shoulder dolman, and added bands to the neckline, sleeve cuffs and hem to give it more of a "sweatshirt" feel. I totally love how it came out, and my niece has requested a million more for school! I know it's super hard to please my discerning five-year-old fashionista, so I definitely count it as a win when a seventh grader loves what I made! The gold leggings are a second pair of Rocky shores, cut to a cropped length.
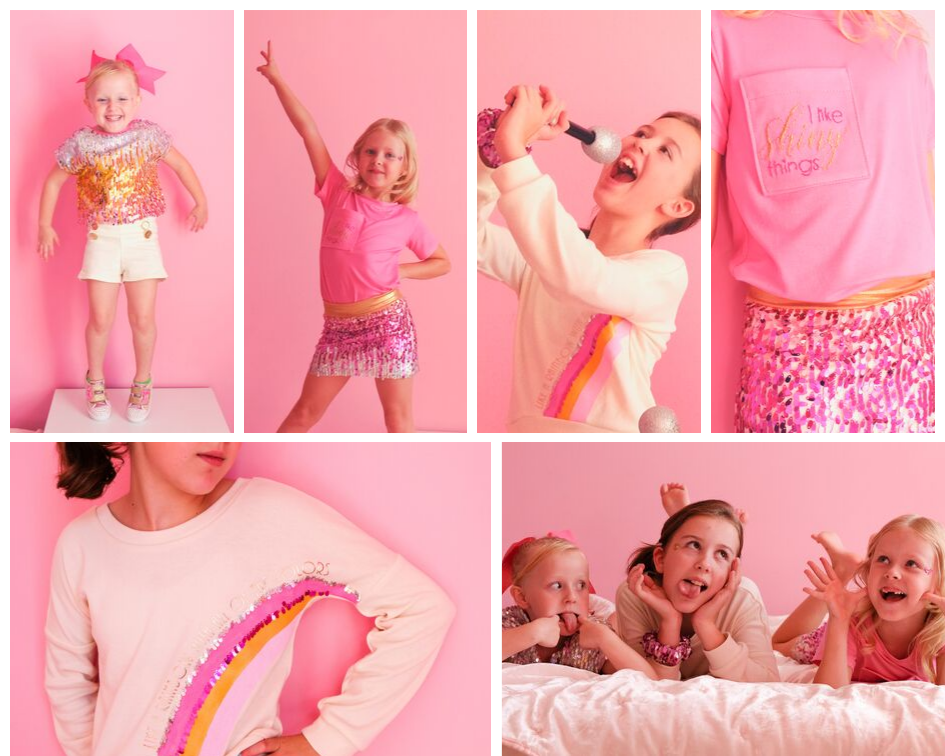


Since her lyrics are the main thing that draw me to Taylor Swift, I had to include them on the outfits! I did a little hand embroidery on the pink tee pocket, with a line from the song "Paper Rings". To do it, I designed the text in Silhouette Studio and traced it onto my fabric with a wash away fabric marker. The graphic on the rainbow sweater was inspired by a line from the song "ME!". I painted it on my cut fabric with acrylic paints mixed with fabric medium, so the paint is flexible like screen printing ink. I cut the words from gold iron-on vinyl with my Silhouette.  If I was making an outfit for a middle schooler, of course I *had* to include a scrunchie! Because apparently the 90s are back. And who am I to stand in the way of a trend? 🤷‍♀️


Check out my blog for lots more photos from our dance party, links to some of our favorite TS songs, and more words than any normal person is going to want to read! 😜


Love Hazel Grace Designs - Butterfly


This week's theme did not come easily for me. For weeks, I went around the house mumbling about the sound of fashion and what did that mean. One day my oldest daughter, Johanna, said to me, "Mom will you stop and just design something for that week" so I sketched something that I liked but it had absolutely nothing to do with any genre of music and that bothered me. So Johanna sat down with me, much like I have over the years with her, and started asking questions. She got about 5 minutes into her questions about the theme and looked at me like I had 3 heads and one was spinning around in circles, you know that look tweens give you when they think you have lost your mind. She said "Mom you have had this designed for years and it is finally time to sew it!" She got very excited and animated as she said "Your genre of music is K-Pop (Korean pop music) and your design is the modern hanbok you have sketched and have never sewn up." After calming her down a bit and making sure she would actually let me take her pictures in said modern hanbok, I set to work. For this reason, I am calling this post Butterfly 나비 after a BTS song and how these designs emerged like a butterfly. 

Now you likely have two questions (1) how did you get into K-Pop long before K-Pop was cool (if you know popular music think BTS - they are a K-Pop boys group) and (2) what is a hanbok. This first question is easy. Samuel and Johanna are adopted from South Korea. 11 years ago my husband, my mother and I spent a little over a week in Korea meeting not only Samuel and Johanna but their foster parents and falling in love with the country that made my husband and I parents. Going to Korea we were a family of two and coming home we were a family of four! Ever since that trip we have worked to learn to read, write and speak Korean as well as learn about the culture. Which brings us to the 2nd question, what is a hanbok. Hanbok is the traditional attire of the Korean people and has a history as colorful as the garments themselves. Traditional hanboks were worn daily up until about a century ago but the hanbok remains an important icon of Korea, and is still worn on special occasions and holidays. You can see a picture of Johanna’s 1st hanbok here and her current hanbok here. 


Many K-Pop girls groups have worn modernized hanboks in the last 11 years and I have always loved the look and so has Johanna. There are a few aspects that were non-negotiable for Johanna; the pleated skirt, the jacket and the hanbok bow. Ideally I would prefer a dress that can be washed and ironed easily as well! I started with fabric and for the solid colors I decided on Kona cotton and the skirt a watercolor floral cotton to symbolize the flowers sometimes embroidered on the hanbok. Next I knew the skirt needed to be shorter. The to the floor look of the hanbok was not one that Johanna liked and Hazel always fell over her hanbok skirt. I determined that just above the knee was the perfect look to be age appropriate and still keep with today’s trends. Finally I added pockets, since what girl does not need pockets in her dress!

In a traditional hanbok, the “dress” is two thin straps you slip on your shoulders and then wrap the bodice around you and tie at the chest. Our family has had many times where someone’s hanbok came undone and it was a good thing they had on clothes under the hanbok. For the bodice of this dress, I took a basic sleeveless bodice sloper and lengthened it a little past Johanna’s natural waist.  She asked to be sure it did not plunge in the front but in the back she wanted a little plunge, so I made those changes to the bodice as well. Finally, I used an invisible zipper in the back, which helped to make the bodice more form fitting for Johanna. 

For the jacket, Johanna requested the shorter jacket similar to the one on her 1st hanbok but with short puffy sleeves. Using Johanna’s current hanbok jacket as a starting point, I made the overlapping jacket and created a starting point for the sleeves. I added some to the sleeves to make them poof like Johanna requested. The jacket collar is made out of the same material as the skirt. The last touch for the jacket is the traditional hanbok bow.


Johanna insisted I also make a modern hanbok for Hazel. I thought the look I designed for Johanna was a little old for her 2 year old sister, so for the younger modern hanbok wearer I designed a wrap dress. I started with a jumper pattern I designed for Johanna when she was 4. That pattern is made to cross the body in the back with a full gathered skirt. I started by flipping the front and back pieces of the jumper. The now front pieces of the jumper needed to have a straight edge so I squared those off to resemble the same closure of Johanna’s jacket. After constructing the lined upper bodice portion, I added puff sleeves similar to Johanna’s sleeves and a “belt” to make the upper portion look like a jacket and resemble the big sister look. Finally, I added a removable traditional hanbok bow, to cover the buttons required to keep the dressed closed. 

For the skirt, I changed the gathers to pleats to keep that aspect of a traditional hanbok. Hazel does better with skirts and climbing all the things when the skirt falls just above her knees, so I hemmed the skirt at that length! I also added pockets to Hazel's skirt.


These dresses will be perfect for celebrating Korean holidays with friends and family as well as to wear to church and special occasions! I am so grateful that Johanna sat down and brainstormed with me this week!  To read more about the patterns and fabric used check out my blog post.
Patterns: Bodice sloper for size 10 girls; Ready to Wear hanbok; Love, Hazel Grace Designs unreleased jumper pattern  Fabric: Kona cotton, watercolor flower cotton from Hobby Lobby

Unfortunately, our 4th designer had to drop out before completing this week's challenge due to health and a hospital stay!  We wish her the best and know our sponsors will be rewarding her handsomely.

Now it's your turn to help these designers out. 
  The designers scores are determined as follows: 
1/3 of the score is based on YOUR vote
 1/3 of the score by this week's celebrity guest judge Jess of Lil Luxe Collection
1/3 of the score comes from the panel of judges

Tuesday, February 19, 2019

Season 19 Week 3: Botanical Beauty

It time for the designers to wow us with their Botanical Beauty creations.


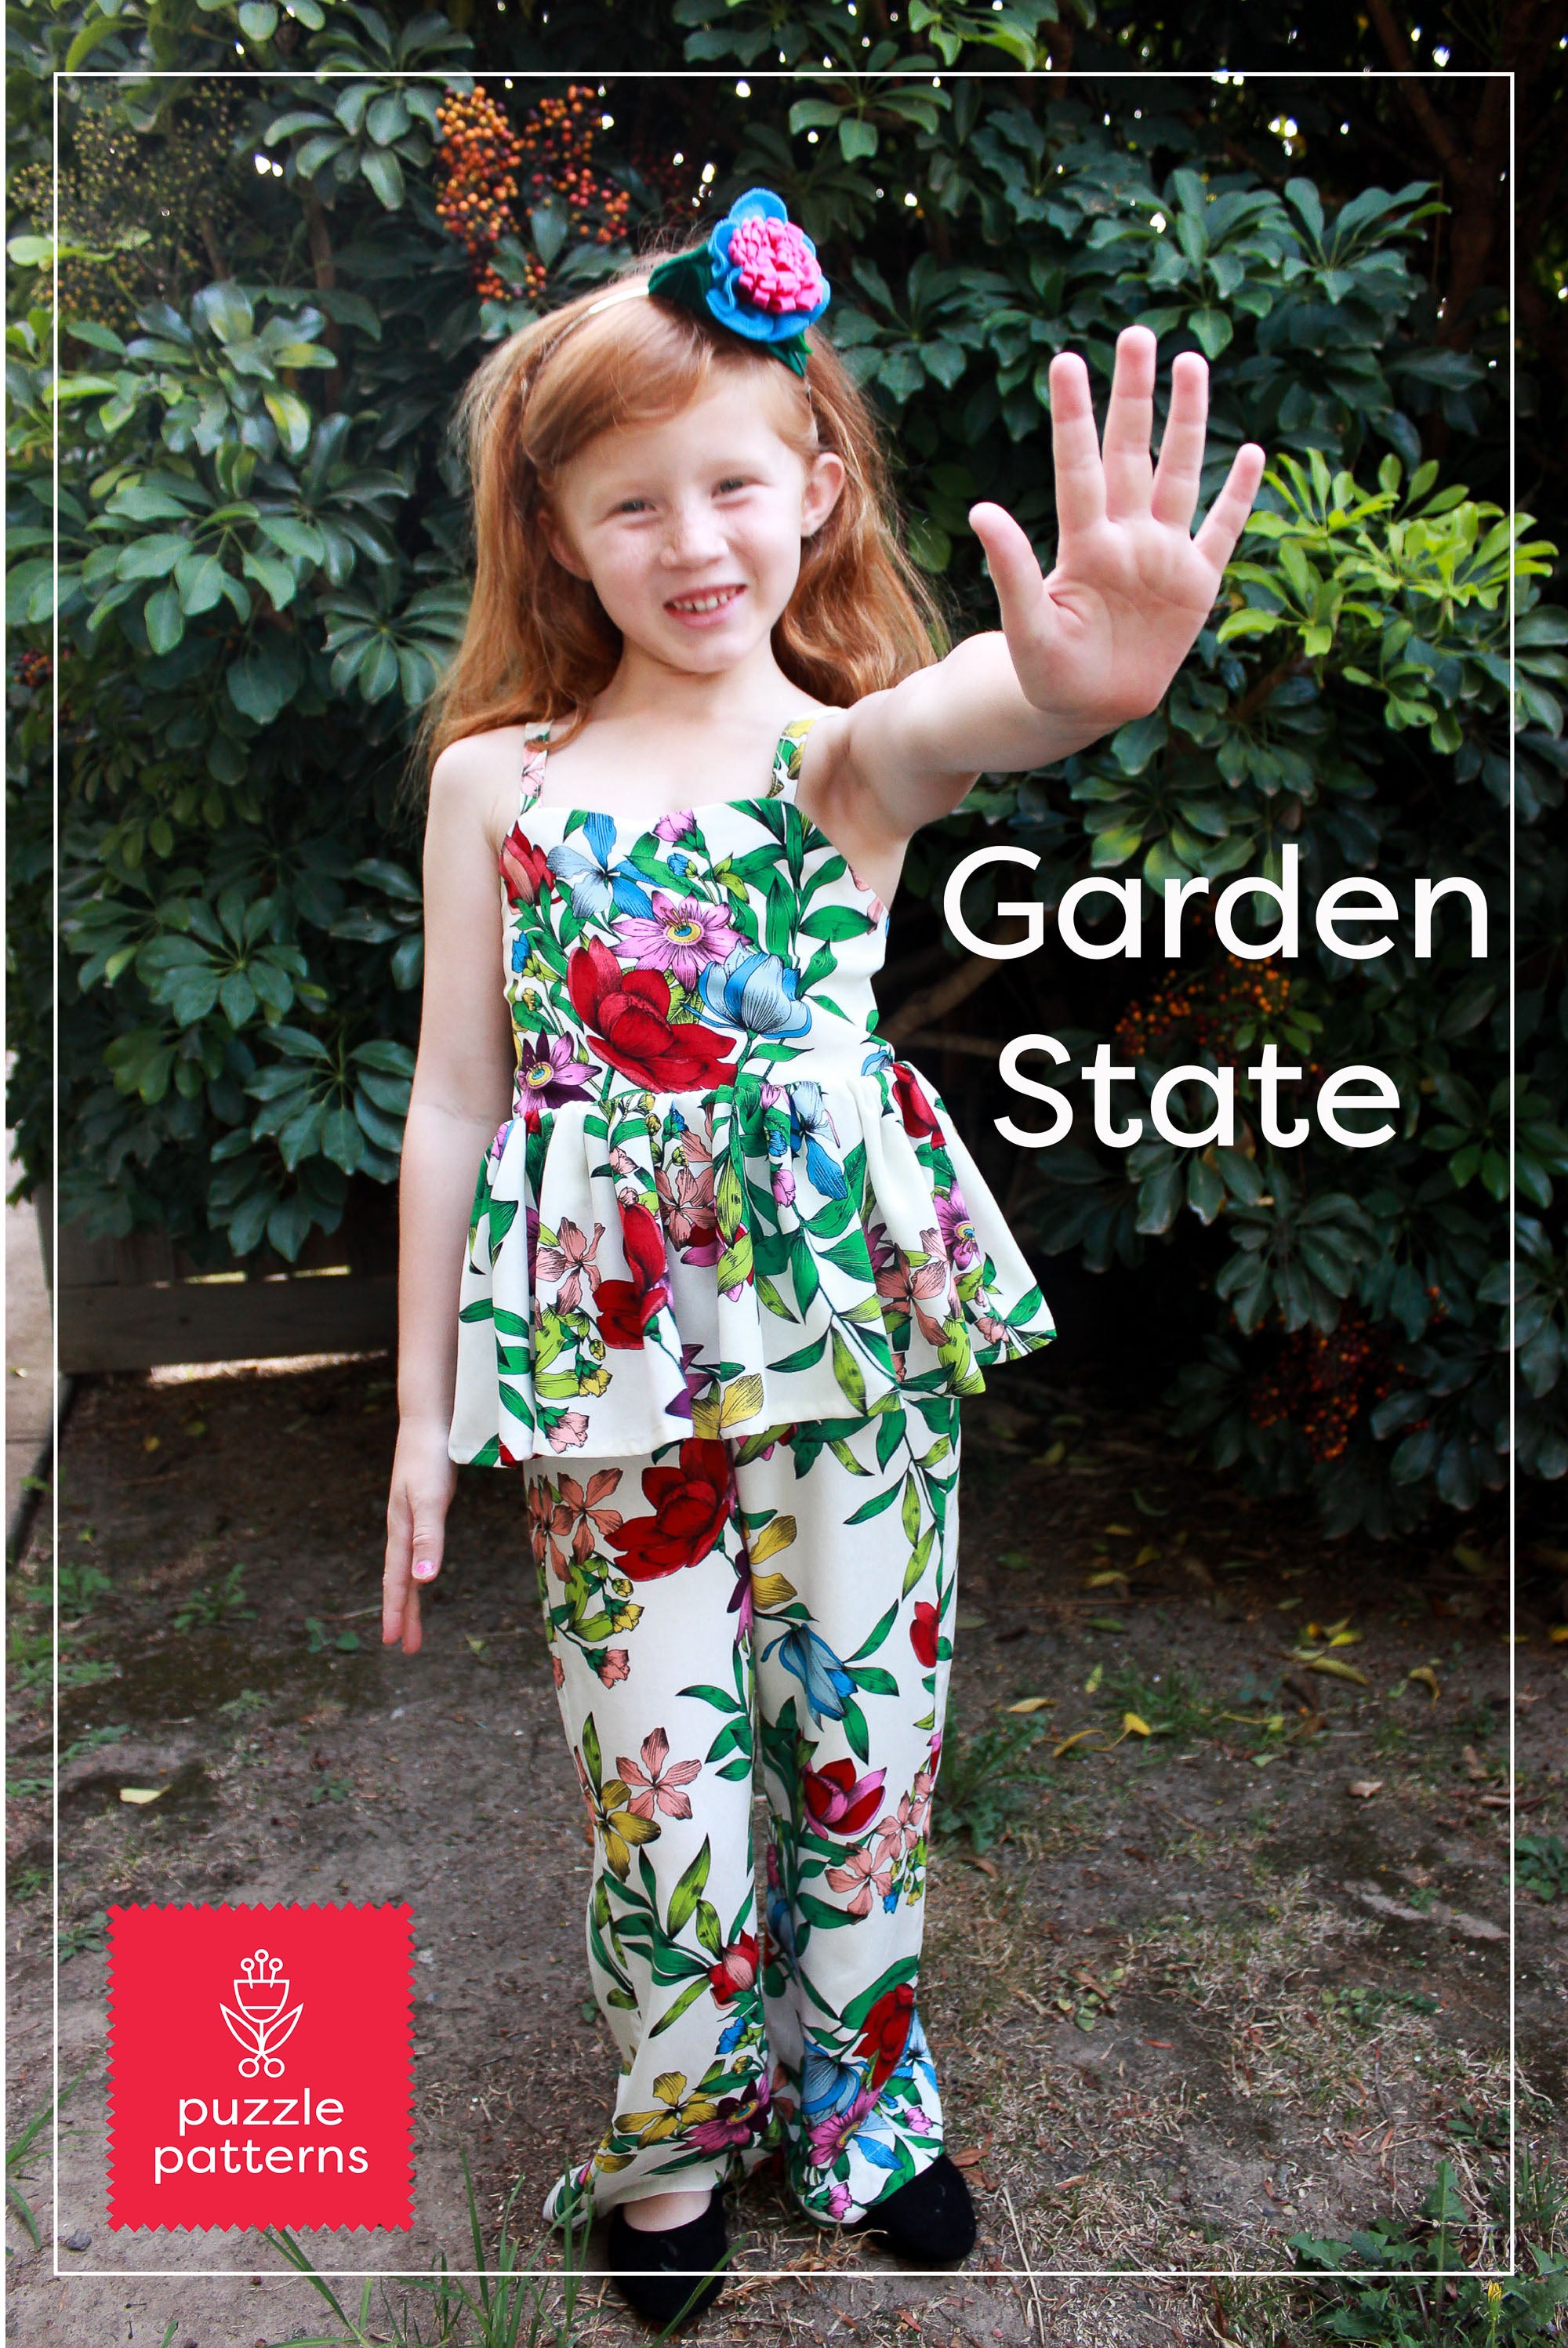
Puzzle Patterns - Garden State

puzzle patterns

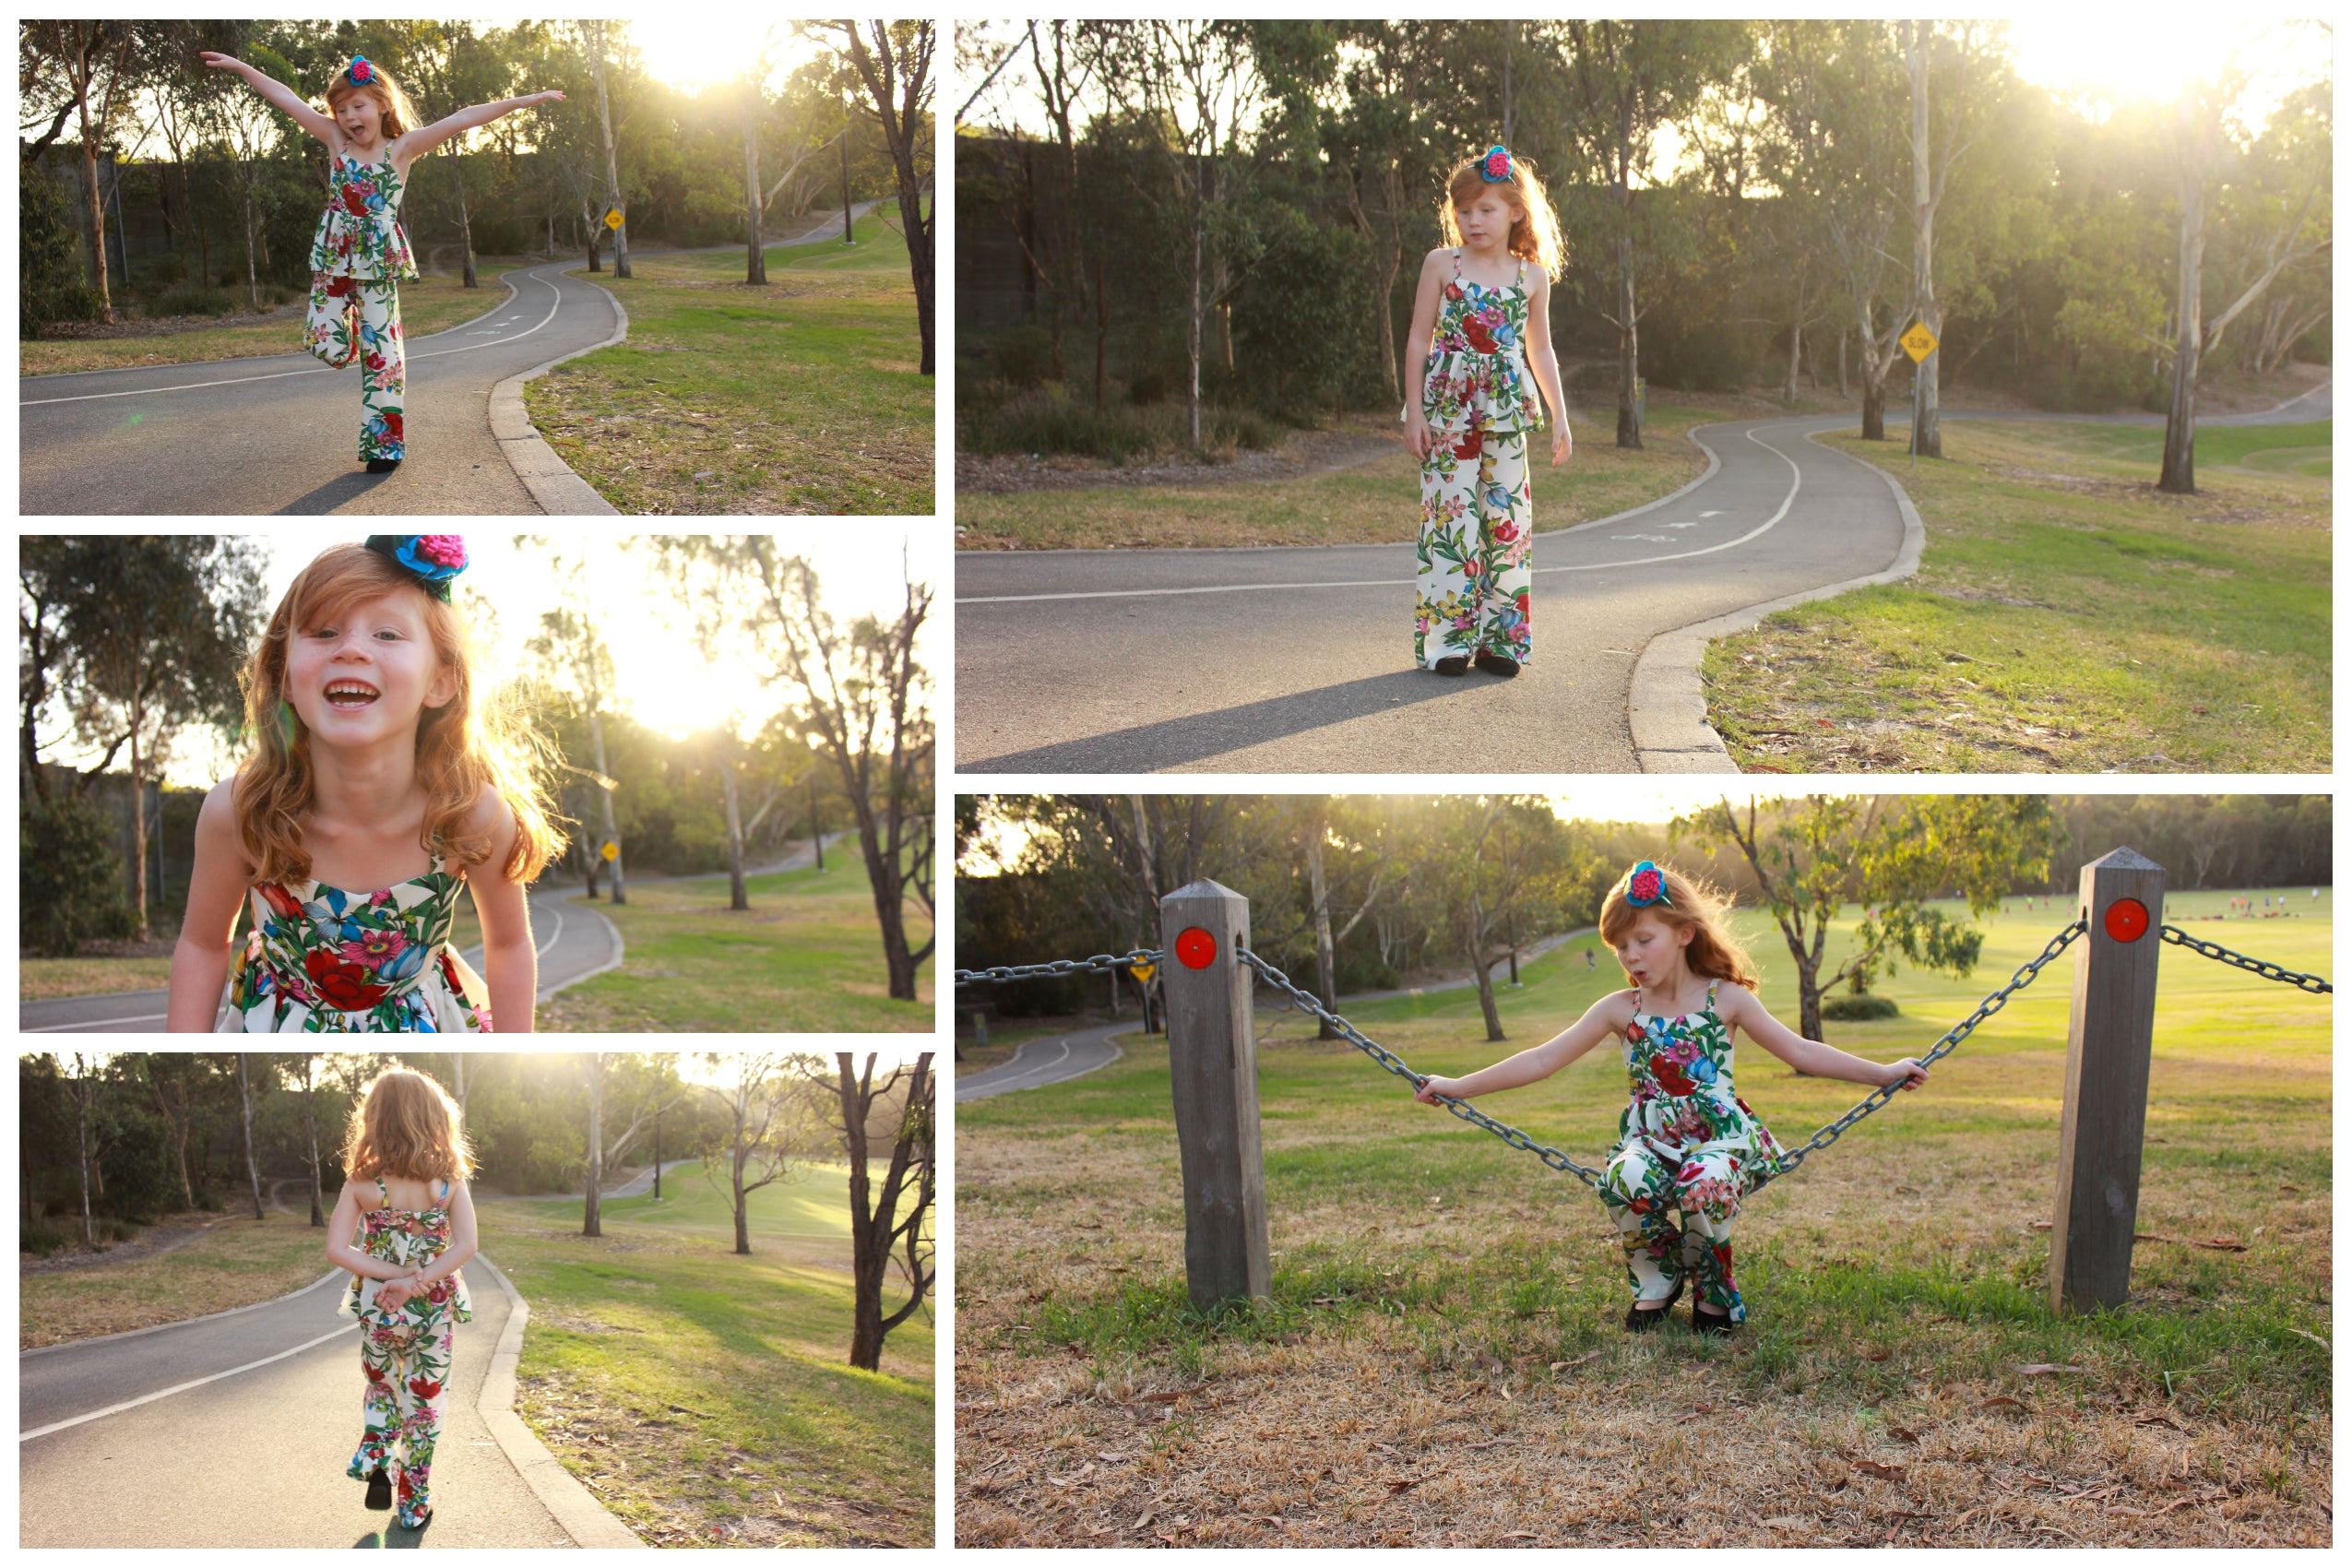
Victoria is the Garden State of Australia so the theme this week literally hit home for me.  One of my favourite things about Australia is the colourful flora and fauna, I just love all the wild and wonderful flowers you see all around.  I'd had my eye on this vibrant Rayon and when I went back to the fabric store I snatched it up and I knew It would be perfect to help me portray this.

puzzle patterns

I focused on one outfit this week for a couple reasons, but mostly because this competition for me has been done with a newborn strapped to me in a baby wrap.  Hubby went back to work this week and so my photoshoot and my creating was done in between feeding and rewrapping our newest little love, chasing a toddler, doctors appointments and all the school and kinder drop-offs with the trio of littles in tow!  I had to really focus my design on something specific I was going to love and that would portray this weeks theme.

puzzle patterns

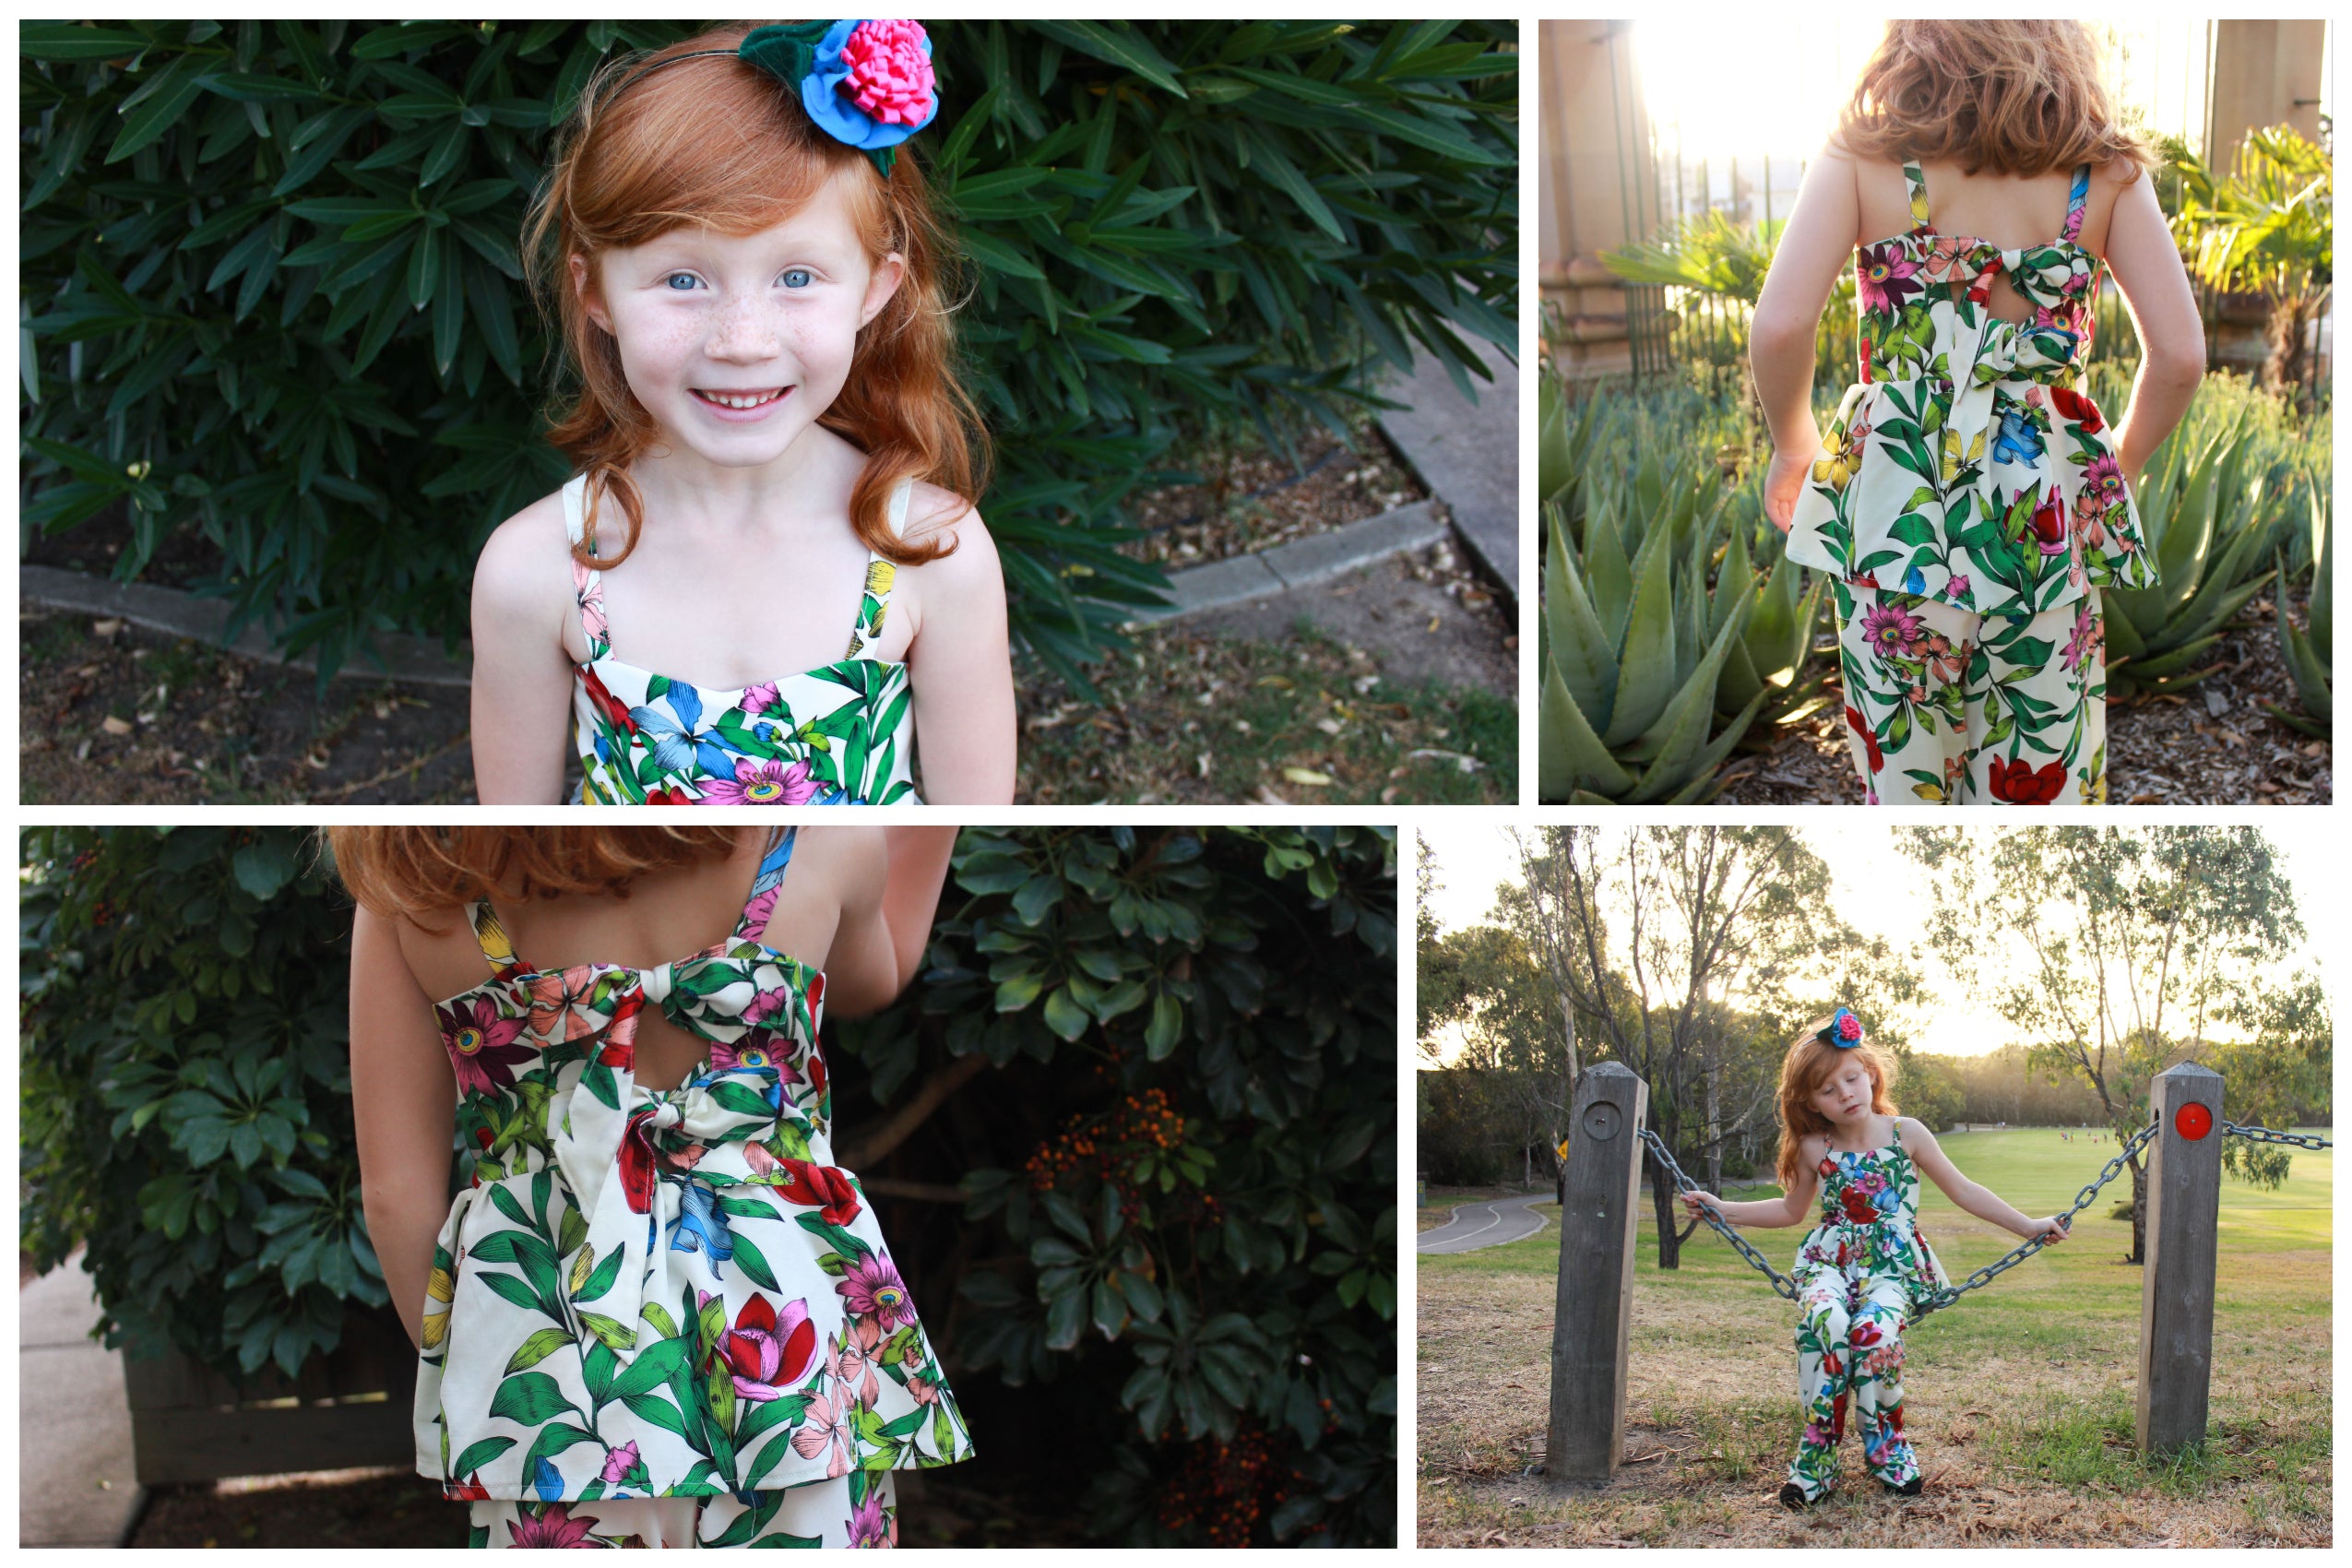
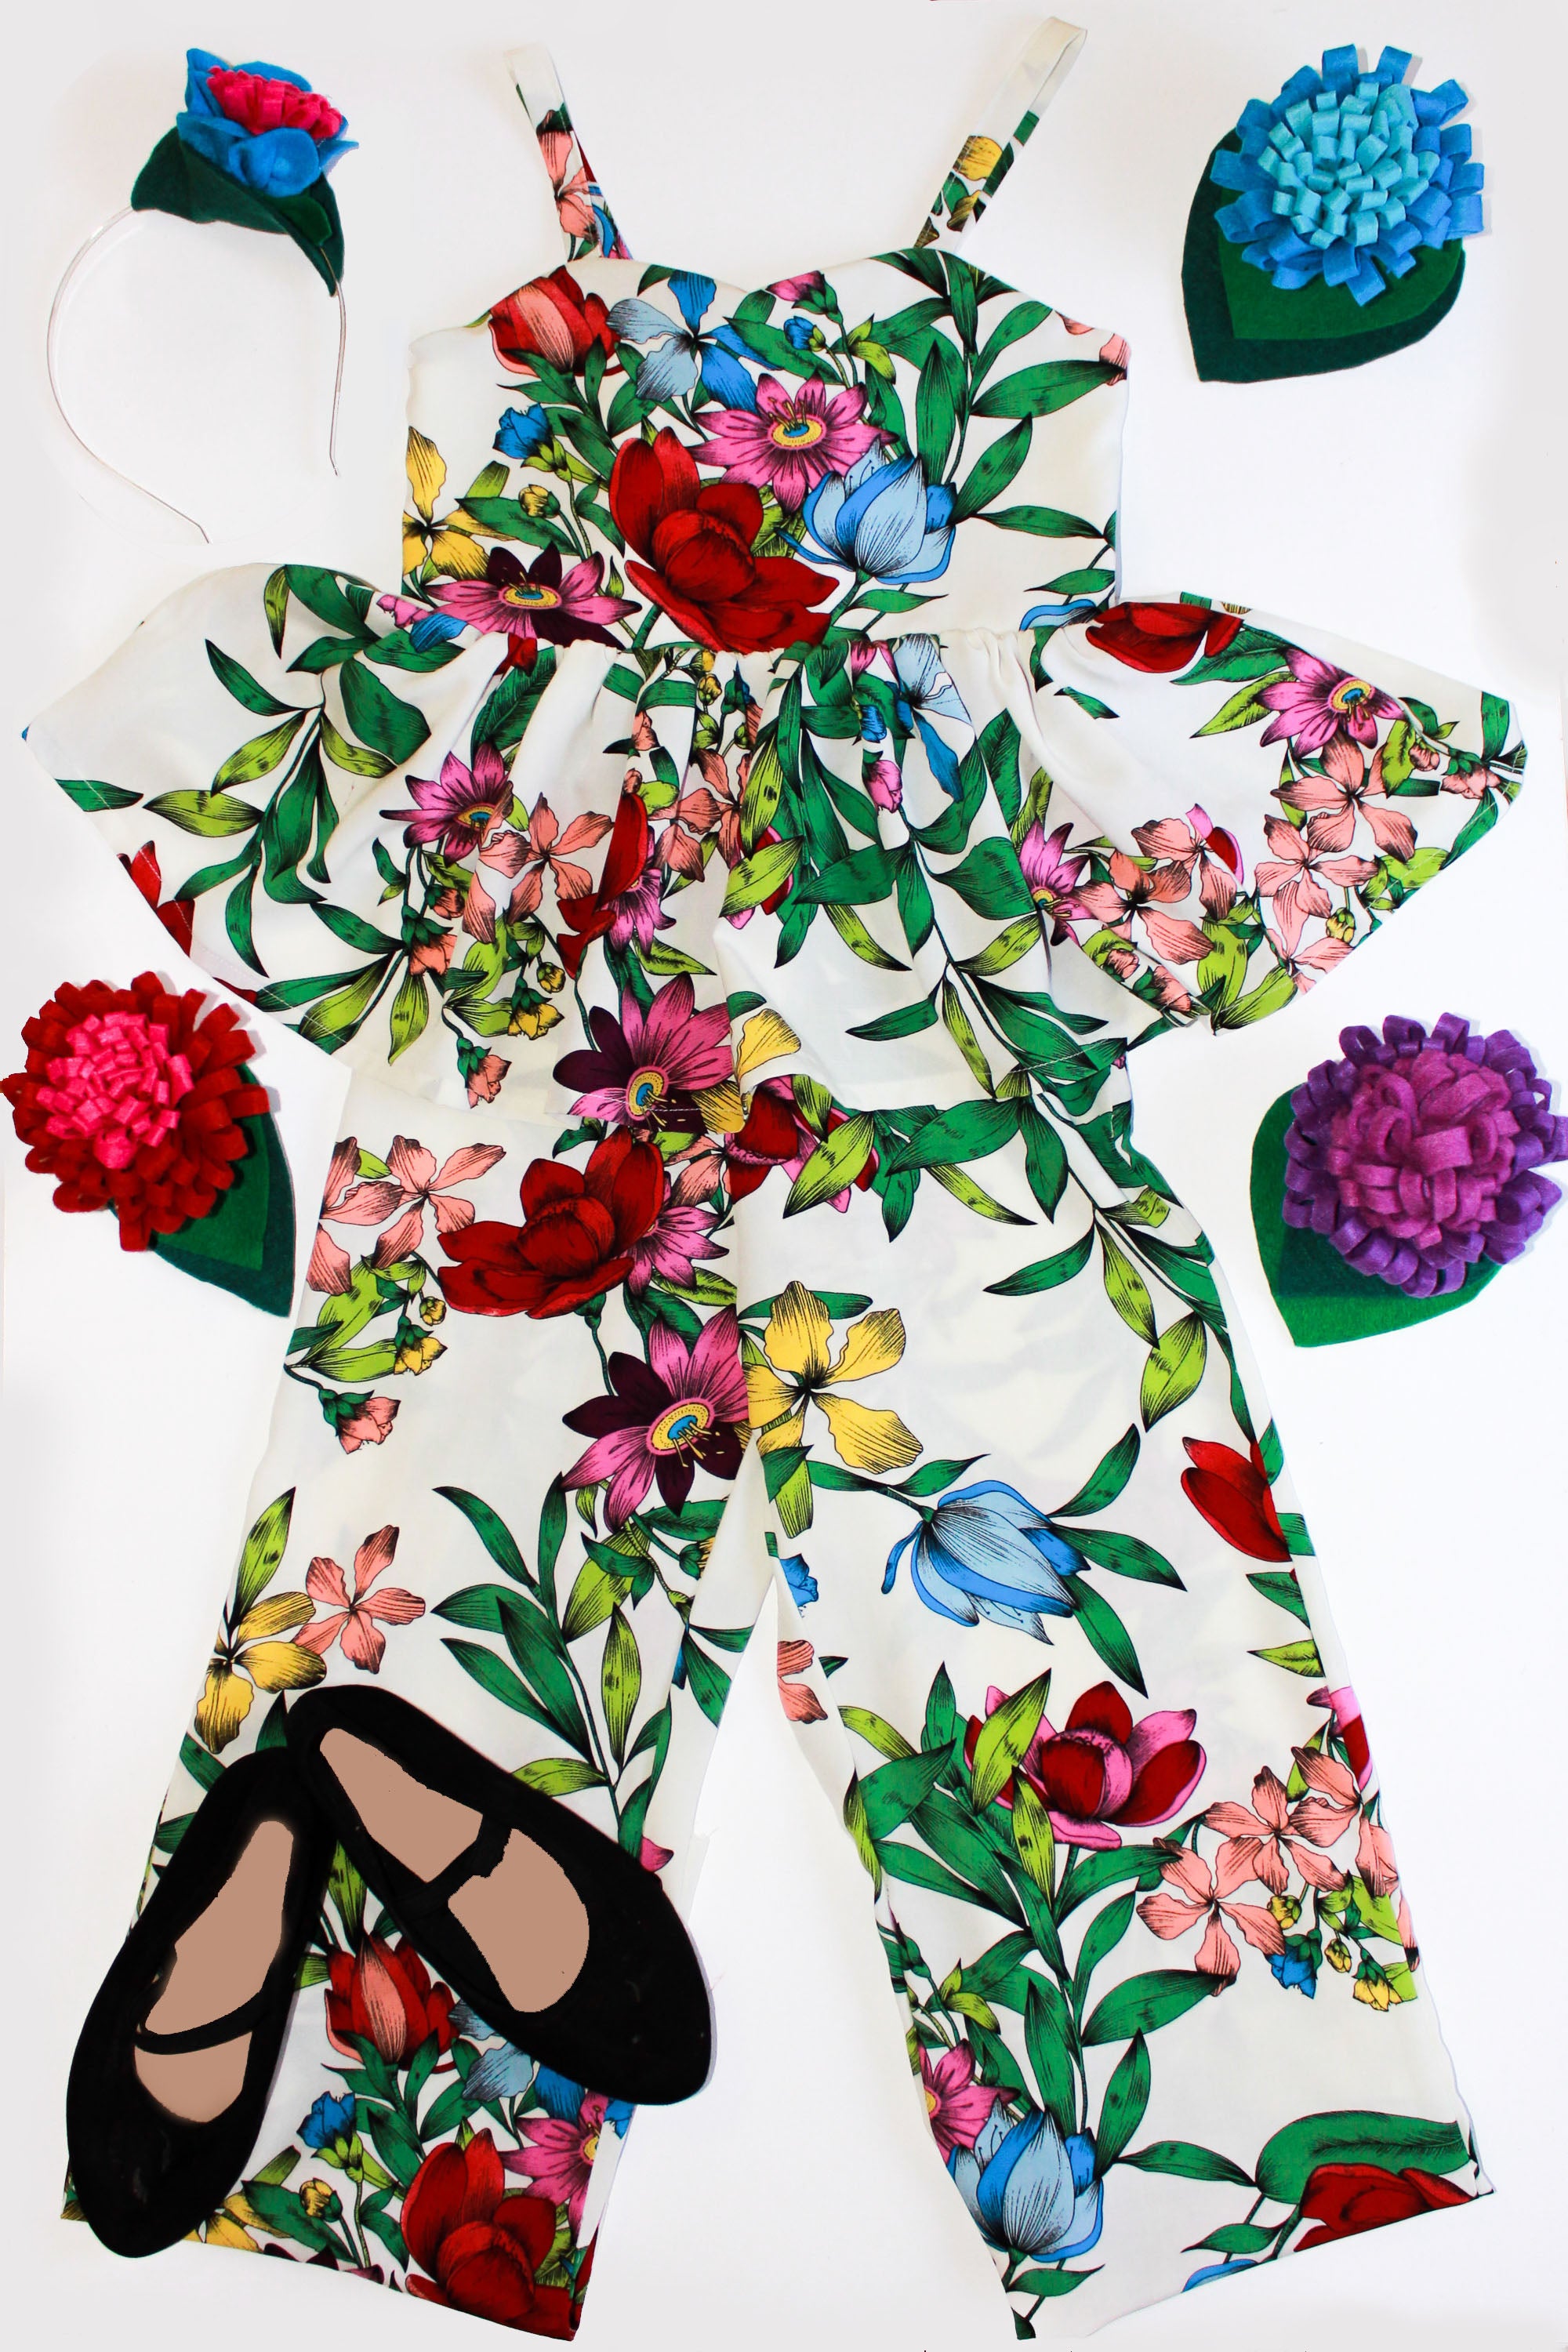
For my design I drafted a pair of wide legged pants and a peplum that would drape nicely with the beautiful Rayon.  The flow of the peplum reminded me of a flower and gave the outfit that extra spin for when Lottie was dancing, skipping or twirling.   Luckily, as I was shopping the Little Lizard King sale this past week I happened up on the Malibu dress and it had the exact neckline I had sketched for this design.  Yay! I ended up using the bodice of the Malibu and modified it a bit for fit and then took off the back waistline elastic casing and included two bow ties in the back.
Then - as we all know - accessories are everything, so I created a felt flower headband with coordinating felt and then whipped up a couple extras for my flat lay because I have so much fun making them!
I had a great time this week and I've really enjoyed being part of the Aussie leg of this tour with so many talented and lovely designers.  If you want to see more pics of my creations I'll be posting them and discussing the process in more detail over on my Instagram and Blog.

puzzle patterns


Idle Sunshine - Bohemian Beauty


It's Week 3 of Project Run & Play and I'm thrilled to be here sharing my makes!  The theme this week is Botanical Beauty and I took the opportunity to make an outfit that has been stuck in my head for a long time!  I'm so proud of this set, it's floaty and romantic and the botanical print is just gorgeous.  I used a gorgeous mauve floral rayon fabric for this set, and then got a little crafty with the glue gun and made a flower crown to match!


I created this cropped wrap top with the Mori Dress Pattern by Elegance & Elephants as a starting point. I redrafted every single pattern piece to get the look I wanted.  I raised the front neck line, widened the front and back centre panels and changed the angle that the flounces set into, I lengthened the bodice, cut the full back into angled separates, created huge flounces and a wrap waist band!  I think the only thing I left alone was the shoulder angle and armscye!  I did a double fold narrow hem on the flounces and created a really long waistband to tie around the body.  I am so happy with how this turned out and that being a wrap top, it will fit my girl for some time.  She started talking Year 6 Graduation outfit, swishing around in this set, so that made me happy that she loved it too!


The skirt started with a flat front, elastic back waistband.  I cut 2 extra wide skirt panels and cut the ruffled tier double the width of the skirt.  I measured my daughter's waist to the ground to calculate the length of the finished skirt, which I then used to work out the length of both the panel and ruffle.  I hand cut the high low front panel, using a curved ruler as a guide, to get the finished height I had calculated for the front.  She loved twirling around in the breeze up on the cliffs in this beautiful skirt.

 I really wanted this outfit to be a show stopper, so I made sure the skirt had the same generous feel as the flounces of the wrap top.  We took our photoshoot out to the boardwalk above Fingal Bay in Port Stephens.  This is one of our family's favourite spots to visit for a stroll.  I knew the stunning combination of the greenery and the ocean would be the perfect backdrop for this botanical outfit and wouldn't compete with the colours of the fabric.  For more pictures and info you can visit the Idle Sunshine blog here.


Tadah Patterns - Banksia in Bloom

Ahhhh florals, how I love them and I LOVE Aussie florals the most.  We live in a leafy little suburb near the ocean called Banksia, named after Joseph Banks, a botanist on the First Fleet who in turn had a genus named after him - Banksia.  We took a stroll down to our local park to take photos in front of the native trees and shrubs.


Ailish and I talked about her outfit for a week or so and she said she wanted to swish like a flower in the wind... not dramatic, at all..... I used the one piece version of a soon-to-be-released Tadah pattern and borrowed the flouncy sleeves from our Vetur Dress pattern.  I used a beautiful flowy pointelle knit from Spotlight and lined it fully.  I paired it with our Tulip Skirt pattern in this beautiful Waratah rayon from Sew Unique Fabrics and she spent a lot of time shaking her booty and twirling while yelling "I'm a flowerrrrrrr mummmmm" (total mum win!)  I finished them off with some super cute little flower buttons I found in my stash.  I got the gorgeous native flowers from my very talented friend Kate from Baby Bowtique and added in a couple of flowers my girls picked themselves from local trees.


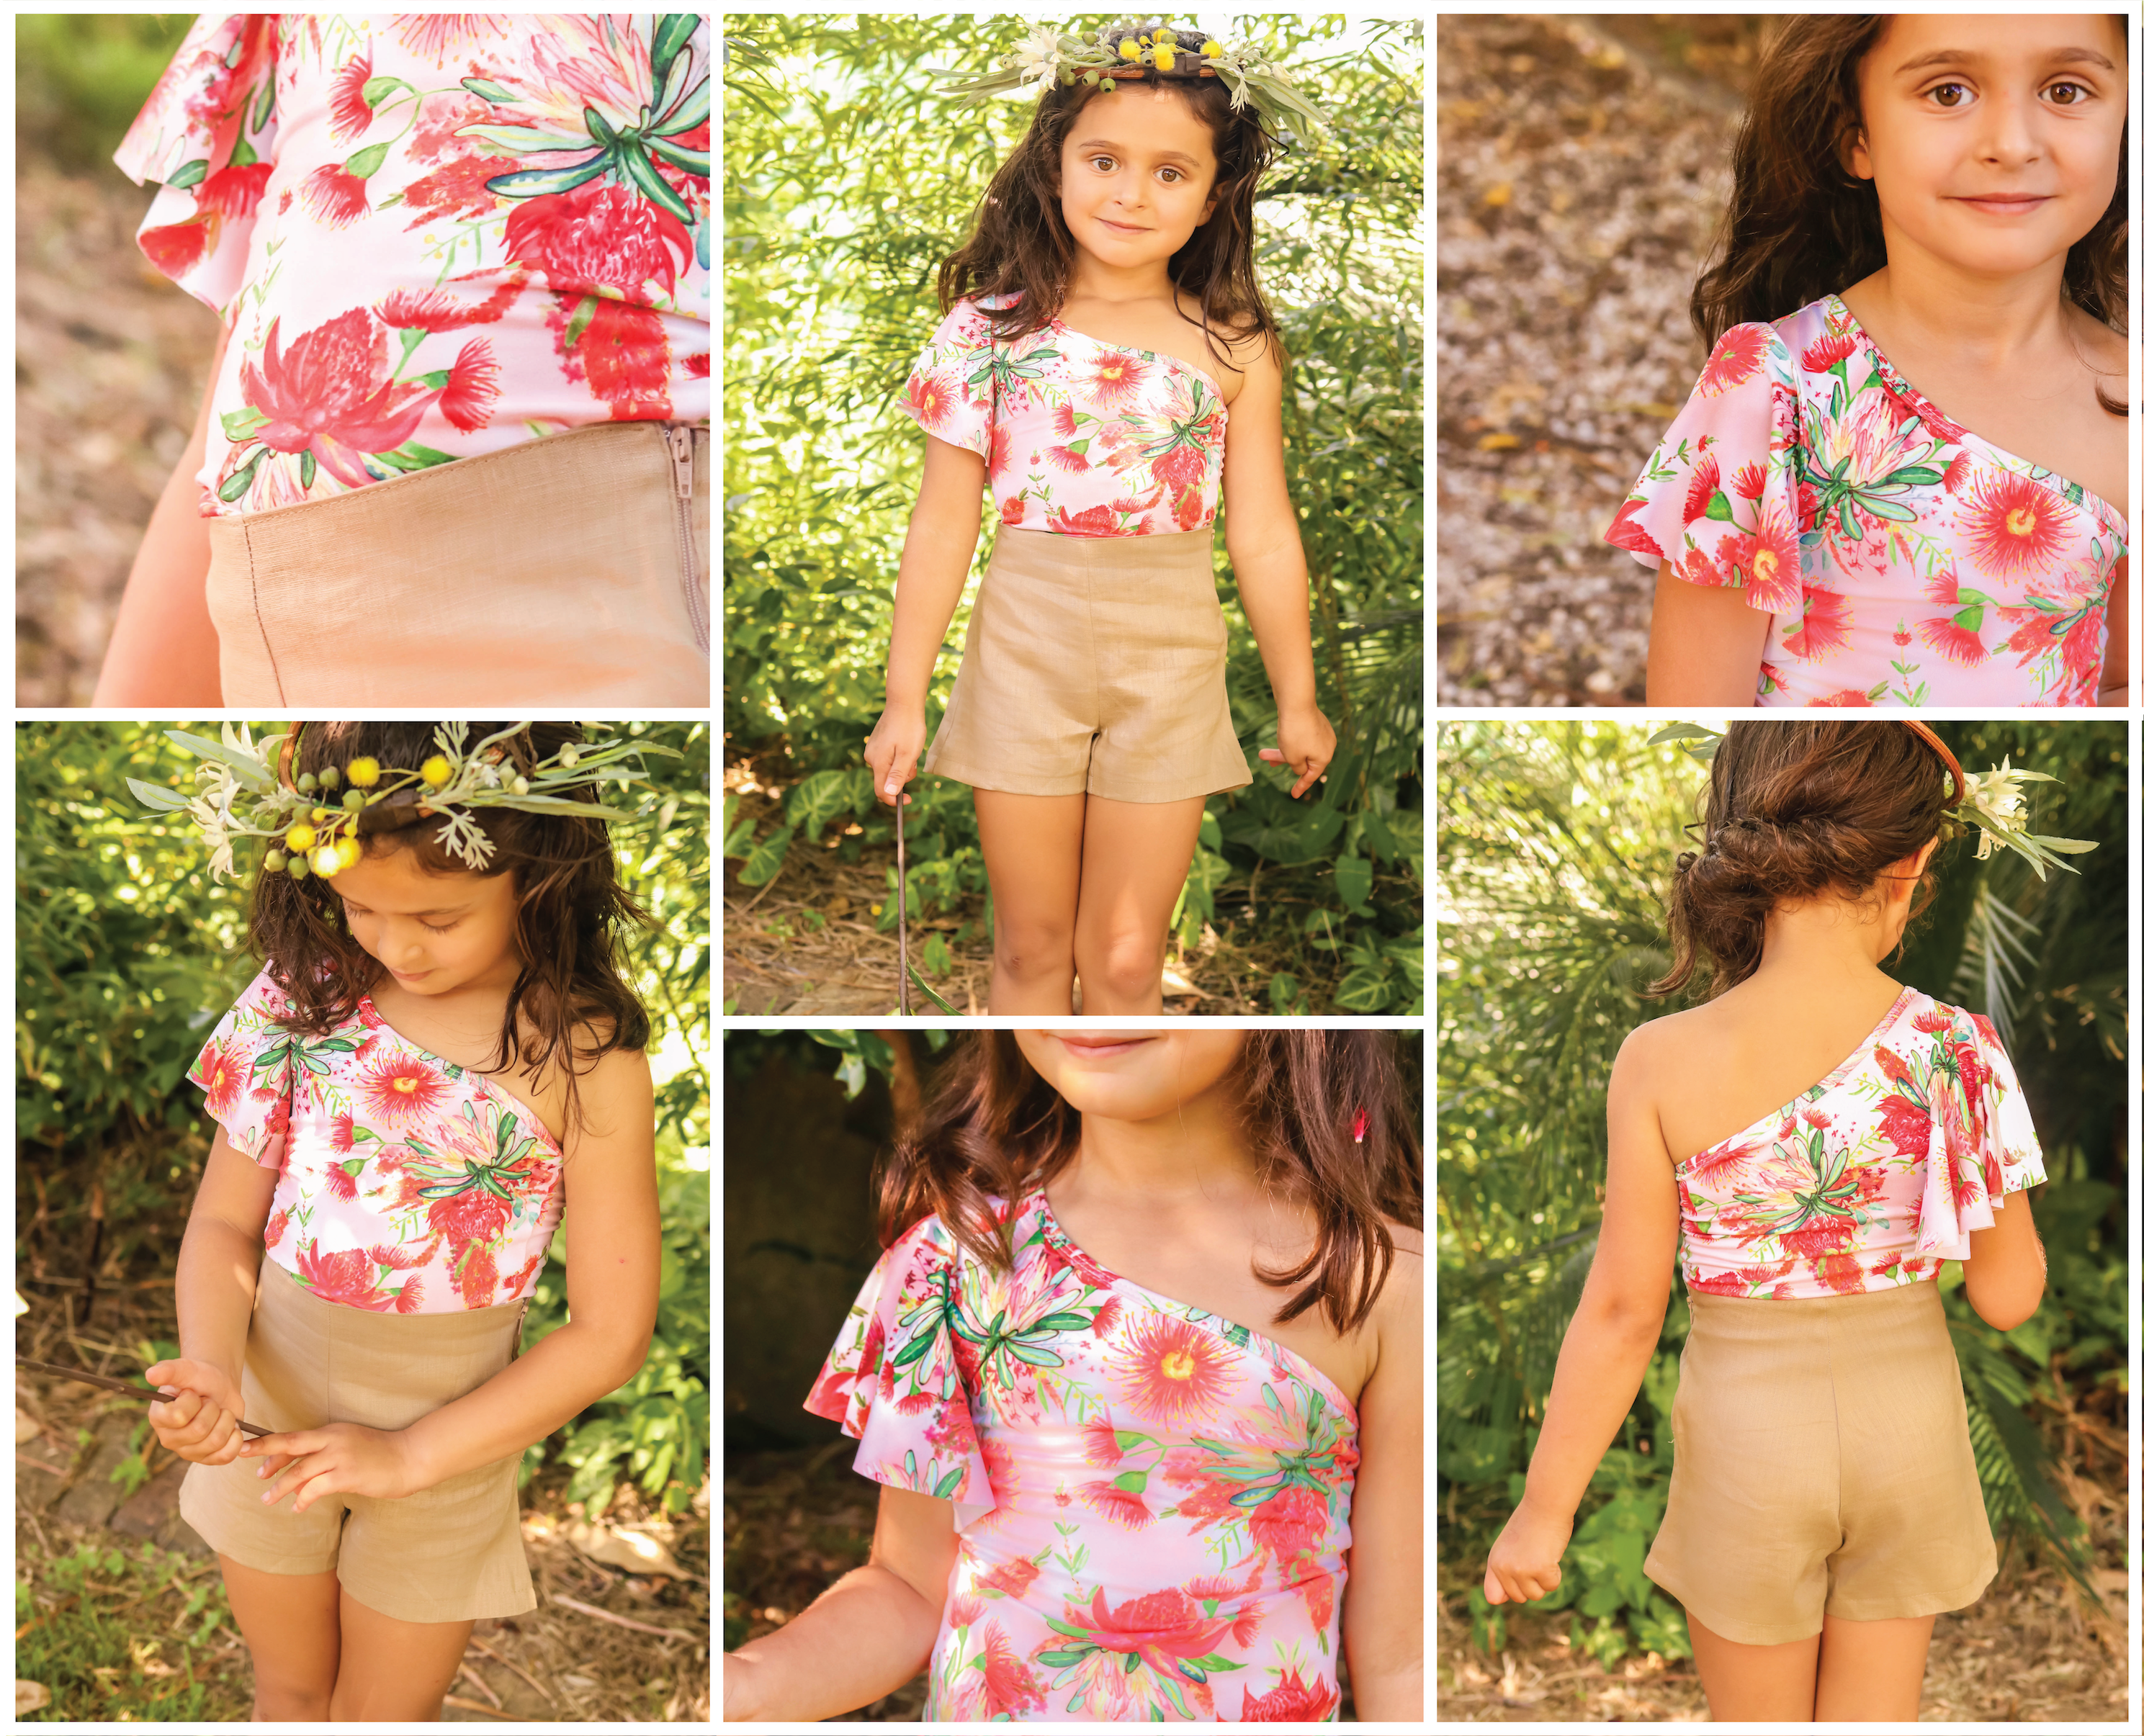
I wasn't quite convinced that Ashlyn's idea for her outfit for this week would be very wearable so we compromised, she's 4 so reality doesn't factor into her ideas!  She wanted "a top with no straps and huge boofy flower bigger than my head on my shoulder!"  It took some keen negotiation on my part but we settled for a beautiful, drapey flounce and a one shouldered top.  I started with our Tea Party Dress bodice to get the armholes correct.  I sized down as it’s a woven pattern, re-drafted the neck to be off-the-shoulder, extended the bodice, added some waist shaping and the Vetur flounce.  I used this beautiful Aussie floral double brushed poly from The Material Girl Australia to give the flounce that beautiful drape.  For the shorts, I used our Peg Shorts to get the crotch curve correct and then drafted a high waisted, slim fit dress shorty short with a side zip.  I used this beautiful linen from Dizzy Daisy Fabrics.


If you'd like to see some more photos of the styles I created, or if you'd like to read about my fabric mishap with my original skirt for Ailish, you can head to our blog and we will also be sharing some extras on our Insta and Facebook pages.


Ellie's Handmade - Butterfly Garden


Our theme for week 3, Botanical Beauty, had me dreaming up whimsical, floral inspired dresses, something I could imagine that little girls would just love to wear! I decided to create two dresses and a headpiece this week, for Ellie, and her very best friend, Lily.  They are both such girly, sweet little ladies, constantly lost in the world of butterflies, fairies, flowers and unicorns... so of course I had to work some of those things into this weeks creations.


I've always loved working with tulle, and decided, it was now or never - I was going to sew a flower and butterfly filled skirt.  I put some thought into how it would be possible to make this dress really wearable, as the flowers and butterflies definitely can't be washed.  So I designed it so that the portion of the dress with the flowers and butterflies is actually a skirt with a waistband, making it completely removable.  The dress can be worn as a simple pink tulle dress, or with the butterfly skirt over the top, sitting beautifully as though it is ''attached'' to the bodice.  It even sits beautifully over a leotard worn as a midi skirt!  Every flower and butterfly was hand stitched on, I think in the end I sewed around 85 flowers on, alternating colours and sizes.  I drafted this dress pattern to have a neckline centred at the base of the neck, with straps that crossed over, and looped through the sides, creating a feature open back.  The bodice and waistband are linen, and the tulle skirt was also lined with a satin with all the seams enclosed.


For Miss Lily, I used a silk georgette fabric I had been hoarding for some time.  I drafted to her dress to have a centre bib, with side panels and elastic back.  After sewing up my test bodice, I decided it needed a little something extra and added in some ruffles between the bib and side panels.  Since the girls love to match in lots of ways - I decided to create a similar back, that crossed over and tied in a bow.  For the skirt, I cut a slightly gathered circle skirt - the twirl factor is fantastic!  I also made Lily a headpiece using some of the left over flowers and butterflies, which the girls promptly swapped every 5 minutes while we were taking pics.  If you would like to see more pics from this weeks entry, please head over to my blog HERE. xo Tash.
Use the voting widget above to support these incredible designers! Their scores will be calculated as follows:

1/3 of the score is based on YOUR vote
 1/3 of the score by this week's celebrity guest judge Sophie of Ada Spragg
1/3 of the score comes from the panel of judges

If you're inspired to link up your Botanical Beauty creations, you can do so right here.