
OHHHH you have no idea how excited I am to be guest posting here on the mothership of sewing for kids. I am always blown away with the creativity and work people put into their contributions. By the way I am Mie and I blog at Sewing Like Mad.
Let's get to business shall we.....
I really love to make every day clothes with a little twist because lets face it that is quite a big part of life. And sewing with knits for kids is just perfect. It is comfortable for them to wear and it washes easily. Peeerfect!

So here we are with another summer version of the My Inner Grandma Dress - this time even in summer colors. Another version you think? Check out HERE, HERE and HERE. The pattern is self drafted and it might be one of my favorites. One of those you have in your head for a while and then it almost comes out better than you imagined.


The navy/ballet pink stripy fabric is this gorgeous super soft light weight cotton jersey blend from Girl Charlee. And if you after this post is inspired to make your own knit dress you should make the jump to my blog because I will be hosting a give away where you can win 2 yrds of knit from their shop. I know!!! But please stay here for a bit first so you don't miss the tutorial.
I am not going to give you a full tutorial because I just don't see the point when the pattern so far is only hanging out in my sewing room. SO I would rather focus on one part of the dress. In this case the double layered front- and back-in-one shoulder yoke and then a few snapshots of the rest of the sewing process. I hope that is okay with you ladies!


Just a quick look at the bottom skirt parts. As you can see does the front and back pieces have different curves for a better fit.

Okay, back to yoke tutorial. Sew the gathering threads and sew front and back top pieces to the outer yoke - right side against right side of fabric.
Btw as you can see have I chosen not to have the gathering go all the way to the sleeve opening (it stops like one inch before) simply because...well, gathering adds fabric/volume and this is all good and kind of the point but I don't want it near the side of the sleeve seams where it can almost look like a bad fit.
Btw as you can see have I chosen not to have the gathering go all the way to the sleeve opening (it stops like one inch before) simply because...well, gathering adds fabric/volume and this is all good and kind of the point but I don't want it near the side of the sleeve seams where it can almost look like a bad fit.

Now you take the inside yoke and sew the front part of yoke to the top of the front facing (right against right). See inside those 'round' yellow circles - should we just pretend my three year old helped me make these?! Drawing course up next, jeeez! The rest of the front yoke seam towards the sleeve opening is free for now. I just folded the seam allowance up into the yoke with the iron. This is a look on the inside of the dress. You can still see the seam allowance where the back top and back yoke has been sewed together....but not for long - uhh the suspense!
 Now to the fun part. You add your neck rib to your neck opening (right against right) and then you fold the front top/front facing in that folding line I showed on an earlier photo. Basically you wrap your inside and outside neck opening around the neck rib and sew it all in one go. See photo above.

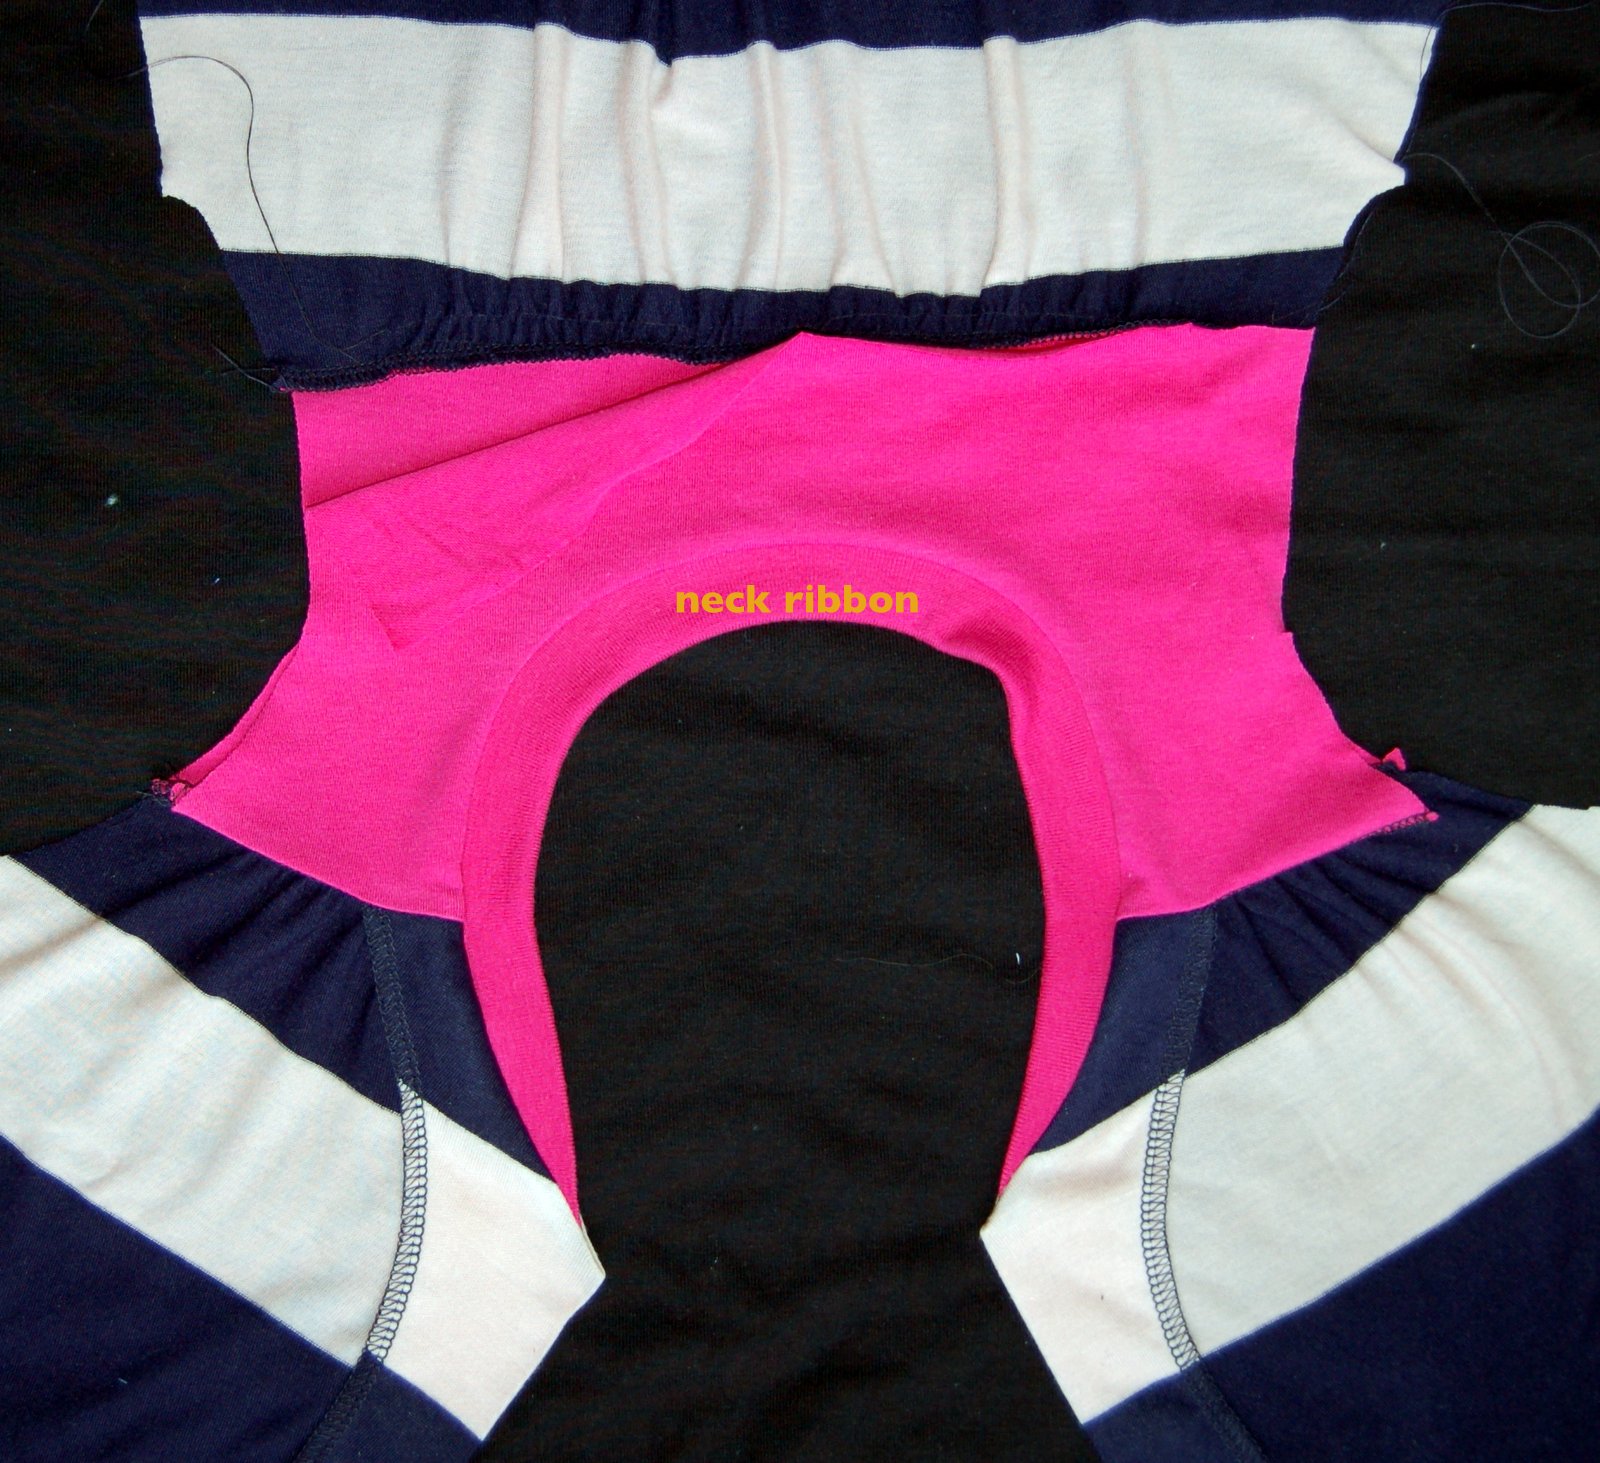
And when you fold it out again it looks like this. This is a photo of the inside of the dress. Next step is to sew the back inside yoke to the back top and outside yoke seam so that that seam is hidden too. First you fold the seam allowance on the back yoke inside the yoke and then lie it down and cover the seam that is already there (back top to outside yoke). Then you reach your hand from the side (sleeve opening) into the middle of the seam (this is easiest to do with two rounds of sewing because of the narrow space in the back yoke) and grab the seam allowance from the inside yoke and the seam already there (back top to outside yoke) pull out and sew from CB and out to the sleeve opening. This you do from each sleeve opening and also on the rest of both front yoke seams too (the part that is not sewed to the front facing). WHY in the world did I not take more photos of these steps, sorry!!


And here you can see the final result - again seen from the inside of the dress. Now that I see this photo I am kind of annoyed I just overlocked those front facing edges....bias tape next time.

Here you see a photo of the rest of the sewing. Side seams of top, waist and skirt has been sewed as well as the sleeves and hemming of skirt and sleeves with a narrow rib. Next is sewing the dress' three main parts together horizontal and sew on the sleeves. Apparently I did not feel like standing on a chair photographing that day so I had to overlap the parts a bit to make it fit in the photo. After drawing course comes photo course, promise!


Dress is almost done and, well, I think the photos says it all: shirring next!


Pheeew is anyone still with me here? I hope so because NOW it is time to jump to my blog Sewing Like Mad and win those two yards of knits of your choice (incl free shipping to US addresses only) from Girl Charlee. I wish I could participate too, ha.
Thank you Project Run & Play for having me and my ramblings!

OH! that dress looks so cute and playable. ~Major Moma
ReplyDeleteAdorable!!!
ReplyDeleteThis dress is put together so smart. So cute! I love shirring but I would have never thought to put it together like this. Pinning this for future thoughts.
ReplyDeleteCute! Love the colors and your hidden seams. :) You are good, Mie. :)
ReplyDeleteSuch a beautiful dress! Love the grandmotherly-inspired style.
ReplyDeleteI just love this dress! It looks so comfy and the color combination is spot on!
ReplyDeleteGreat work!
ReplyDeleteI defenetly have to try sewing with knits...
I LOVE this dress and would buy the pattern in a heartbeat should you choose to draft it for sale :) I liked the other two versions as well, but this was my favorite :)
ReplyDeleteAdorable! Love the colors!
ReplyDeleteI would totally wear this myself! It is adorable
ReplyDelete