
Today we are so happy to have Palak with us sharing her tutorial for an adorable tiered skirt.
(I'm sure you will recognize her style and darling daughter from the sew along group linky parties!)
*****
Hi everyone! I'm Palak from Make It Handmade and I'm so excited to share this skirt tutorial with you all today! Skirting the issue is a wonderful cause, and I'm thrilled to be a part of it.
My daughter has been asking for a skirt to 'twul-luh' (twirl) in for some time, and I thought a classic three tiered skirt would be perfect. I also thought it would be a perfect skirt for Skirting the Issue since it's a flattering style for nearly everyone and quick to make.

Although these skirts can be made with a variety of construction methods; I'm going to share a method that requires no basting or hand gathering. Sounds too good to be true? Well, there is a catch-- you will need a ruffler foot or shirring/gathering foot-- these feet make it possible to ruffle one layer of fabric while stitching it to another. If you have a serger/overlocker, you can use a serger gathering foot as well.
If you aren't friends with your serger just yet; you can check out my serger series and fall in love all over again.

Once you get the hang of this construction method; you can change up the look of the skirt easily. Here are a few that I've made for my daughter.
 |
| Clockwise from top left: Neapolitan Dress ~ Sunshine Skirt ~ Blue Gingham Bias Skirt ~ Happy 4th Dress |
The instructions below are for a 2T size (20 inch waist), but this skirt is easy to adjust to any size (even adult). I'll share some tips at the bottom of the post for adjusting the size and making multiple skirts at once.
Materials:
1 yard fabric (will most likely have leftovers)
elastic (20 inches)
Cut:
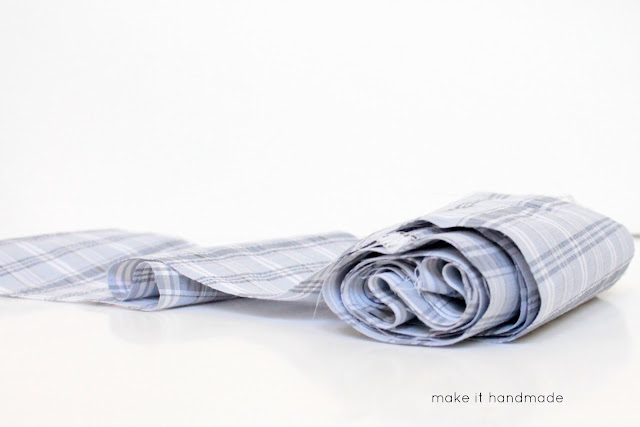
The cut list for this skirt is easy-- just 5 strips measuring 5" x WOF. Using the standard presser foot, sew or serge these together end to end (right sides together) to make a long, long roll of fabric.


Sew:
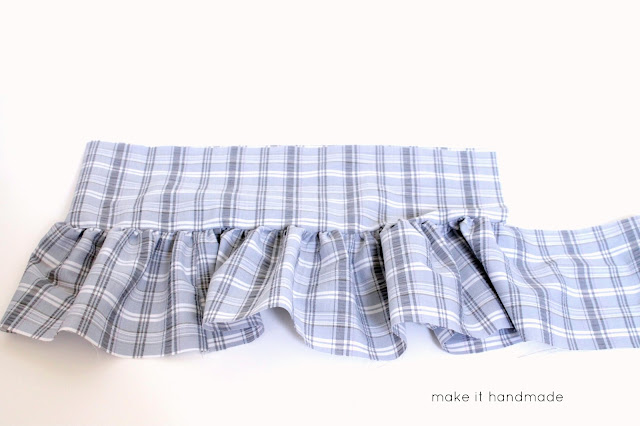
Switch your machine over to your gathering/ruffling foot. This is what mine looks like. There are many different types, and I encourage to look at the manual/instructions if you aren't familiar with yours. Generally, anything that goes under the metal guide will be ruffled, and anything that goes on top of the metal guide will not be ruffled.
Making sure that right sides are together; put the long strip between the presser foot and your machine (on the bottom) and feed the short strip through the guide on your ruffler foot or gathering foot. The foot will gather the bottom (long strip) while stitching it to the shorter top piece. All in one step (see, I told you it was awesome!)
When you've finish stitching the first tier and second tiers together; you'll have something like this.


Change back to your regular foot. Fold the skirt in half, right sides together, and sew or serge the raw edges together as shown. At this point, I also like to finish the hem of the skirt by using either a rolled hem or a traditional small hem.

Finish:
Turn the top of the skirt under by a quarter of an inch, and then another inch to create a casing for your elastic. Leave a small hole for your elastic. Thread the elastic through, sew up the opening and the skirt is ready to wear!My daughter loves this skirt-- it's frilly enough for twirling...


But what about the teens and tweens? To adjust for different sizes do the following:
- Use Simple Simon's handy chart to determine the waist size and length.
- To determine the width of the strips to cut, divide the length by 3 and add an inch. So, for a 21 inch skirt, use 8 inch strip.
- To determine the length of the first tier multiply the waist measurement by 1.5. The elastic measurement should be the same as the waist size.
- Unfortunately, it's hard to say exactly how many strips you will need. A good rule of thumb would be to make sure that your strips add up to be 7 times as long as the first tier measurement and keep some extra fabric handy to attach to your long roll of strips if it looks like you are running low.
- To make multiple skirts from the same fabric, simply keep adding strips to your 'long roll'. Any leftovers from one skirt can be used in the next, so there is very little fabric waste.
Thank you so much for having me! If' you'd like to read more about making these skirts or just want to chat, stop by at Make It Handmade!
*****
Thank you so much for sharing with us Palak!
This week Skirting the Issue is focusing on making skirts. I am planning on donating mine to a local foster care closet. They will come at a perfect time for back to school.
Are you planning to sew along with us? (We hope so!) If so what are you making and where are you hoping to donate it to?
-liZ
PS---I noticed last night that the first two items have been added to the Skirting the Issue Flickr group and they were both skirts. (Thank you Jennifer!) I was so excited. This is going to be so much fun!

Cuteness! I used this material to make a skirt for myself last month- it wasn't a twirly skirt, though, I will have to make a twirly skirt for one of my girls!
ReplyDeleteOK Im ordering a gathering foot, I have so many problems trying to do them the "old" way with snapping threads when gathering and trying to get them the right size and evenly gathered.
ReplyDeleteThe trickiest part of making these is getting the right settings on your serger or ruffled foot. It is very easy to get a square dance look (which is a whole lot of fabric if it is for anyone bigger than a 2T. Do some practice strips to make sure your gathering ratio is 1:1.5 or less. When you do it with gathering threads you can kind of see before you attach it how full it is going to be....with serger or ruffler foot you need to do a sample and practice a bit....and THEN write down your settings and put it promptly with your sewing stuff so you know where to start checking next time you want to make one. (There is variation due to the specific fabric you choose, its weight, hand, amount of sizing etc...so you SHOULD do a little scrap practice each time anyway...like basting...you do baste don't you?!?! Heheheh. ). Don't be intimidated though, you can do it. And if you DO end up with a really square dance skirt, wash it and twist it really hard while wet and leave it to dry. Wrinkled like a broomstick skirt it will hang closer to the body. (Can you tell I have some experience with this? ;) k.
ReplyDeleteK! We must have cross posted! You are absolutely right! Definitely try out a swatch-- especially if you aren't familiar with your foot/ that particular fabric.
DeleteThanks Brooke! I love plaid! Jessie-- I hate to be an enabler, but you will love the gathering foot! I use the gathering foot on my serger all the time to whip out things for my daughter.
ReplyDeleteSew sweet!
ReplyDeleteThanks Cassandra!
DeleteKeeping right sides together, align the bottom edge of the second tier and the long strip in the gathering foot just as before. remalladora
ReplyDelete