You're going to DYE/DIY/DIE over this week's looks by the designers!!!
Make sure to check out all the creations, and then support TWO of the designers with your vote at the end of this post.
Hello everyone, and thank you for having me back for Week 3! I'm still over the moon with my win last week, and can't believe it happened. I hope to wow you again with my "to die for" look for this week's To Dye For theme! I present to you, Pastel Dreams.
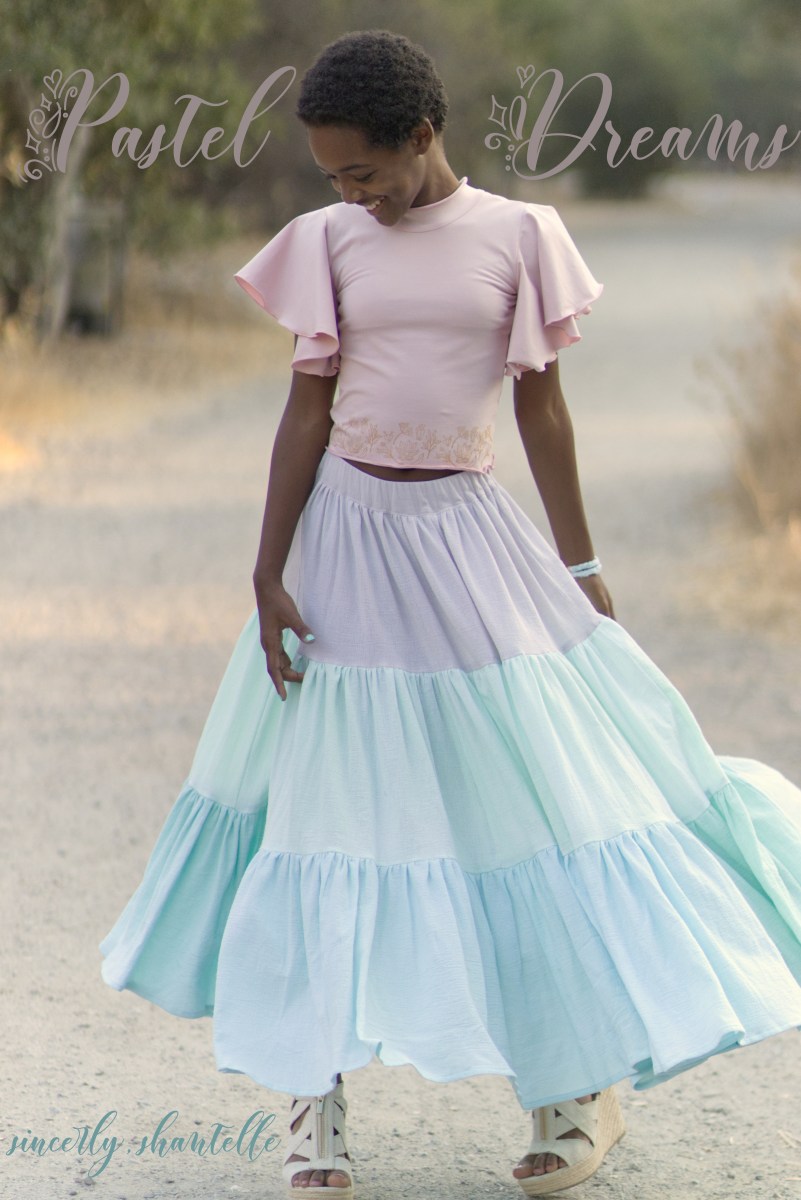
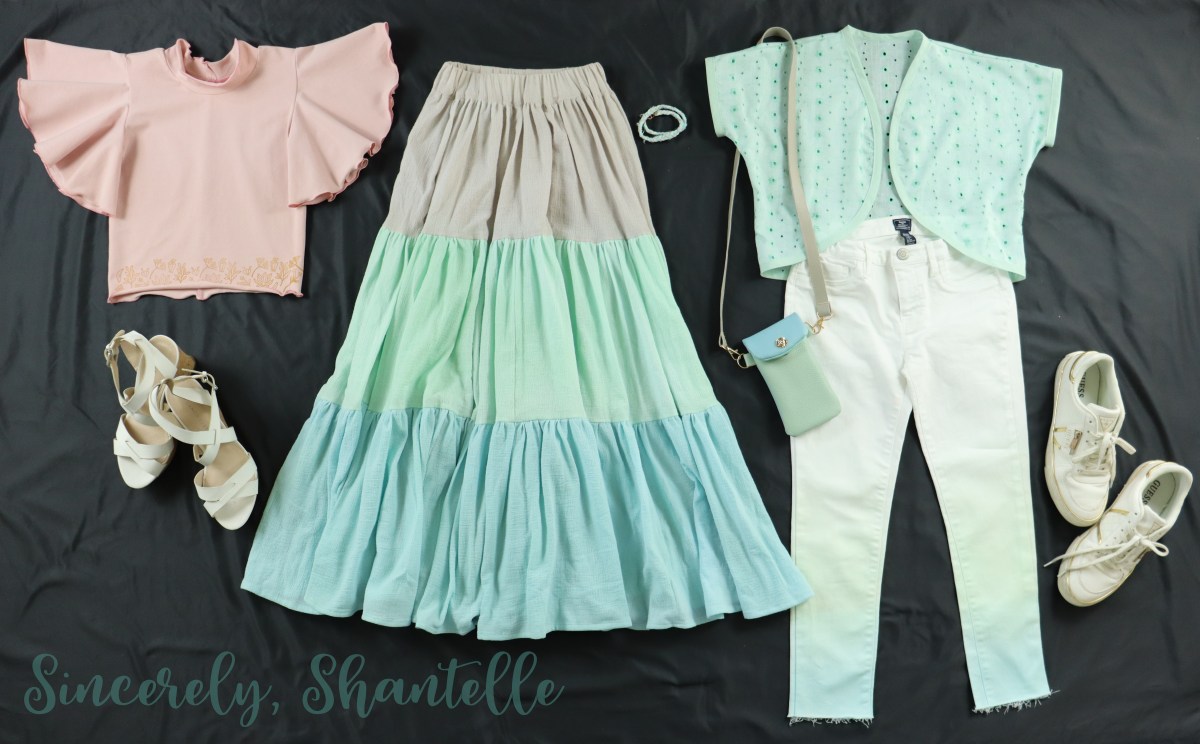
This week, I simply could not commit to tie dye of any sort! Every summer, my family ventures into making tie dye shirts, and over the years, every one of mine has come out very meh looking. I knew tie dyeing anything would likely result in being sent home, so I went an entirely different route. My feature model last week was my son, which meant it was my daughter's turn this week. I took her input using a dreamy, pastel color palette she chose, and used a starting point for the creation of my two looks. I wanted them not only to be light in color, but lightweight, easy to wear, and to give off a very dreamy, airy vibe. For the first piece, I custom dyed 7 yards of cotton gauze so that the tiers matched the bottom three colors of the palette. That was an adventure (first time dyeing aside from tie dye PLUS almost 14 yards worth of gathering), but the outcome was gorgeous! I really liked the look of the colors, so I tapped into my "DIY" bit of the brain and braided some strips of the leftover dyed gauze and added some hardware to create a matching bracelet. To pair with it, I made a flounce sleeve top in dusty pink cotton spandex (for the first color of the palette), cut between crop and regular length so that the entire skirt would be visible. I finished the sleeves and hem with a rolled hem to keep the lightweight, floaty look, & stamped a floral motif around the hem with metallic gold ink, to create a border. My daughter loved this look and said she felt like a princess. Because it's so lightweight, it would be perfect for meeting up with friends at a coffee shop (she's a tea drinker, though) or even out for a day at the mall. It also would pair lovely with sandals for a more casual and comfortable look.

For a super casual look, borrowing from these same colors, I decided to cut and dye some white jeans. I attempted an ombre look, which was very hard to photograph the light colors outdoors. From the bottom to around the knee is a blue into mint gradient. I paired with a plain white tank top we had at home, and created a woven bolero using a knit cardigan pattern with some mint floral eyelet I had in my stash as a gift from a sewing friend. I ended up having to dye white bias tape to finish the raw edges because there was none in the store that matched. It turned out perfect! And because no tween outfit is complete without the most important accessory of all (the phone), I used this cool YouTube video from the Ellie and Mac channel to create a phone purse for her to carry her phone around in style. This also discourages the continuous dropping and helps protect her phone. I made several modifications to the tutorial for my own look, but it was a very good starting point. Though it was my first time working with vinyl, it turned out not too shabby. The colors also came from the palette, and I finished the purse off with light gold hardware, and a gold rose embellishment to continue on with the floral/pastel theme.

As with all the pieces I sew, she could wear the bolero with the skirt or even wear the flounce top with the jeans. I really enjoyed working with these colors (though I was reminded again of how much I despise photographing light colors lol). I hope you love this dreamy look as much as I do, and would be so happy if you'd vote for us and get us on to the finals next week! You can also stop by my blog for all of the full details of the looks, as well as some behind the scenes. I really hope to see you all again. Until next time....
Well well, we’re on to week 3. This week has been a great struggle for me. I really did not know what to design for this week, so I decided to make it a family project.

At first, I asked my daughters to dye the fabric for me, totally random, their choice. They had a few fun evenings doing this, and the result of the fabric was, “made by them”. It was a perfect Paint Party.
My older daughter wanted a set for herself, so this has been a big achievement for me, because for once I made something for her that she really liked. Her style is very sporty, loves to dress in sweatpants and nothing else!
My younger daughter loves everything I sew, loves to dress, loves makeup. She likes wearing skirts, dress, styles her own outfits, she even overdresses for many ocassions. The best thing is that she does not feel shy about anything!

So the great challenge for this weeks them was to design something that would blend my daughters style together. I had to upgrade an outfit for my older daughter and downgrade my younger daughter’s design. The common thing has been Tie Dye, which they both love.
The first thing I chose was the fabric. Knit fabric is perfect for both of them. Comfortable, sporty, casual.
They both helped me design their outfits. Noor (my older daughter), wanted shorts and a Tshirt. I gave her the privilage to design the shorts, I designed the top. I self drafted the shorts, taking as a base one of her favorite shorts.
The top was a hack of a fibre mood sweatshirt I made for myself. I shortened it, and tightened it.

Queralt (my younger daughter) and myself designed the dress together. She wanted a dressy but casual outfit. The ruffle of the dress gives it a dressy mood, and the knit fabric the casual mood.
I decided the ruffle would have all the tie dye, and the rest of the dress is black to sober down the color!

Self drafted pattern. I also made a headband and a scrunchie for them to accessorize.
You have more info in my blog, and my Instagram account.
Hope you like my designs, and hope to see you next week!
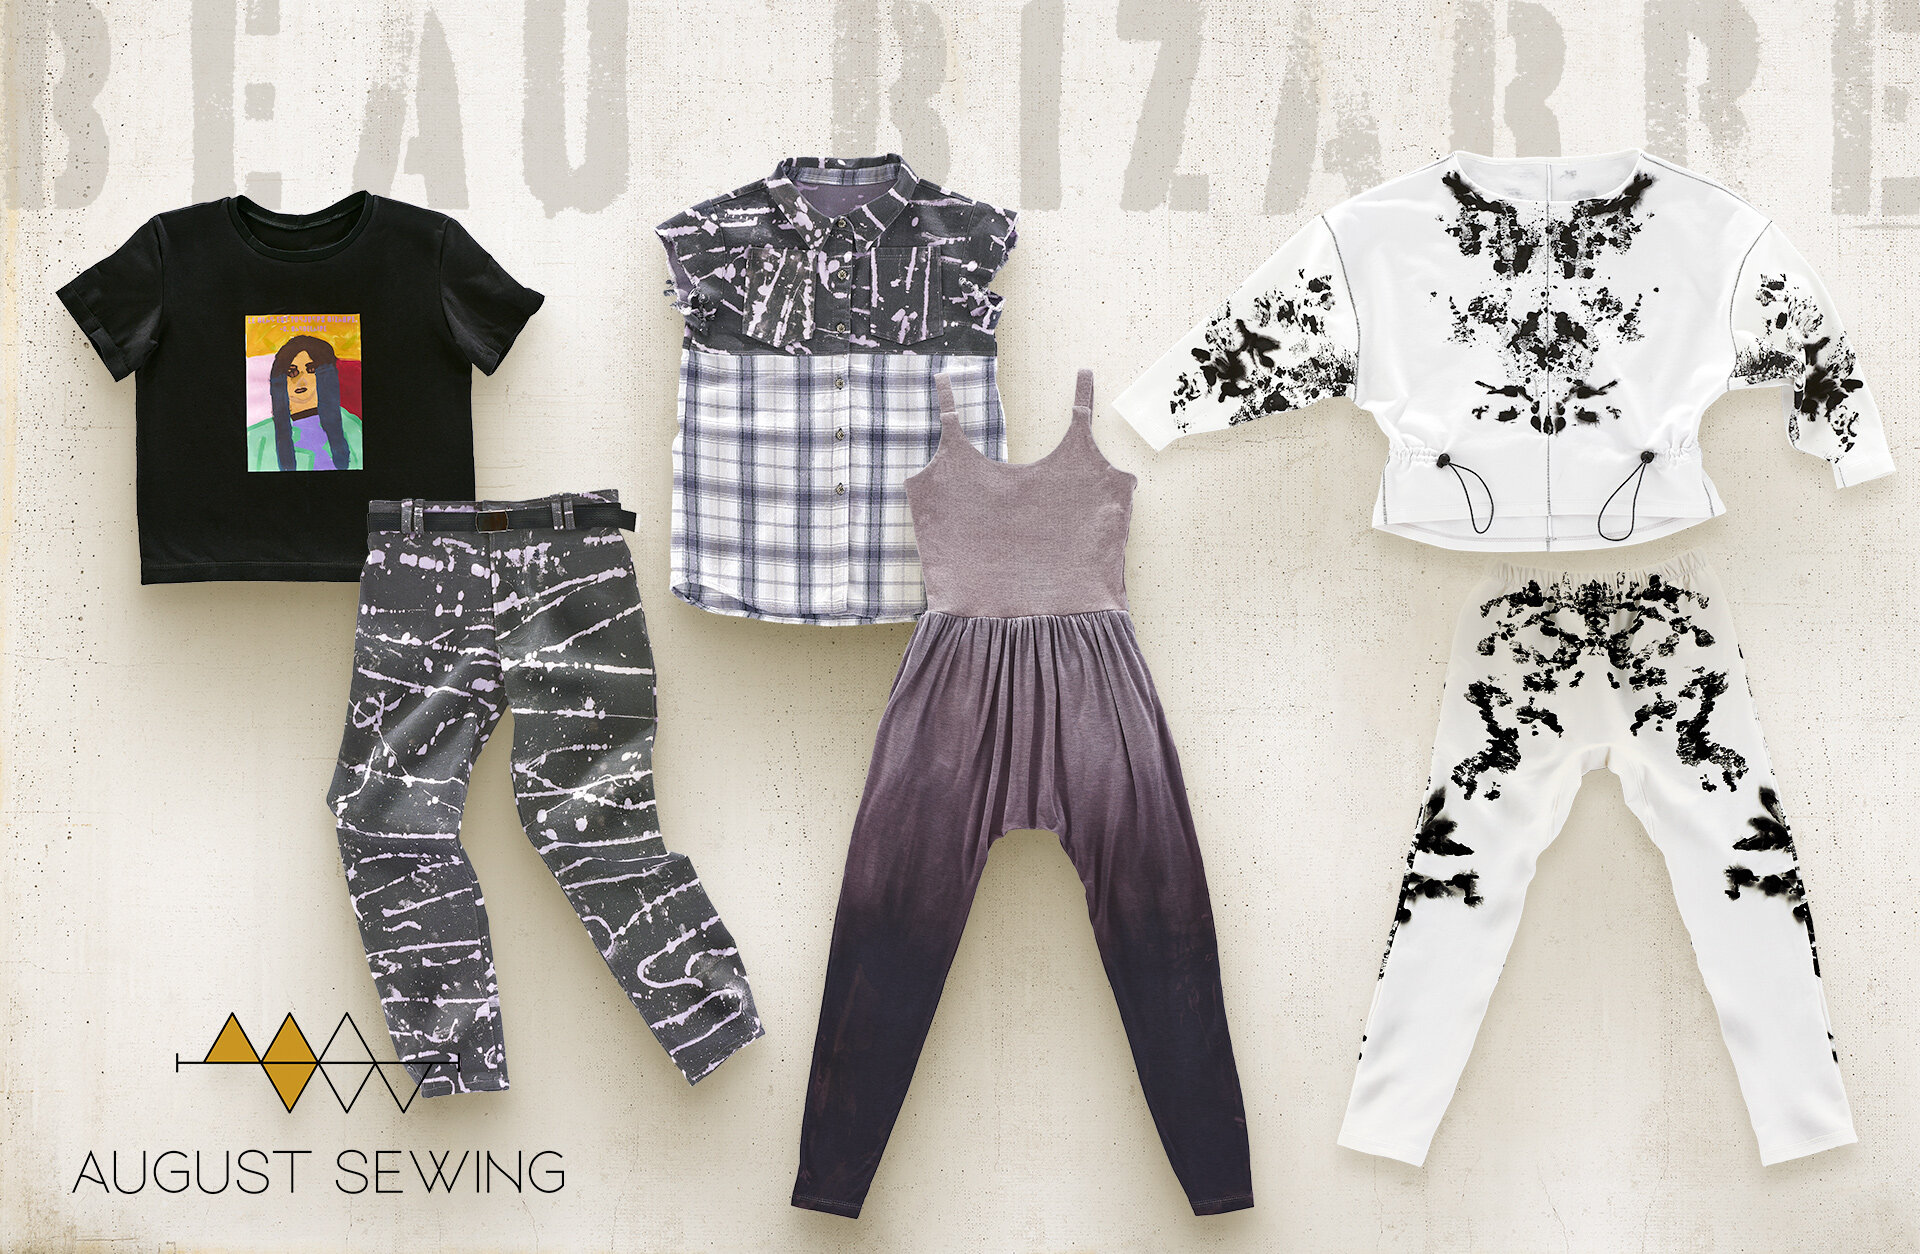
August Sewing - Beau Bizarre
French poet, Charles Baudelaire wrote, "Le beau est toujours bizarre,” which translates to “Beauty is always bizarre.”
During the preparation of To Dye For, I often had to ask myself, "is this totally ugly, or really cool?" Dying fabric is one of those things that feels risky and exciting. I had triumphant moments and results that looked like clown puke. This is a collection some of you will appreciate and others may want to quickly forget. That’s the beauty of it.
Look one is inspired by the 90s and grunge. I started with Bonobos deadstock denim that was bluish-gray. I used bleach and cotton cord to create a pattern and then gave it a quick dye rinse for a subtle violet hue. Making jeans has been on my list of things to do. The Laura Jeans from Suco by Susana had an awesome video tutorial which helped me along. I modified the belt loops and adjusted the pattern to eliminate the elastic waist. I added the belt to highlight the belt loops. I cut the legs a bit wide but straight and added pleats to the hem for a more barrel shape. For the arcuates, I stitched my daughter's initial L. To complete the look, I made the self-drafted tee in black Supima Modal from Goldie Olding Fabrics. The intention was to create something that might be reminiscent of a band tee. It features a painting my daughter created that I paired with Baudelaire's quote. It has a modern Mona Lisa vibe. Can you guess who it's a painting of?
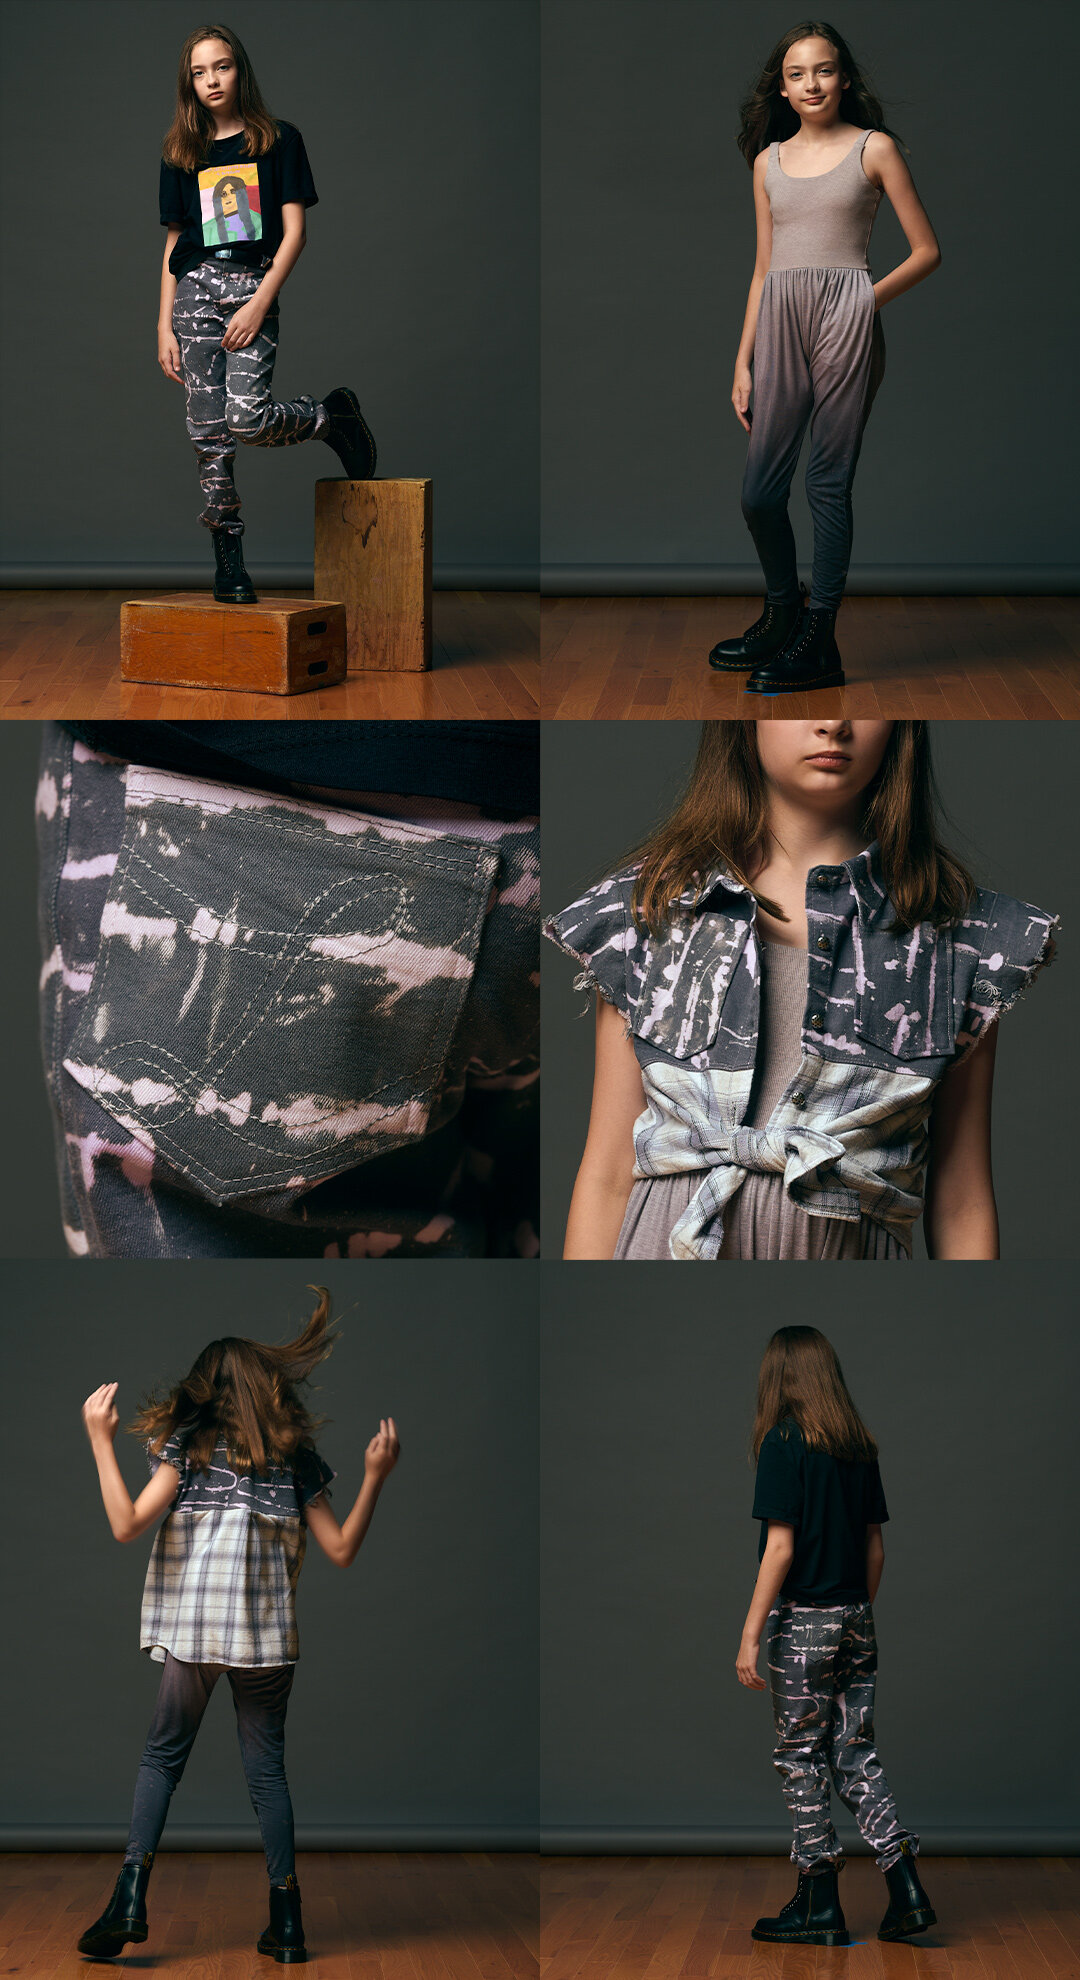
For the second look, I drafted this jumpsuit I call Bounce. I used a gray rib for the top and a gray modal for the bottom. Both fabrics came from my shop. I dip-dyed the finished jumpsuit for an ombré effect. It’s paired with the Bayfield button-up shirt from Little Lizard King. I modified the sleeves of the pattern and blocked the top using bleached denim and added a flannel to the bottom. Metal buttons from Super Textiles complete this look. My daughter loves this outfit. She’s been tying the shirtwaist into a knot upfront.
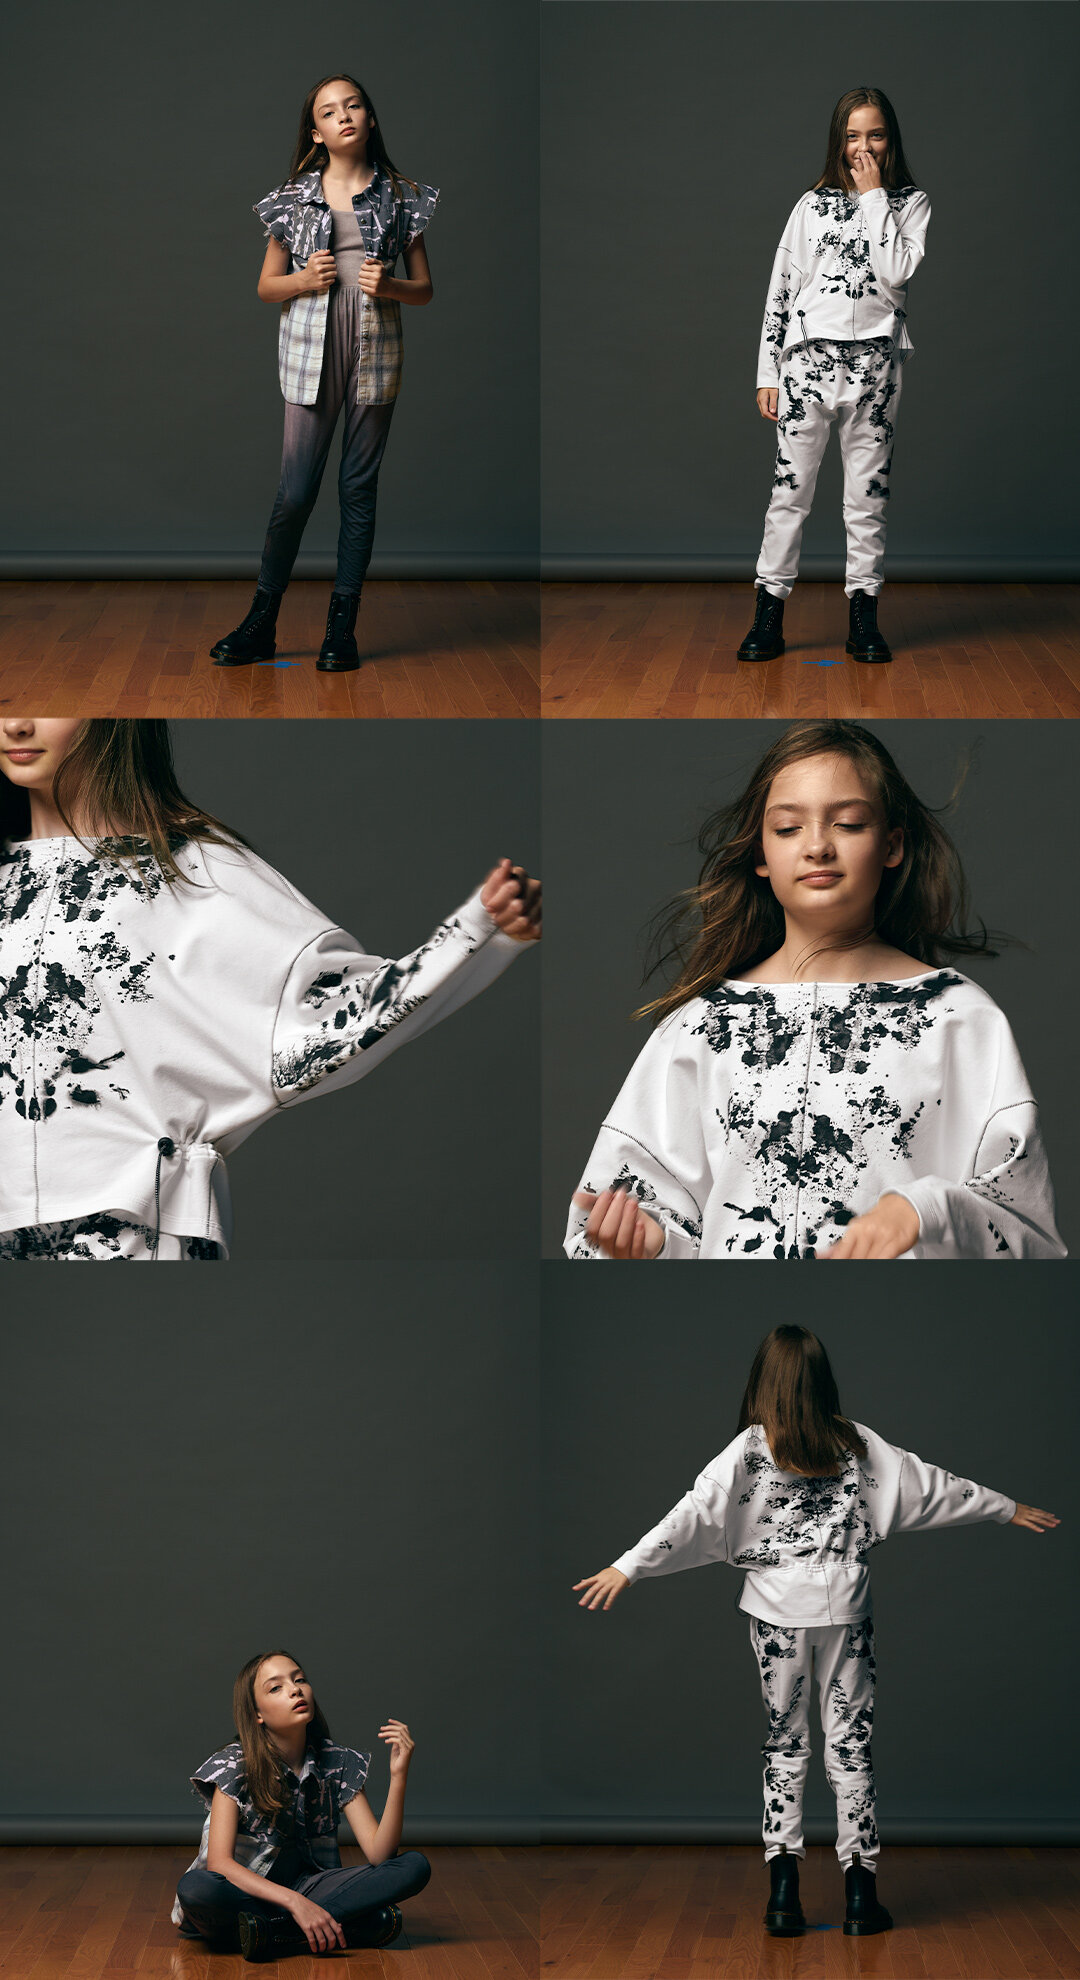
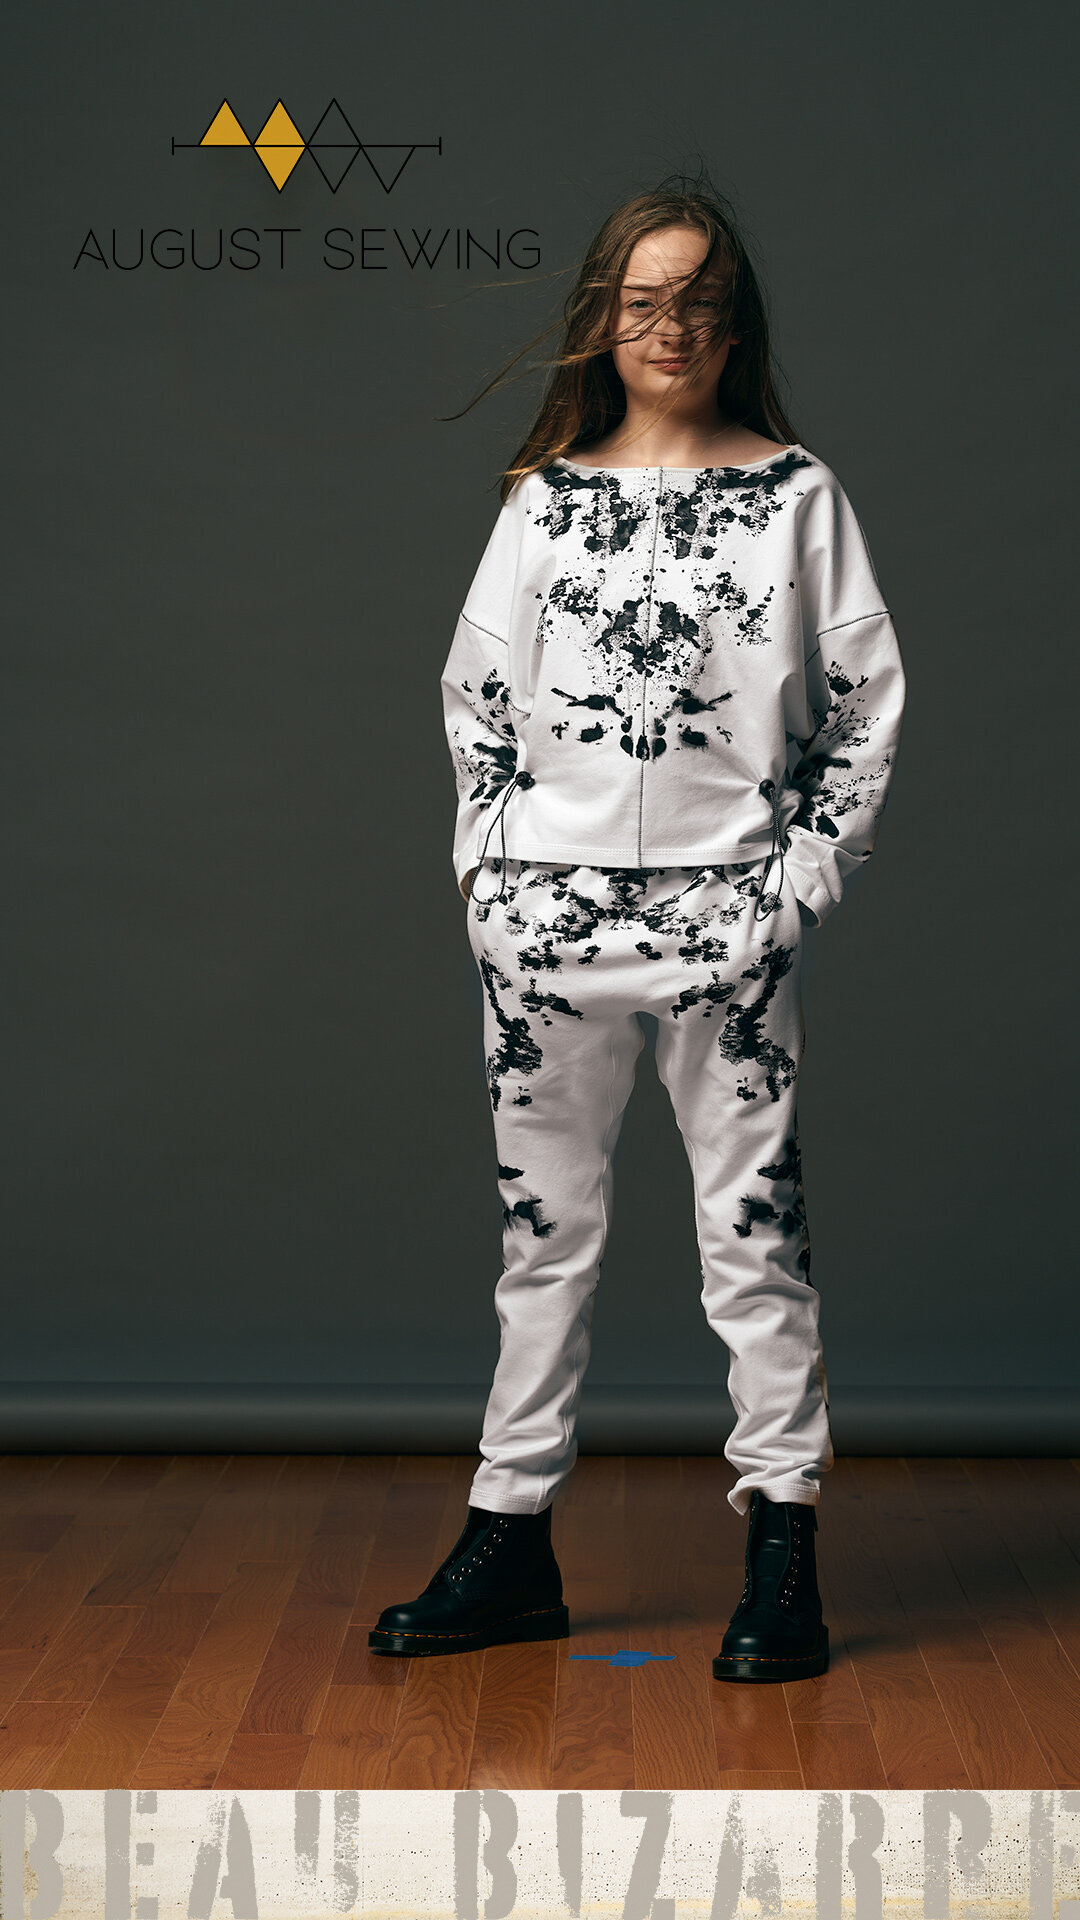
Then, we come to the Rorschach look. Rorschach's initial interest was in how people perceive things differently. I couldn't think of a better way to represent my theme. I used a combination of black, white, symmetry, and abstraction to create this classic Rorschach inspired look. Painting the fabric was quite fun! The self-drafted Squeeze top is super comfy. It has a detail which I love, middle seams, flatlocked for emphasis. The self-drafted Slouch pants have an elastic waistline, inseam pockets, and a gusset. This is a pattern I've often made for my daughter. Both pieces are made from French Terry cotton from my shop. For more details about my Rorschach painting method, visit August Sewing.
Enjoy!
Sew Whit Designs - Live like you were Dyeing

If I’m being honest this week was the one I was most worried about. Tie dye is everywhere right now, and it is not my cup of tea. But, I was up to the challenge to create something cute and fun that my daughter would love. When I came across this reversible tie dye spandex I knew it would be perfect to create a look for my tiny dancer who lives life to the fullest, and dances like no one is watching.
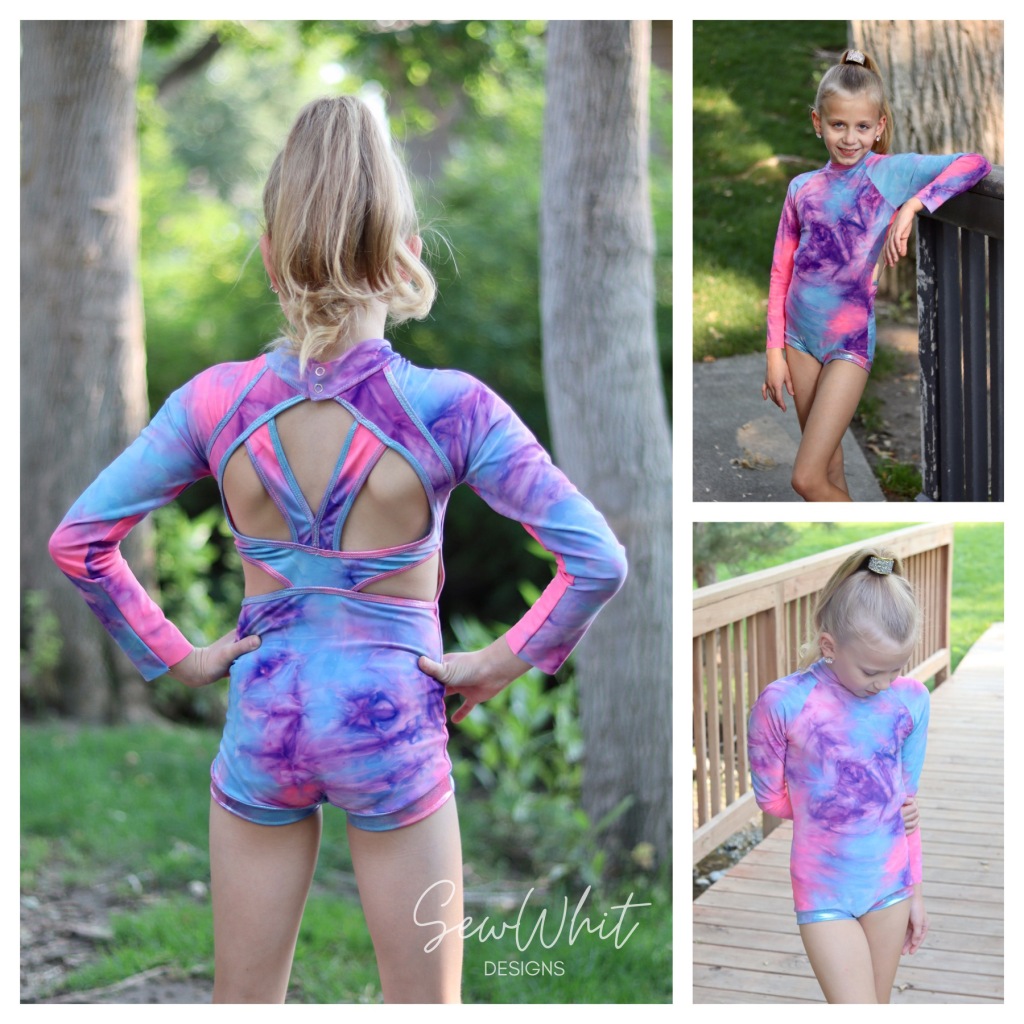
For the leotard I use the “wrong” side of this sparkle tie dye fabric from JoAnns. I mashed 2 patterns to create the Leo and self draped the back, on a duct tape dress form of my daughter. I combined the Mairin from Sew a little seam and added the raglan sleeves from our favorite rashguard, the Aloha Burn Blocker. I bound the back details and added the leg bands with the “right” side of the sparkle fabric.

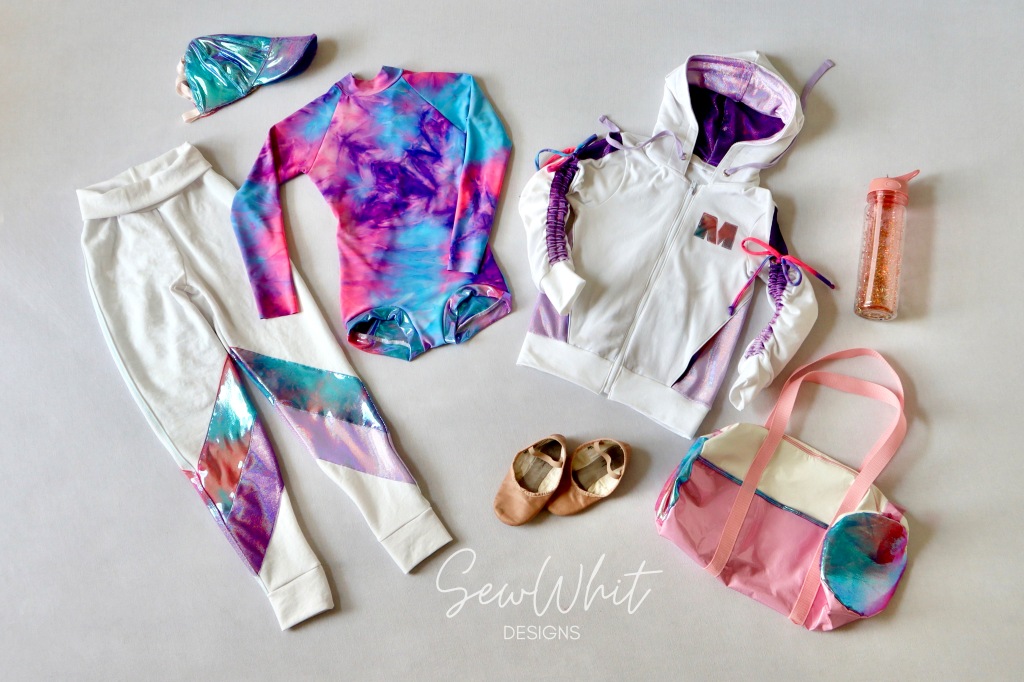
For the warm up set I used a white pique from my stash. I color blocked the Jordan joggers from Peekaboo Pattern Shop and added a yoga waistband. For the zip up hoodie I started with the Horizon Hoodie from Lil Luxe Co. I chose another ombré dyed purple sparkle fabric for the color blocking and hood lining and I changed the pullover to be zip up. We needed some TIEs to go with our dye look, so we added the cinch strings on the sleeves. On the back of the jacket I did a little DIY personal touch. I projected her studio logo onto the fabric, cut it out, ironed on the back and machine appliquéd. I made a girly ball cap with fold over elastic in the back that allows her to pull her pony tail through the top. For the final touch I drafted a duffle bag out of white and clear pink vinyl. I use the tie dye fabric for the lining and the sparkle side for the ends of the bag. Turns out tie dye is actually not that bad. For more details and pics head over to my blog.
The designer scores are determined as follows:

Beau Bizarre displays an outstanding, well executed collection. Hard to believe this seamtress has only been sewing for 3 years. Amazing!
ReplyDelete