Monday, January 31, 2022

Pantone Party 2022

Are you ready for the show?  It's time for the 2022 Project Run & Play Pantone Party!!!


Every year Pantone chooses a color of the year, which influences fashion and design trends everywhere.  For 2022, they’ve created a new color, Very Peri!  This color displays a spritely, joyous attitude and dynamic presence that encourages courageous creativity and imaginative expression.

One of our goals here at Project Run & Play is to stay on the cutting edge of children’s fashion and sewing patterns, so this next bit of fun is designed with that in mind.  


Our Pantone Party event combines two fantastic elements in the sewing world, fabric and patterns.  Some of our handpicked designers are going to work with fabrics from special sponsors to create looks using these two Pantone colors and patterns from our shop.  Look for an on trend, inspirational event!  

Our virtual party will exuberantly fill the month of February.  Prepare yourself to be inspired, no make that prepare yourself to be completely blown away!  In fact you'd better dig through your stash and see what you have in shades of Very Peri because you are going to need it!!!

Stay tuned all week long as we kick off this ultra cool Pantone Party! 

Tuesday, January 25, 2022

Chromium Hoodie Dino Spikes by Leslie

We are excited to share this really cool hack from Leslie today! Leslie will walk you through adding dino spikes to your Chromium Hoodie. Take it away, Leslie!  


Chromium Hoodie is fun a hit because it has such fun ear options. However if you a kiddo like me that insists on Dino Spikes rather than animal ears you will LOVE this easy hack!


Cut all the pieces for the plain hoodie.


Make a triangle pattern piece that that will be the spikes.  Make sure to take into consideration seam allowance.  The triangle side will also be dependent on how many spikes you want to have.


Cut mirror images of the dino spikes.


Then sew them together right sides together, leaving the bottom open.


The best part of these Dino Spikes is that they are stuffed to help them stand up!  I use a Poly-filler like this. but you can also just as easily use small fabric scraps to stuff the Spikes.


Once your Dino Spikes are stuffed, position them on the hood where desired. Spikes will be sandwiched between the two hood pieces.  Sew along hood as close to the stuff as possible. Pro-tip, from a non-pro , I used a zipper foot when sewing to bump up right against the stuffing. 


Now your Dino Spikes are Done! 


Construct the rest of the hoodie per the tutorial and now your kiddo can rock Chromium Hoodie with Dino Spikes. Enjoy!


The Chromium Hoodie is on sale until the end of January. Sign up for the newsletter to receive your $3/off coupon code! 


Tuesday, January 18, 2022

Colour blocked Chromium Hoodie: Janelle Davis

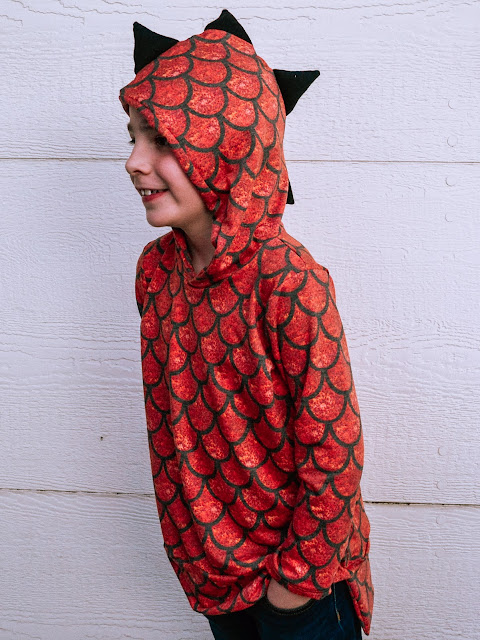
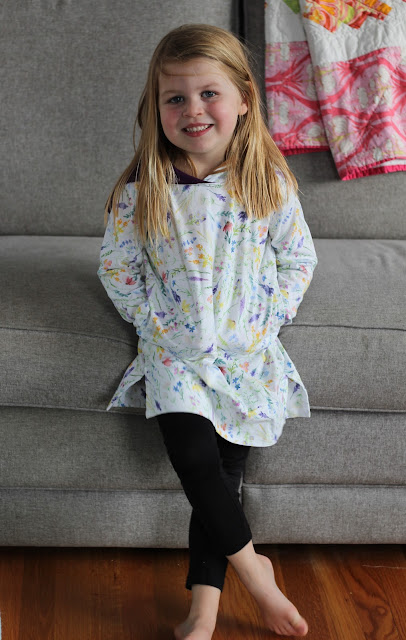
 Today, one of our ambassadors, Janelle, is showing us how she color blocked the Chromium Hoodie. This project would be great for using up scraps or just adding personality to your project! 


Colour blocked Chromium Hoodie

Hi.  Janelle here again on the project run and play blog.  Today I’m showing you how I hacked the Chromium hoodie to make this colour blocked version.  This is pattern hacking 101.  Super easy.

Before I started I blended the pattern pieces for 6 width and 10 height.  She is a size 5 chest width and between 9 and 10 for height, but we are mid summer here so I sized up.  I held the pattern pieces up to my daughter to determine the length of both the hoodie and the sleeve.  I used the cut line for the vented hem for size 6, so we are somewhere between cropped and full length.  I also used the size 6 line for the sleeve piece to allow for thumbhole cuffs.

I drew a line parallel to the CB/CF from the point where the neckline meets the shoulder to the hem.  I measured along this line from 1cm down from the top to 1cm up from the bottom.  (To allow for seam allowance.) I divided this measurement by 3.  I drew lines perpendicular to CB/CF at these 3 points on the line and cut the pattern along those lines.  I highlighted the pattern pieces, along my cut lines, to remind me to add seam allowance there when cutting the fabric.

Using the top piece, I measure down the sleeve from the underarm point the same amount.  I drew a line here perpendicular to the sleeve fold line.  The next line on the sleeve was the same length down as the line on the front/back piece.

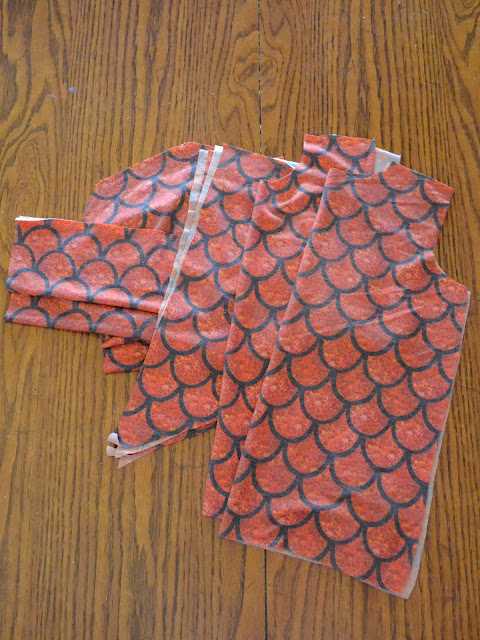
I cut out the pattern pieces, adding seam allowance (with my quilting ruler) along the highlighted bits.

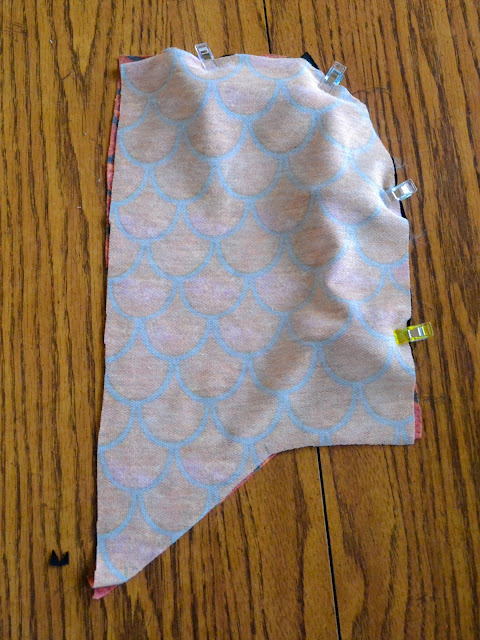
I layed out the pieces to make sure I sewed them together correctly.

I sewed the front pieces, the back pieces, and the sleeve pieces together.

I pressed and topstitched these seams to remove the waviness, as my overlocker was being a bit funky, and to help them sit nice and flat.

I then followed most of the pattern directions.  When sewing the sleeve and side seams, I pinned at the seam lines I made to help line them up.

I made and attached thumbhole cuffs.  My daughter loves thumbhole cuffs, and requests them on most hoodies.  I haven’t explained here how I made them, as I just used pieces from another pattern.  But I’ve made them 5 different ways and I tend to interchange them, just eyeballing the length of the sleeve.

I used a “normal” waistband as I didn’t have enough fabric for the vented hem.  I totally made up the length and width based on how little fabric I had left.  I like the vented hem, and might use that next time.  Although I liked the cropped length too, so maybe I’ll do that instead.  Or both!


Make sure to sign up for our newsletter to receive a $3 off coupon that is good for the month of January. Be sure to share your makes in the Project Run and Play Fans FB group or tag us on IG: @projectrunandplay.


Friday, January 14, 2022

Call Ajaire: Chromium Cropped Hoodie

 Today we have Ajaire from Call Ajaire sharing some of her favorite Chromium Cropped Hoodies. This pattern was released with our Watercolor Beach Collection. It is such a wonderful wardrobe staple and I think after this post, you will see why.


Here's Ajaire:

I'm so excited to share one of my favorite DbCA patterns with you guys today! The Chromium Cropped Hoodie was developed years ago as just the right layering piece for my oldest daughter. She loved wearing sleeveless dresses ALL YEAR and a sweatshirt to throw on top was what we needed for the colder months.

Bean Chromium Cropped Hoodie

This one was made about three years ago and it's worn here exactly as designed. You'll notice that this view doesn't even have a hood haha! Chromium was given a new life one Halloween when Bean wanted to be a cat. I added a hood with ears and thus the cropped hoodie took shape. When it was brought in as a part of the Watercolor Beach collection I added a few more options that we've been loving more and more as the years go by.

Bean Chromium Christmas Star

This is the full length view in a cotton lycra that I made when she needed a last minute (last second?) shirt to wear for a holiday dress down day at school. I love how quickly this top comes together and in a C/L it feels like a slightly oversized t-shirt, which is exactly the vibe she's into these days.

I also made both of my girls some fun, chunky sweatshirts for a casual Christmas look before the holidays. For these I used a thicker luxe fleece and again chose the full length view. I sized Kitty's up for length only here (then folded up the sleeves), because I'm hoping she can get two year's worth of wear from it. The fleece stretches great so I didn't alter the width or size up since she's relatively petite around the chest/waist and I didn't want her swimming in it. Chromium was designed for minimal stretch fabrics so the fit worked out great.

Bean Chromium Lamb

For my most recent Chromium Cropped Hoodie, I again left off the hood and went back to the roots. This Cuddle Lamb©  fabric is sooooo soft and Bean couldn't wait to try it on. I made a size 11 to hopefully keep this one fitting for awhile on this rapidly growing tween, so it's a little wide and long on her right now. She loves it just the same and paired with the new Prancer Pull-On Jeans, this cropped sweatshirt is all the rage in our house right now.


Make sure to sign up for our newsletter to receive a $3 off coupon that is good for the month of January. Be sure to share your makes in the Project Run and Play Fans FB group or tag us on IG: @projectrunandplay.


Wednesday, January 12, 2022

Chromium Cropped Hoodie Fabric Comparison

Today we have a fabric comparison for the Chromium Cropped Hoodie pattern.  We've seen this fun pattern made up quite a few different fabrics for a good reason: it's such a great pattern with tons of different options! 

The fabric recommendations for the Chromium Cropped Hoodie are knits with at least 20% stretch, but not to exceed 75% stretch. Some options are stretch fleece, sweatshirting, ponte de roma, or french terry.

For the purpose of this fabric comparison post, I wanted to see how the Chromium sewed up if I pushed the envelope a little on the recommended fabrics.  So I tried a very thick fabric with a small amount of stretch and a very thin fabric with tons of stretch.  


Let's talk about that adorable Chromium made from Sherpa Fleece first.  It is very thick, and has some stretch, but is quite challenging to work with.  Obviously worth the effort as illustrated by the happy smile!


My thoughts on sewing with a thicker and less stretchy than recommended fabric: be sure to go up a size.  (Moment of truth: I did this because I was too lazy to print out his size and since I was already making one for his sister in the next size up, my laziness worked out in my favor!)  It is still just a little tight getting it over his head, due to the thickness and lack of stretch.  To solve this, the neckline could be widened and cut lower in front.  Another thing, I skipped the topstitching everywhere except the neckline to deal with the extra thick piles of the sherpa fabric.


And now my thoughts on sewing with a thinner and more stretch fabric than recommended: think about going down in size unless you are going for a slouchy look.  My daughter is right at the top of this size, so again it worked out in my favor.  You can see that the funnel neck on this Chromium does not stand up as intended, but it's not a horrible look either.  She will be wearing this one for quite a while as it's big enough and she loves it!

Here are quite a few more examples of Chromium's sewn up in fun fabrics:

The cover Chromium Cropped Hoodie in a thick sweater knit by Call Ajaire

A boy version of Chromium Cropped Hoodie in french terry by SewSophieLynn


 Chromium Cropped Hoodie in bamboo jersey by That's Sew Kari

Chromium Cropped Hoodie in black sweatshirt fleece by Sew Haute Blog

Striped Chromium Cropped Hoodie in cotton lycra by Cut, Sip Sew

Tye Die Chromium Cropped Hoodie in sweatshirt fleece by SewSophieLynn

Be sure to grab the Chromium Cropped Hoodie pattern here in the shop.

Make sure to sign up for our newsletter to receive a $3 off coupon that is good for the month of January. Be sure to share your makes in the Project Run and Play Fans FB group or tag us on IG: @projectrunandplay.


Monday, January 10, 2022

Chromium Hoodie Pocket Hack

 Hi! It's Randi from Cut, Sip, Sew. One of my favorite patterns is the Chromium Hoodie. It works for all your kids in sizes NB-16, which is an incredible size range! Ive made a few through the years but my favorite is the tunic length vented hem option. The cropped length is adorable and the regular length is the perfect staple but something about the vented hem just gives me all the heart eyes. 


I recently came across this dress from Gap and knew I could make that from the Chromium pattern. All I would need is the tunic length pattern pieces with hood, some added length and a pocket pattern. 


I apologize in advance, my pictures are dark. I am not really sure the last time we have seen the sun in the Northeast US. The weather has been very gloomy- perfect for sewing but not photographing a tutorial. 

If they are too dark to follow along, here's a video that should help: How to Attach a Pocket

Chromium does not have pockets so I used the pocket from Cedar Coat and Cardigan


First, I decided how much length to add to my bodice piece. I compared finished measurements of dress patterns I like with the tunic length Chromium and decided on 2" for size 5. 2" ended up a little short for the dress length I was hoping for so for the next two, I added 3". I printed my pattern pieces added the additional length and then worked out where the pocket should go.

I marked where I would like the pocket to sit on the side of the pattern. I compared a dress with pockets that my daughter was wearing and decided I wanted the top of the pocket about 5 inches down from the arm pit. This worked well for a size 5 but I would measure your own child or compare a RTW garment before deciding. 


I made a few marks before deciding on pocket placement so my pattern piece is a bit messy. 


Since the seam allowance on this pattern is 3/8", I decided to make my pocket opening at 1/2" so it would be visible but not huge. I marked 1/2'' on my pattern and then connected my notches with that marking. 


Here it is shown with the pattern piece cut where my pocket markings where. For the front bodice only, you will cut the pocket curve. The back bodice will stay straight since we are sewing the pockets in place on the front bodice. You will need to cut 2 pocket pieces, 2 strips for the pocket accent color, and the rest of your pattern pieces. For the accent color fabric, I cut two long strips at 1" and folded in half with RST. 


Then, you will need to align your raw edges and sew your accent fabric RST to the pocket curve with a 1/4" SA, stretching the accent fabric slightly as you do. 


Trim your excess accent fabric, flip the accent color so the seam is on the wrong side of the main fabric and give it a good press. 


Then, line up your pocket with your pocket opening and pin really well around the edges. This way, it won't move around while you sew. 


Your front bodice piece should now look like this. You can now follow the rest of the Chromium instructions. 


Of course it wasn't enough for the 4 year old to have pockets, she wanted pockets were her "fingers could touch" so I went back to my pieces and made another Chromium but with a kangaroo pocket. 


I used the same markings for the other pocket pieces but just made slits on my front bodice where the top and bottom of the pocket would hit. I cut 3/8" into the bodice from those markings.


You can see how this folds over nicely. To make the pocket, you have to add 1/2" inch to the width of the pocket opening on the top and bottom, and measure the length of the bodice. 


You can see here how I marked where the pocket will line up on the back of the front bodice. The lines are 1/2" from the pocket slits. I also added a small strip of interfacing to the wrong side of part of the pocket that will fold over. Once you iron on your interfacing, iron the pocket opening to the wrong side of your fabric and topstitch. The opening should be about 3/8" from the edge. Then, line up your pocket piece and pin really well. Sew the top and bottom edge of the pocket piece with a 1/4" SA. Give everything a good press and continue with the rest of the Chromium instructions. When it comes time to sew the side seams, be sure to side the pocket opening out of the way so that doesn't catch in your seams. 


These hoodie dresses are her current favorite thing to wear and I don't blame her! They are the perfect amount of snuggly and cute. 

If you'd like to grab the Chromium Cropped Hoodie, make sure to sign up for our newsletter to receive a $3 off coupon that is good for the month of January. Be sure to share your makes in the Project Run and Play Fans FB group or tag us on IG: @projectrunandplay.